I set out to make a set of chairs that matched the farmhouse style kitchen table I’d made. I ended up creating the sturdiest chair in the world.
Over the past year I’ve gotten into woodworking as a hobby. During my sabbatical last fall I made a farmhouse style kitchen table, and the family loved it.
But the chairs weren’t a great fit. They didn’t match the table’s style or finish at all, plus they were starting to fall apart. I made a note to make new chairs and then forgot about it.
A few months went by and the kitchen chairs were really starting to need replacement. So I picked the project back up again.
I wanted to use the same wood (4x4s, 2x4s, 2x6s and 2x8s) in the same pattern I’d used in my farmhouse kitchen table build. Further, I wanted to assemble them the same way as I’d done with the table; namely, using pocket hole screws.[1]
The issue with that approach is we don’t move a table very much, but chairs need to move all the time in addition to reliably supporting more weight than a table. That meant having four 4x4s attached to 2x4s with pocket hole screws as originally designed was going to cause issues.
So I updated my design to use rabbet and dado cuts:
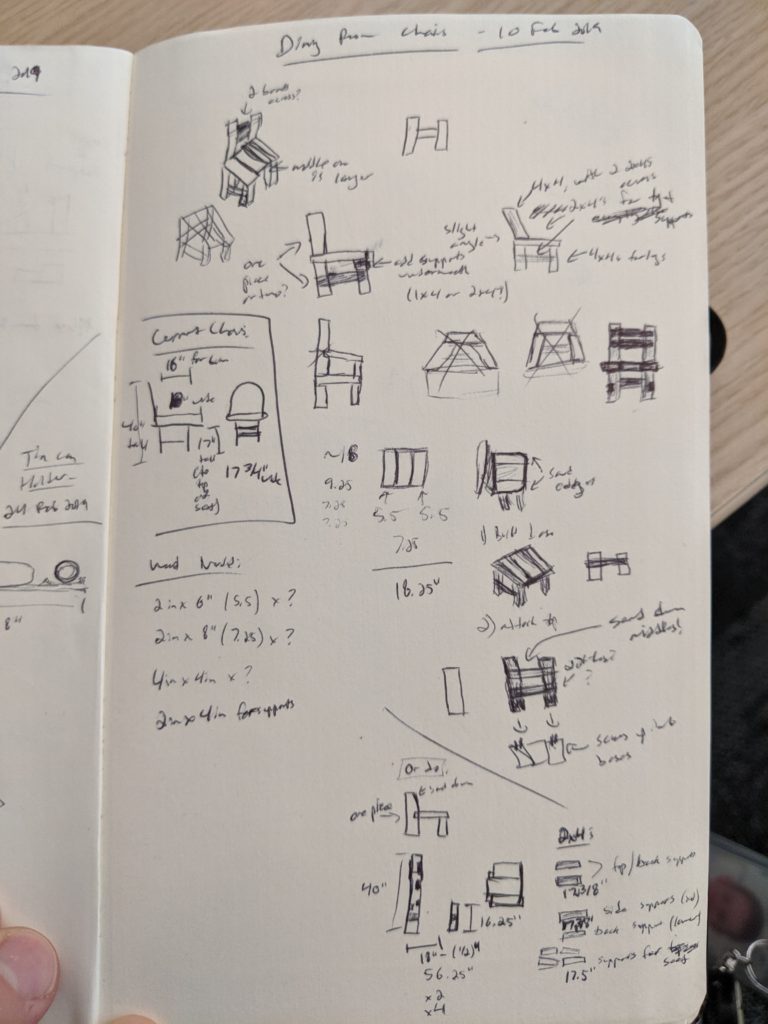
I didn’t know it then, but the result would be the sturdiest chair in the world.
After finding usable scrap in the garage and getting the remaining materials, I went to the table saw and cut my dados and rabbets.
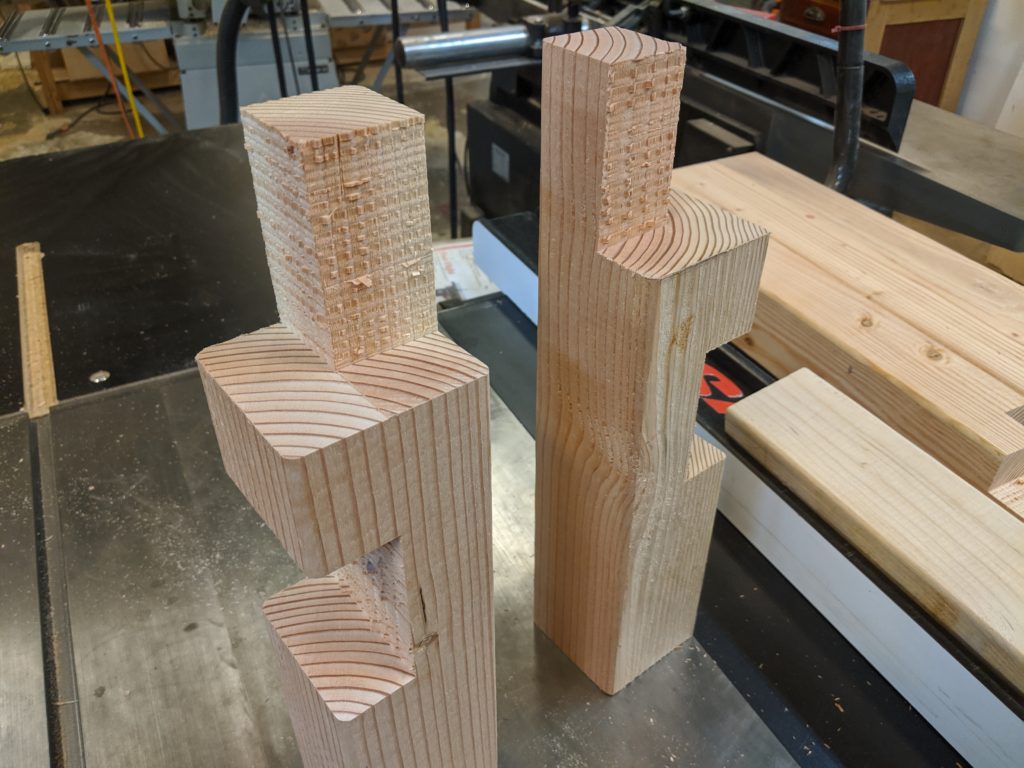
Things got a bit crazy with the back legs; I had multiple dados on each leg as well as a 3.5 inch dado right below a 1.5 inch dado (for the seat):
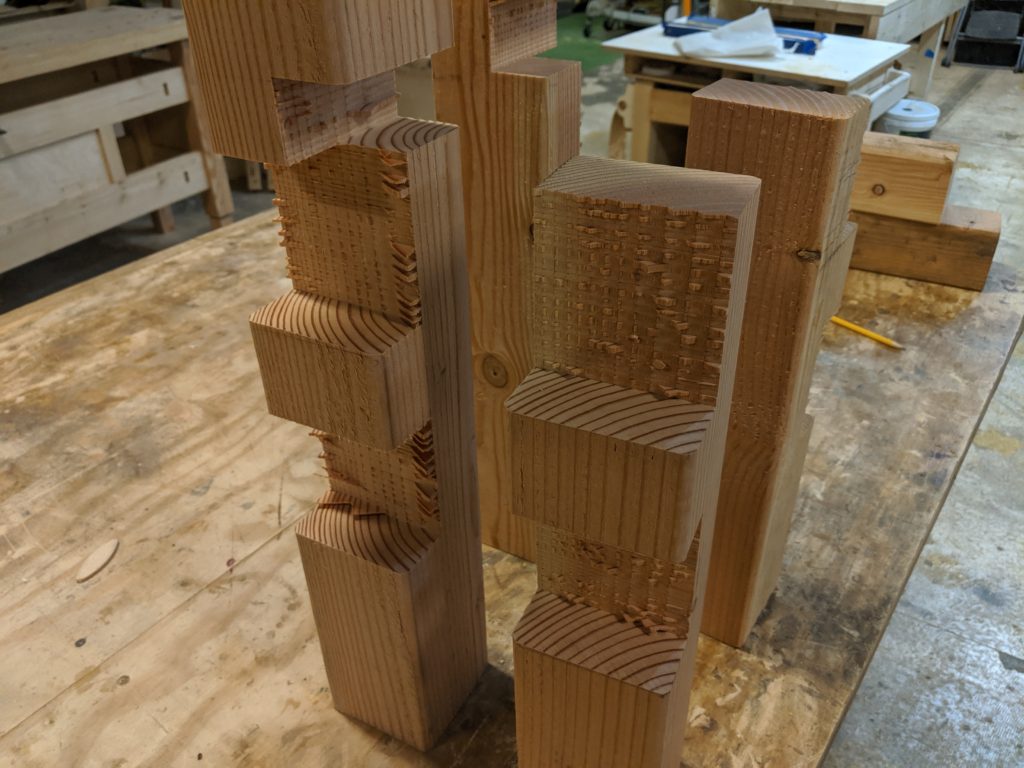
With the legs done it was time to dry fit and correct any major issues before moving forward:
Not bad! I had to make some adjustments to a few dado cuts but nothing major.
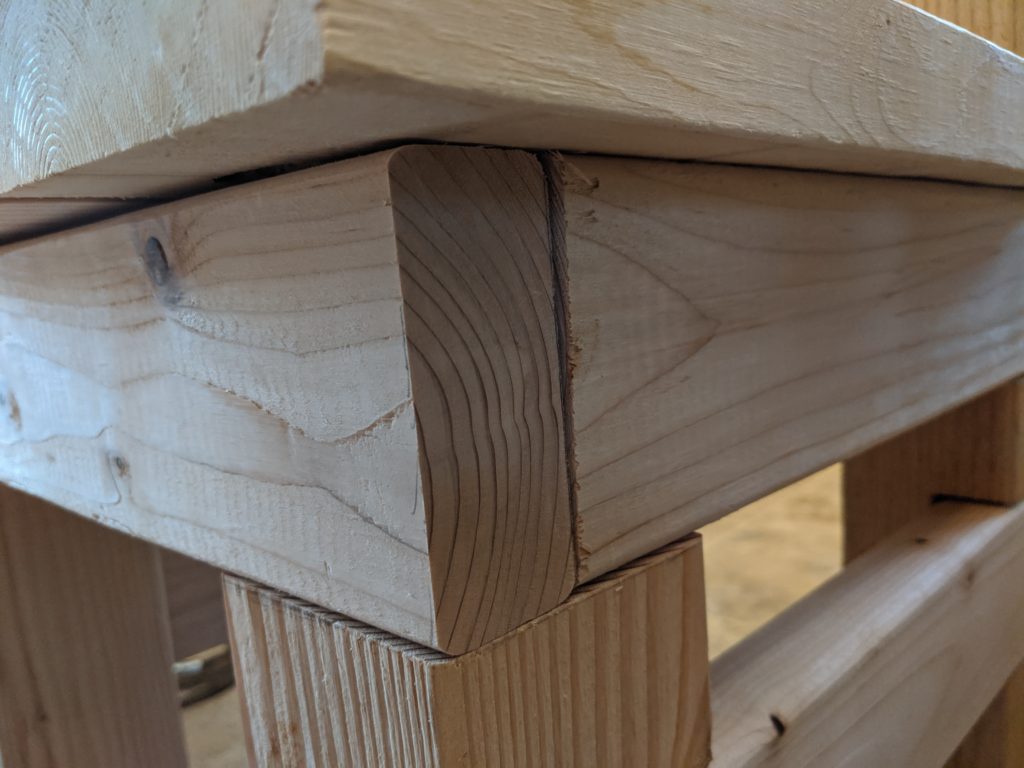
I then cut the other wood (2x4s, etc) to size. Here’s a closeup of the chair’s front right corner so you can get an idea of how I placed the top supports:
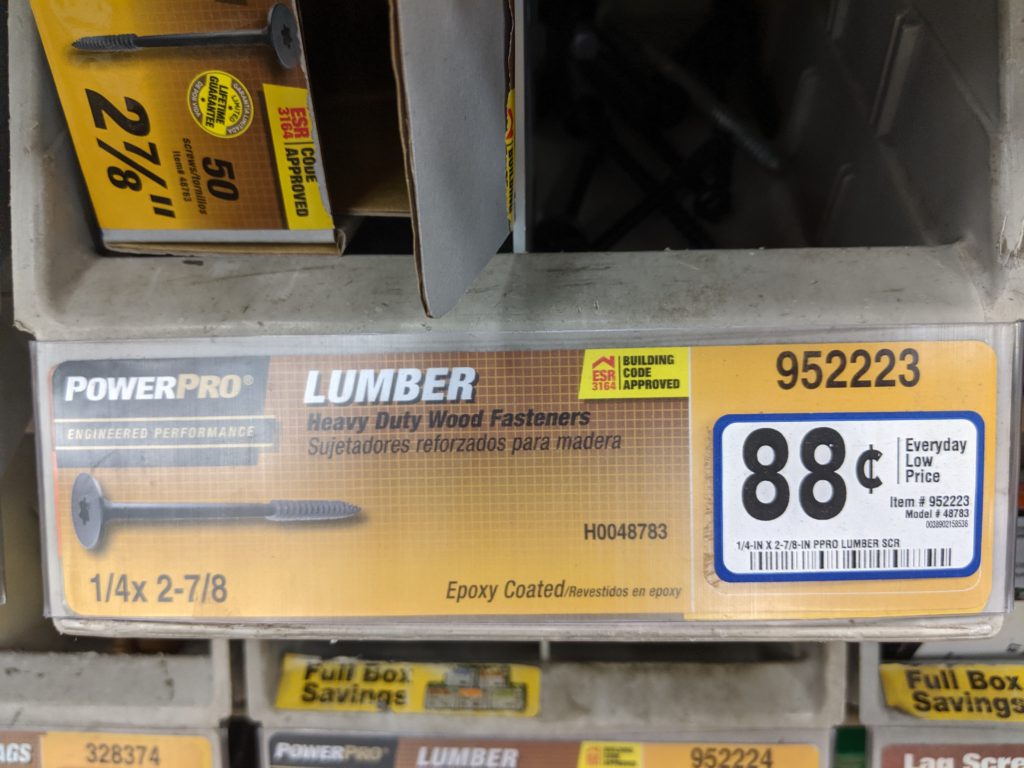
I then used these screws from Lowe’s to put things together:
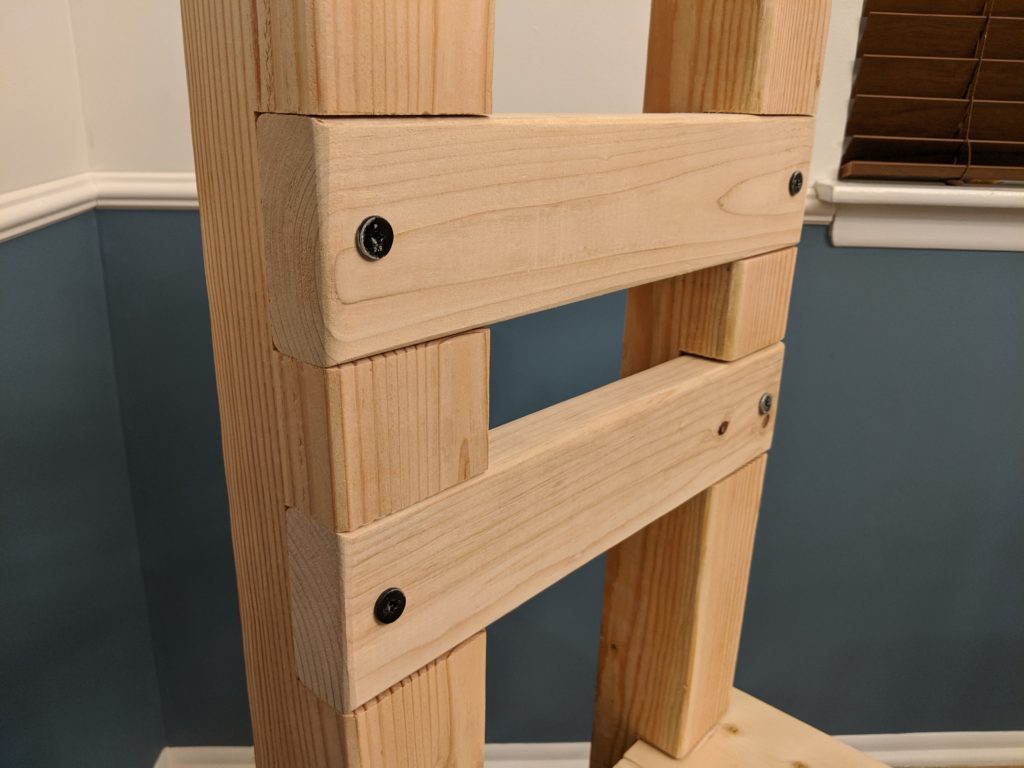
Here’s the backrest; I planned on using 2 screws on each side for each backrest piece but it ended up being really sturdy without them:
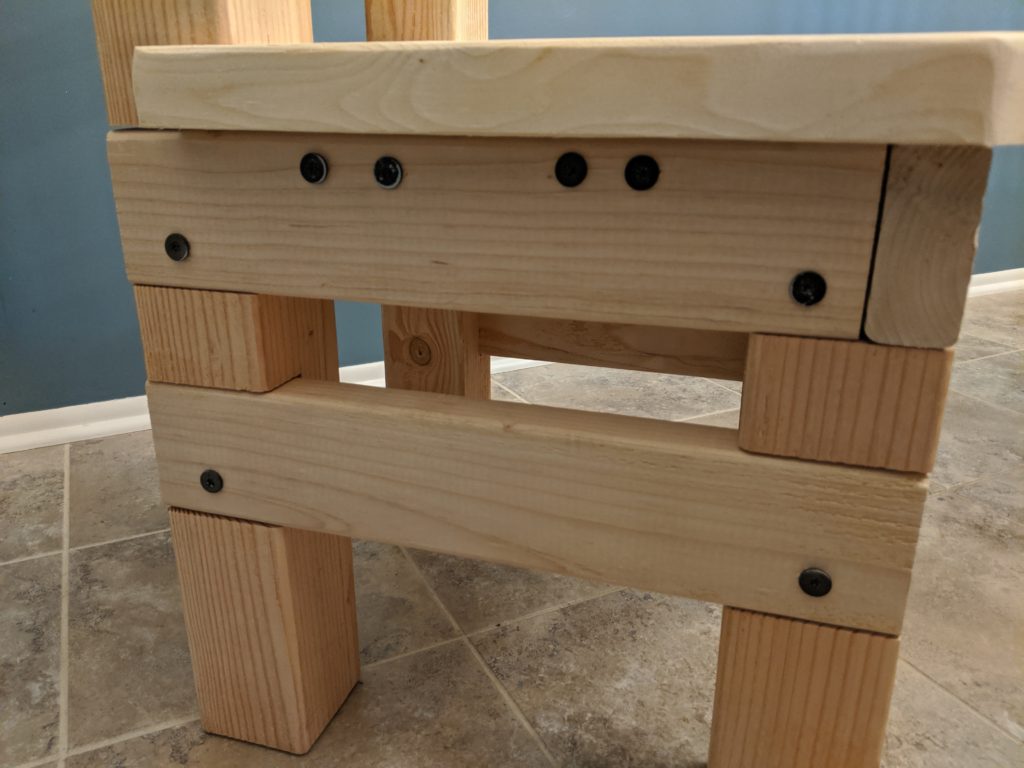
And here’s how I screwed in the sides:
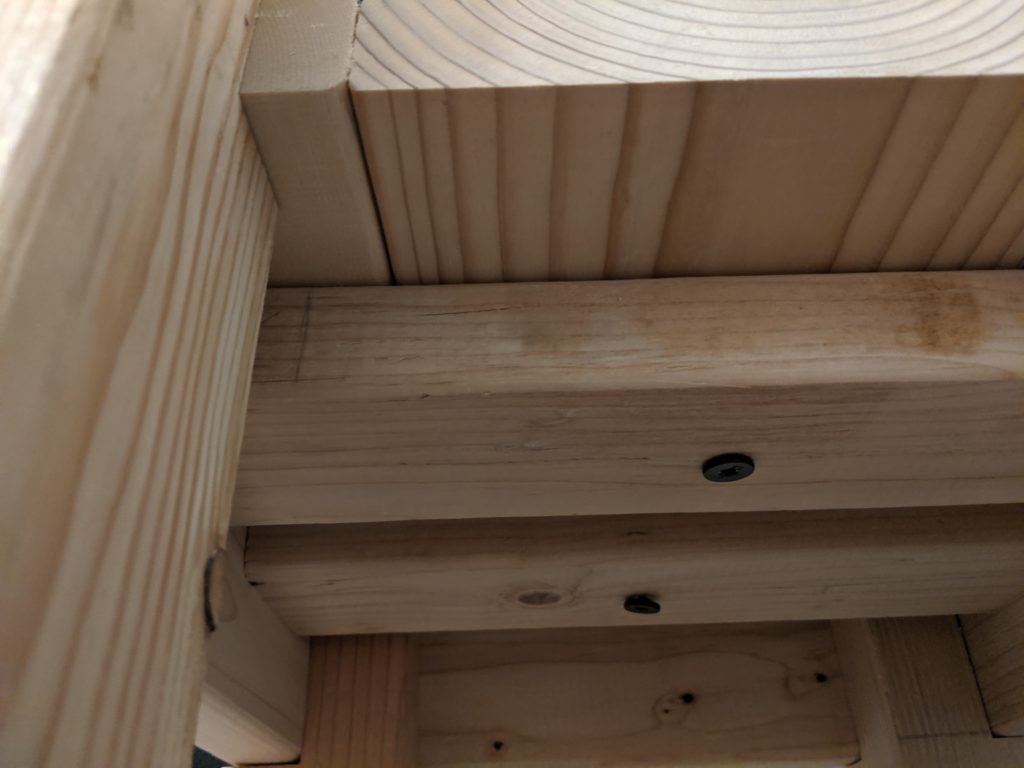
I decided to add two support pieces underneath the seat for added stability since the seat pieces were attached to each other using pocket hole screws:
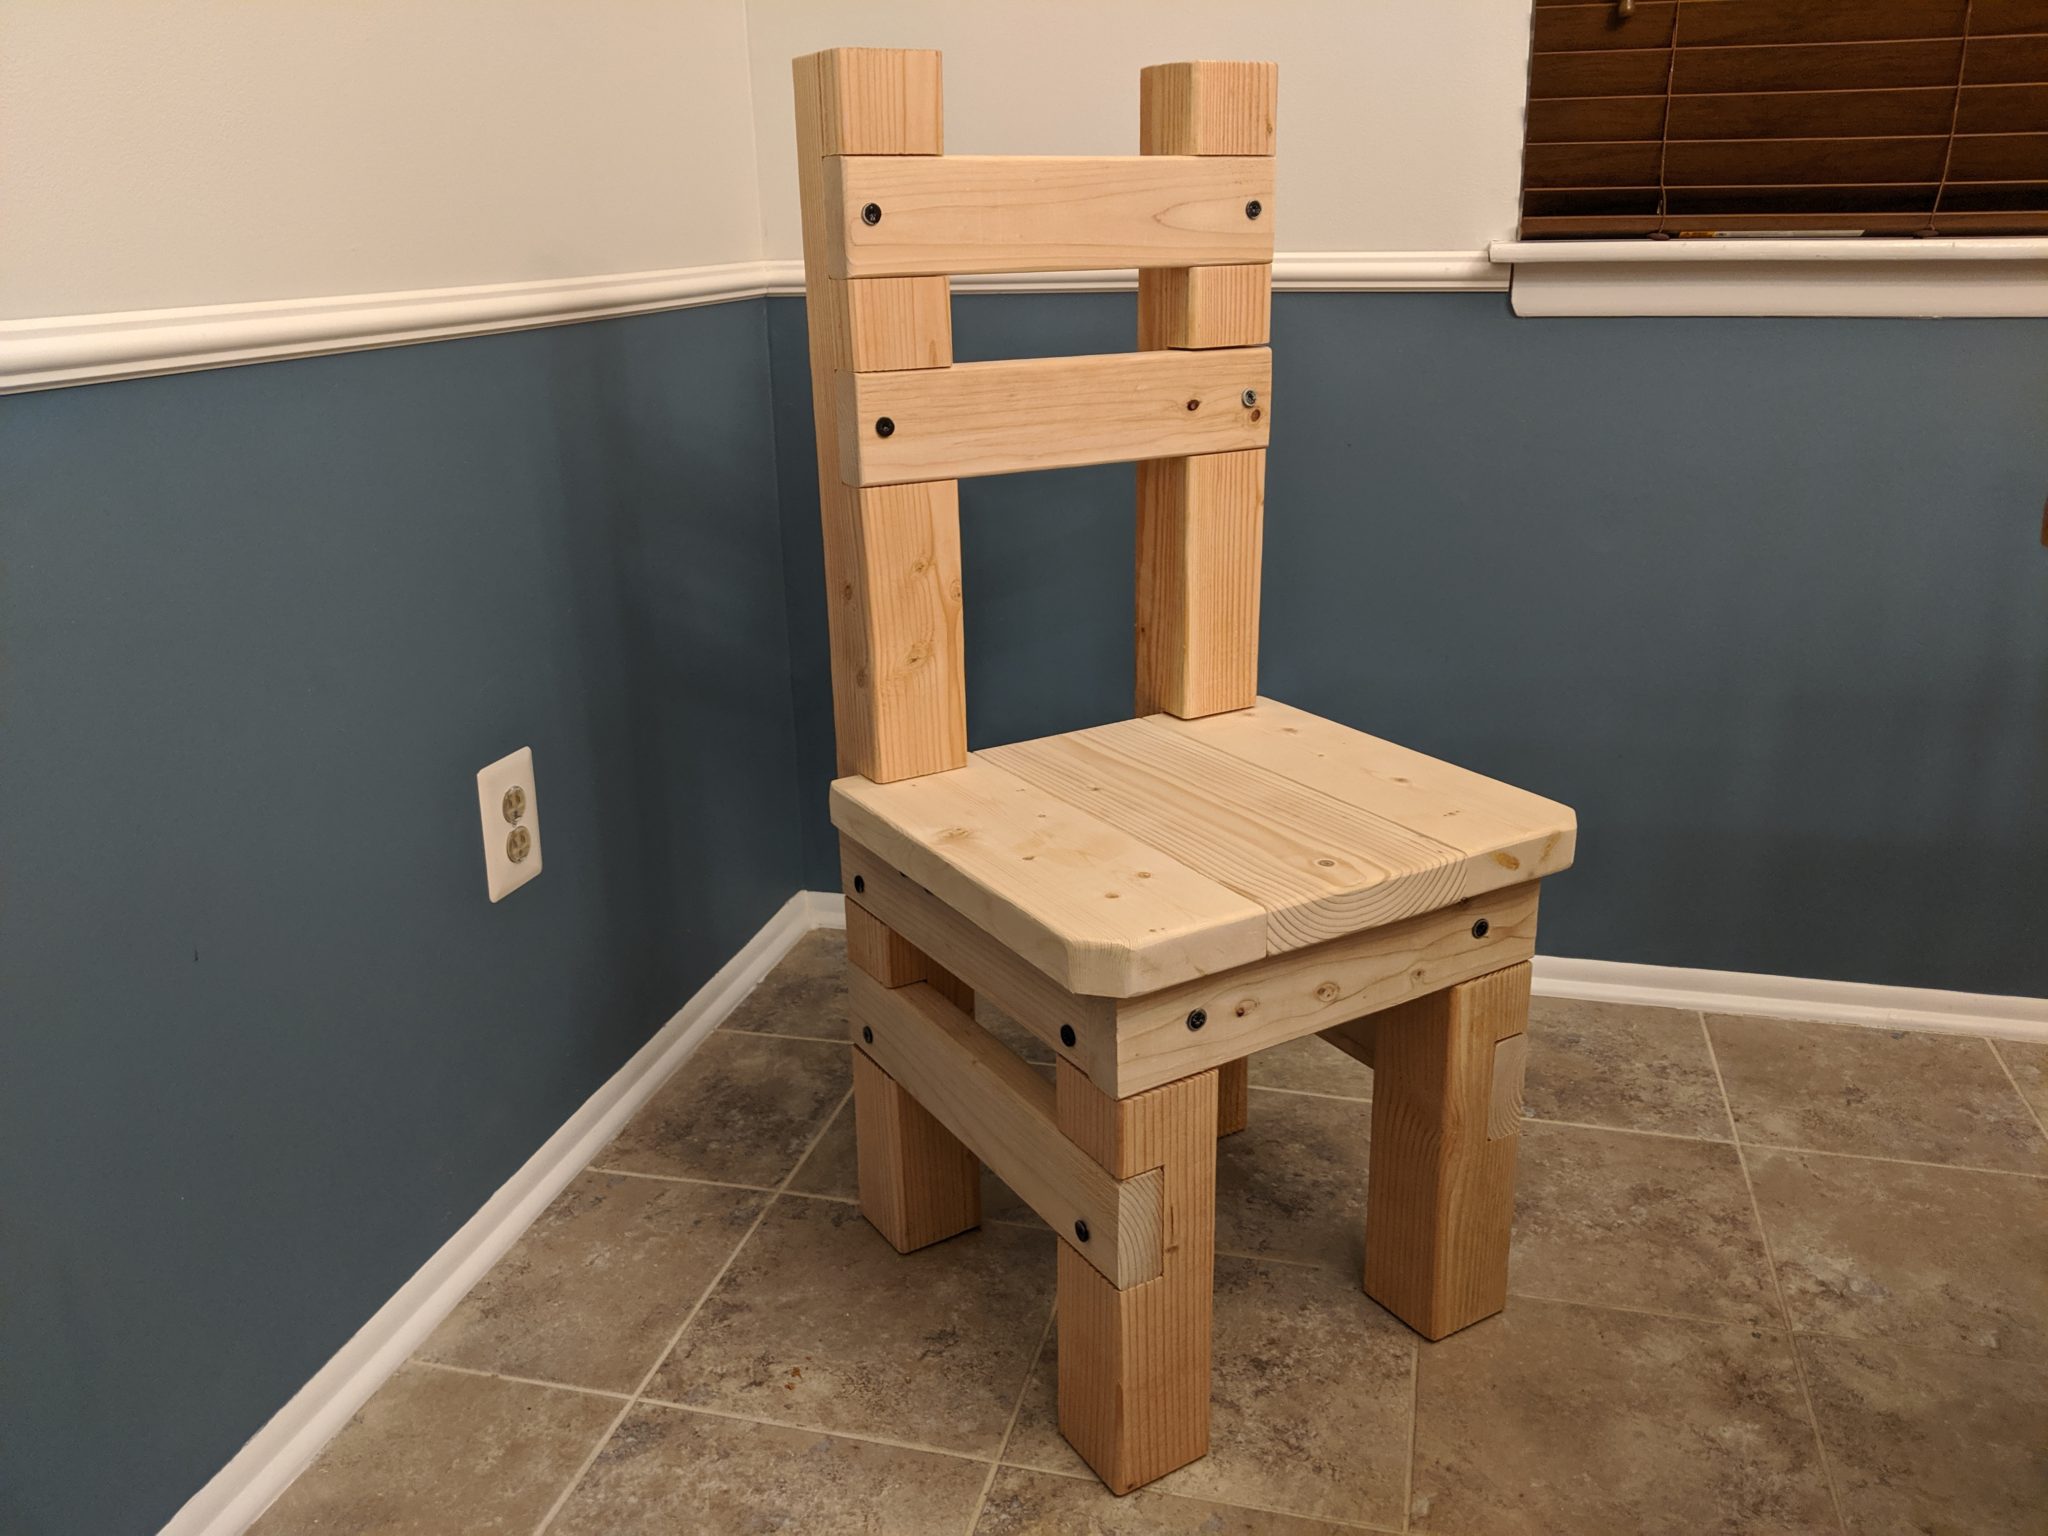
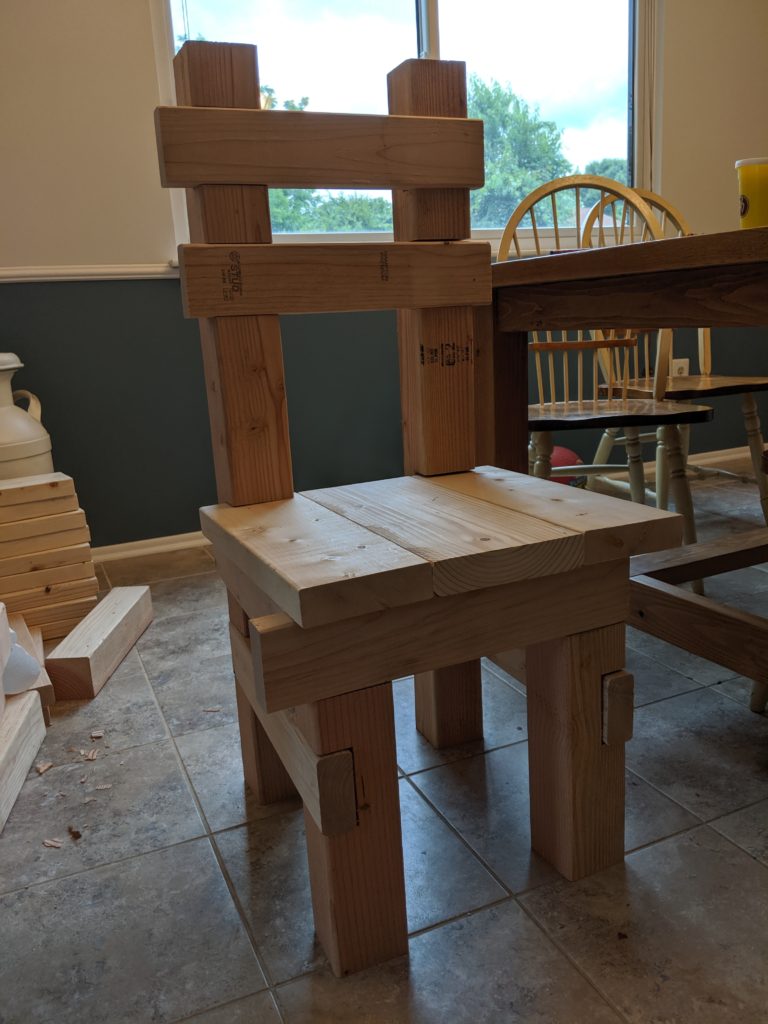
I spent extra time sanding down the edges and corners so no one would get hurt, and here is the result:
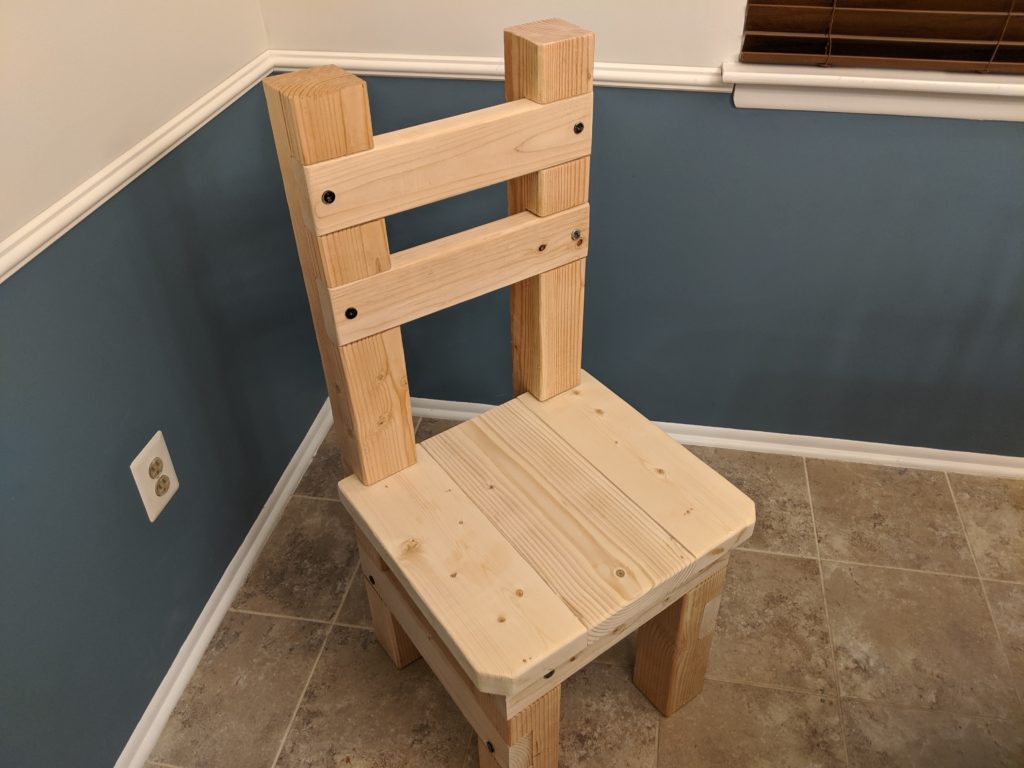
Sitting on it was actually not bad; the next step was to use the bandsaw to cut a curve in the backrest pieces to be more comfortable.
But before I could do that we got a nice surprise: someone gave us five really nice Ikea chairs!
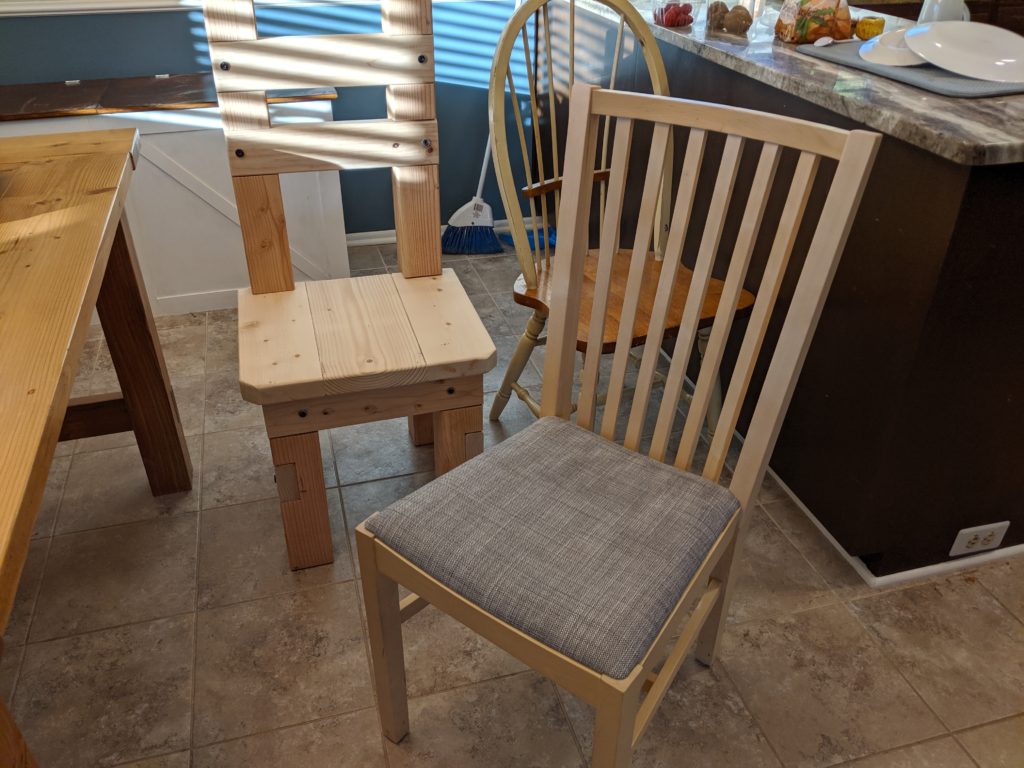
As a result, the chair I designed and made was now obsolete; I wasn’t going to turn down five free $70 chairs when I still had to make 3 more by myself.
If you are interested in building this chair for yourself, here are the cuts you need to make for each chair (along with a column you can use to check off as you make each cut):
| # pieces: | Wood: | Cut to: | Part/Reason/Placement: | Cut? |
| 3 | 2×4 | 16 in | Back rests & front support | |
| 2 | 2×4 | 17.25 in | Side supports on the bottom | |
| 2 | 2×4 | 15.75 in | Side supports on the top | |
| 2 | 2×4 | 13 in | Supports underneath the seat | |
| 2 | 4×4 | 40 in | Back legs | |
| 2 | 4×4 | 16.25 in | Front legs | |
| 2 | 2×6 | 16.25 in | Seat top (sides) | |
| 1 | 2×8 | 16.25 in | Seat top (middle) |
Note that the two 2×6 and one 2×8 pieces give a total of 18.25 inches in seat width which was perfect for us, but you can adjust as needed by either using smaller wood combinations or cutting them down.
[1] I love pocket hole screws. They’re magic.