Tag: diy

An Ode to Desks

an ode to desks

Desks are the fields and factories of our time.

As civilization turned to cultivation, mankind moved from forest to field. As the industrial revolution overtook farming, mankind moved from field to factory.[1]

And as civilization turned to corporations, mankind moved from factory to furniture.[2]

Desks play a huge role in our lives. You’re at work? Probably at a desk.[4] In school? Desk. Arrived at a hotel? Check in at the front desk.[5]

And even within those desk activities you can notice various displays of intra- and interpersonal behavior; the obsessed desk decorator from HR, the kid doodling the cool S thing on a school desk, that weird feeling of having your personal space invaded when someone stops by and leans on your desk.

So below will follow a story—my story—of desks.

When my older brother left for college and I moved upstairs to his old room then a tall, dark wood desk with many drawers and shelves became mine. It smelled like a countryside cottage, not old but well seasoned; it contrasted sharply with its location in a suburban home’s upper floor. Further, it was stately and grand and quite unlike anything else I’d had.

I proceeded to make that grand desk reflect me and my interests; action figures, my Lego creations, awards, interesting finds from the nearby river and woods, and other odds and ends adorned the desk and its attached shelves.

Some of my favorite memories from the time I spent in that room include that desk; sketching, drawing, writing, playing music or a riveting game of Sid Meier’s Alpha Centauri or Medieval: Total War on the Pentium 4 computer at its center. Snowy days looking out the window by that desk watching the evergreens in the backyard blanketed white and heavy.

Then seasons changed. Snow days turned to summer days and with the change of the seasons comes the passing of years. As my older siblings had left and I’d inherited the desk, so too I left and passed the desk on when I went to college. I don’t believe I’ve seen that desk since.

College dorms aren’t known for their magnitude, and I got used to a small rickety end table that was lying about being a desk. A bad sneeze would have knocked its legs off.

Then a few years later, while walking to my slightly larger newlywed apartment, I found an old desk put out for the trash. It had a certain charm that my particleboard desk lacked, and I spent an hour lugging it the rest of the way home myself:

The desk in all its glory. In hindsight, I should have left it for the trash.

We took that desk with us across a few states but ultimately had to leave it on one coast when we flew to the other (sadly, I wasn’t in love with that desk enough to pay for movers).

So to fill a hole in my heart the size of a desk, I looked around in the garage for some spare wood. I challenged myself to make a desk without buying lumber; it was a true Ultimate Scrap Challenge. Plus, I had the added challenge of not having any woodworking tools other than a drill and an old circular saw which I had to borrow from my parents. And as you’ll soon see, I didn’t have any woodworking experience, either.

Making this desk was…a good try. Yeah, we’ll call it a good try:

Ignore my (lack of!) cable management. And my lack of skill.

Fine. It was merely a try. How that desk never fell apart I’m really not sure (especially since I had not yet discovered the magic of pocket hole screws).

About two years later I saw this picture and decided to do something like it for my kids:

If I build them a desk, they’ll do their homework without me asking, right?

It resulted in my first trip to IKEA, which is an interesting place (the meatballs are extremely overrated). ALEX drawers for the win!
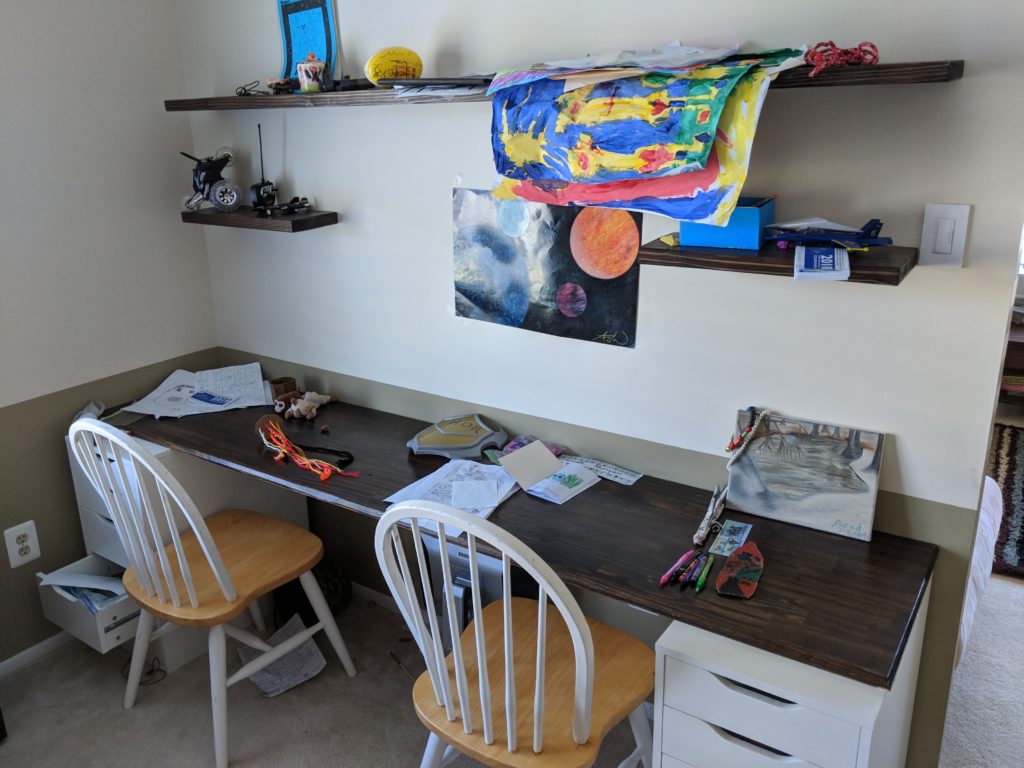
Kinda messy, but it worked!

Soon after the kids’ desk then I made a desk for my wife to house her PC and the printer (which was either on the floor or took up half of her desk space before I made her this desk):
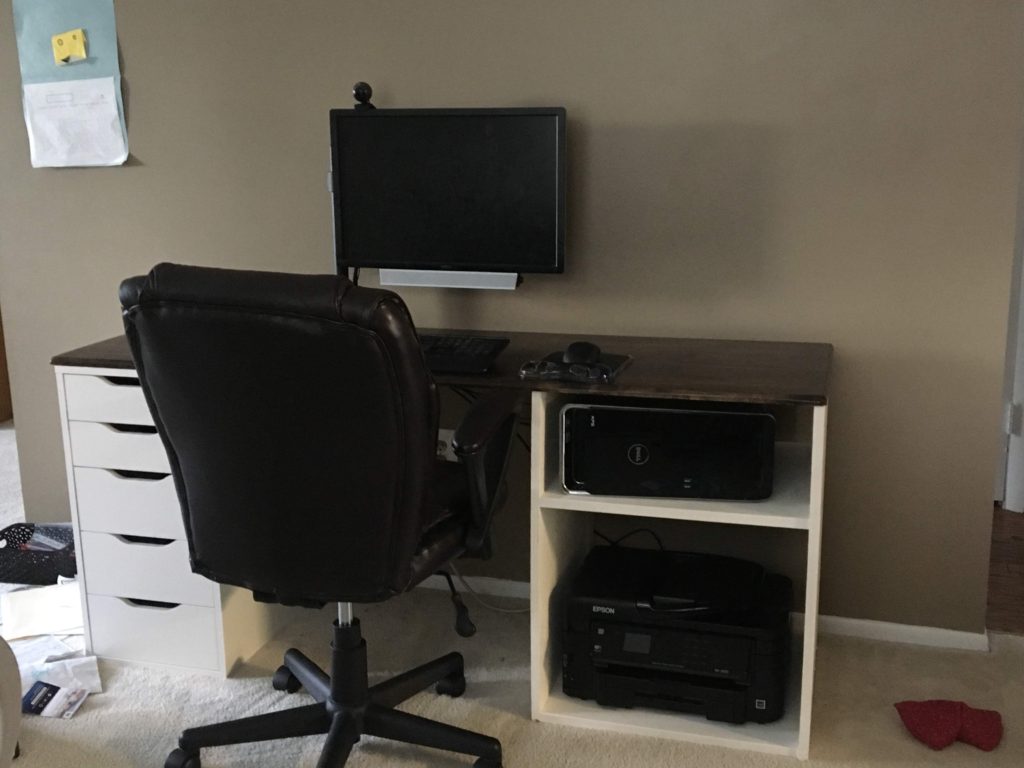
Not too shabby- plus my skills are improving!

At this point my rickety desk was starting to wobble and I started looking for a replacement before it collapsed entirely. I longed for a grand desk like what you’d see on Downtown Abbey, and reading A Gentleman in Moscow intensified that desire- who wouldn’t want a stately desk, full of history, with secret compartments for gold coins?!

After looking into grand desks I realized they weren’t as appealing as I thought, in part due to their cost but also their immense size and weight. Of course, if gifted such a desk I’d gratefully accept it and baby it, but buying one was out of the picture.

So with three years of woodworking experience that followed my first desk creation attempt, I was ready to make another try.

What resulted is this:
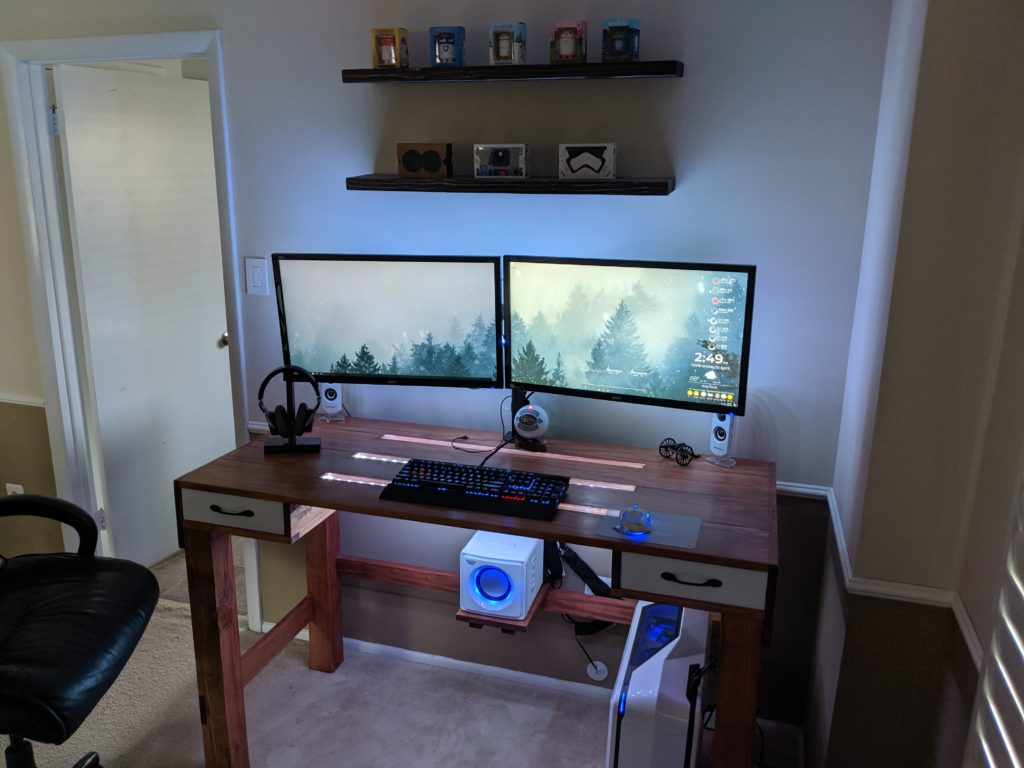
Resin? LEDs? MUCH better!

I’m writing up the whole process of creating this desk, but it’s an amazing thing to have completed for someone like me, who was still fairly new to woodworking.

May your desks be strong and your productivity high!

[1] This is a generality; of course not every single person moved from one to another. There are still forests, and farms, and factories.

[2] I would have said “mankind moved to desks” but I had to keep going with the F words.[3]

[3] That F word is NOT what I meant!

[4] I see retail/food checkout and service areas as long desks.

[5] I used to work at the front desk of a hotel and I still don’t know where the other desks are. Is there a back desk? A side desk? No one knows!

DIY Wood Google Home Mini Stand

Adding some style and utility to our Google Home Mini

I won a Google Home Mini from a raffle at work and it’s been a huge hit with the family. Who knew a robot could make fart jokes?

The only downside to it was our struggle to find an optimal location; it seemed designed to sit either flat on a table, desk, or counter, or to be mounted vertically on a wall.

However, we preferred to place it at a 45 degree angle on the kitchen counter so we could better see its aesthetic design, have it in arm’s reach, and avoid adding holes to the wall.

A few weeks before we received it, I had been looking around for a phone stand and came across this version that resembled a Viking chair:

The Vikings would be proud

I thought this wooden phone stand design looked awesome, and decided to make a version of this for the Google Home Mini to rest on.

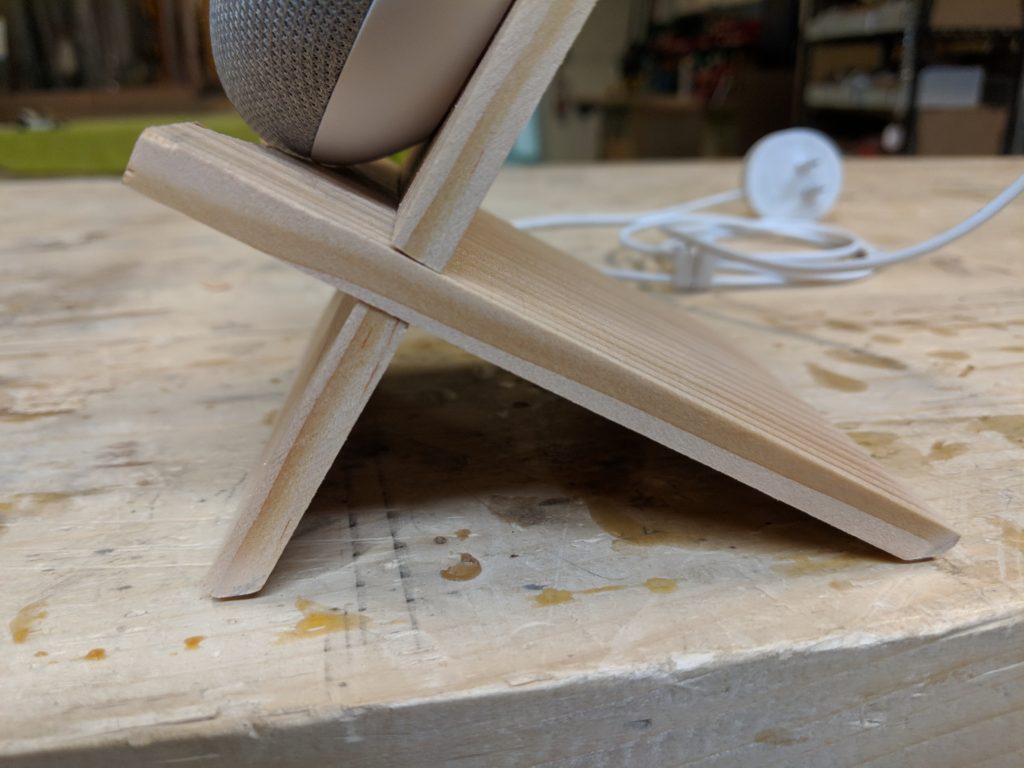
I started out with two .25″ thick pieces that I intended to stain later on. I sanded them down and then made a .25″cut on both going halfway through and combined the cutouts on each piece like this:

Smooooooooooth

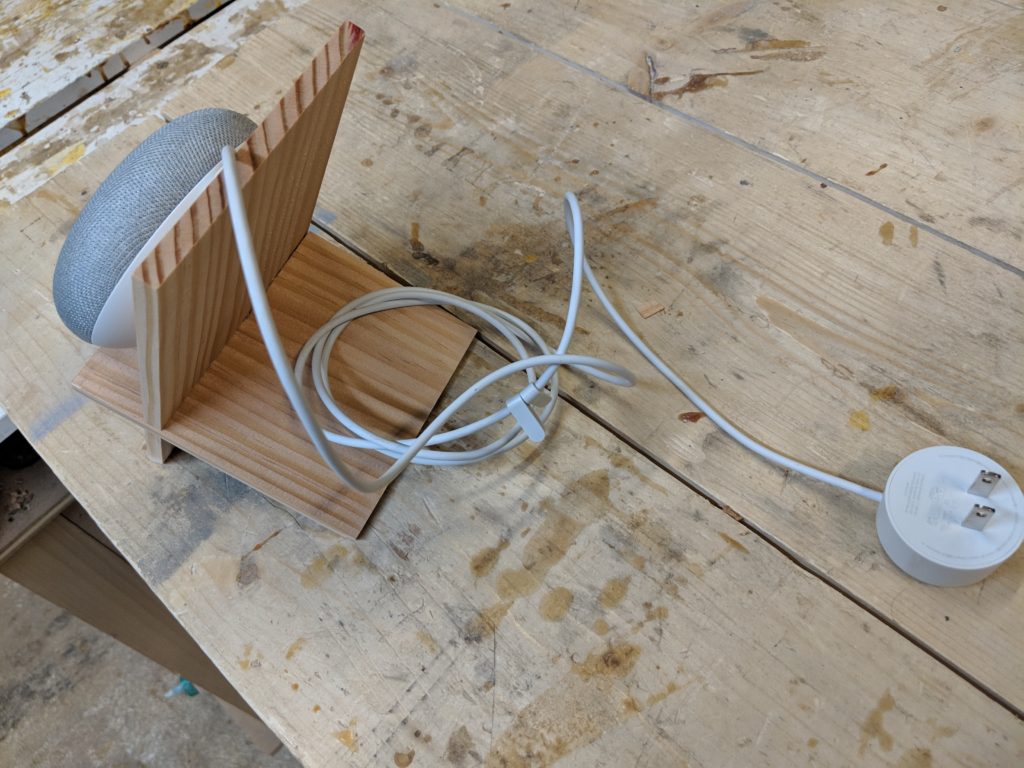
After placing the Home Mini on it, I realized that the power cable would look messy just hanging out the back:

Don’t let the cable management folks at PCMR see this

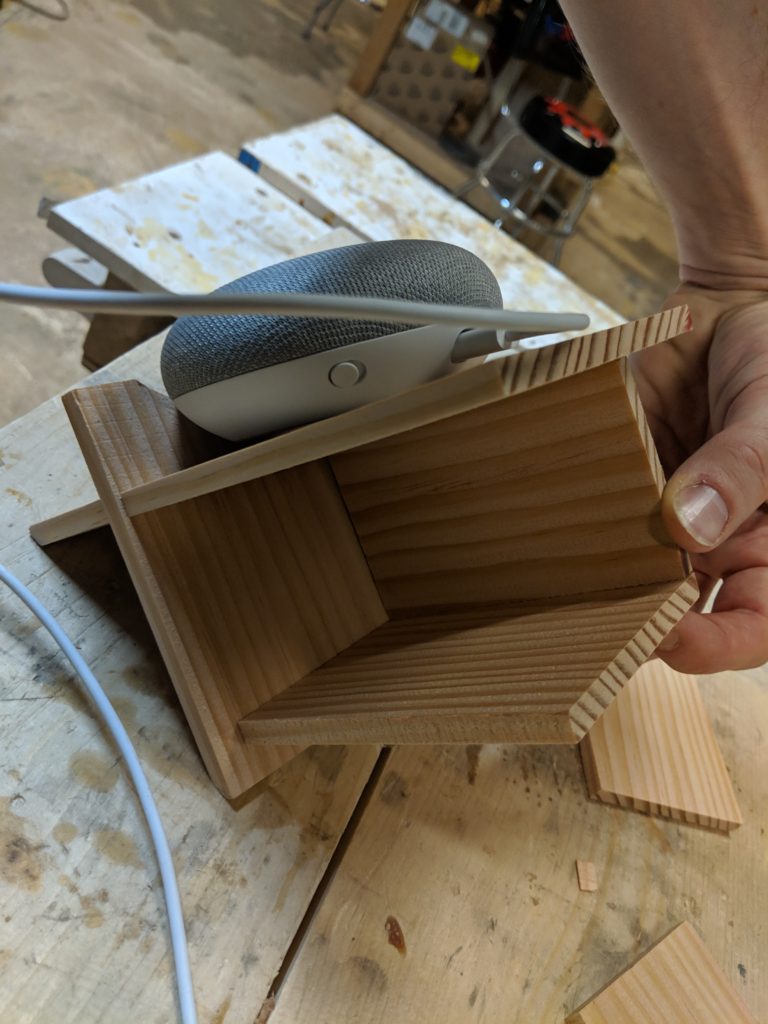
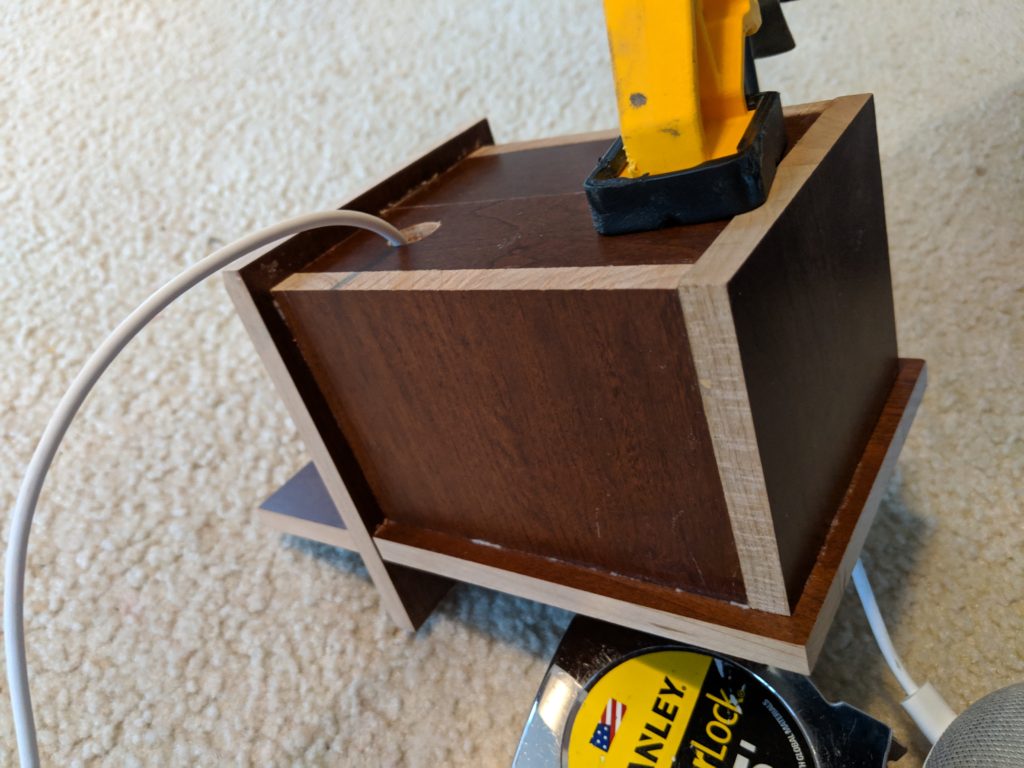
So I decided to make a box to go on the back that I could use to route the cables into, then back out again to the outlet:

Dry fitting pieces

Then once it was glued together I put it on the counter for a test:

Lookin’ good!

Some of the sharper-eyed among you might have noticed a cut into the front where the Home Mini sits or rests. I did that after worrying that it wouldn’t sit on a flat surface and could potentially roll off.

View from the front

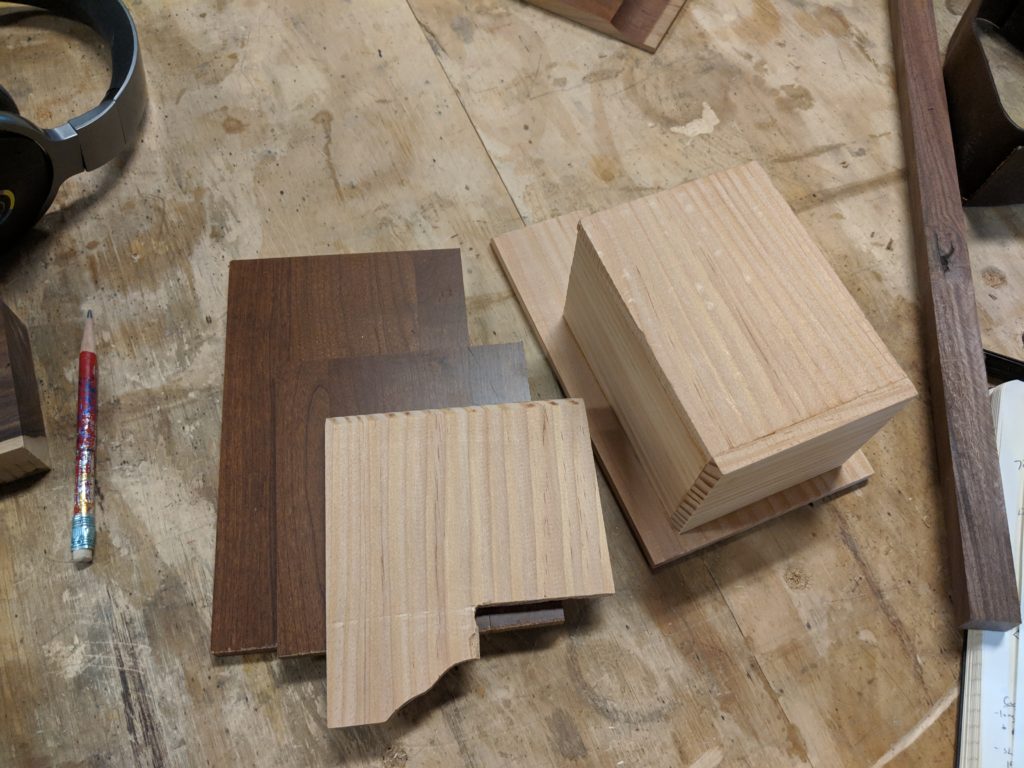
However, tragedy struck when I dropped the holder and it broke right where I’d made that cutout!

The broken piece on top of some replacement pieces

After briefly considering glue, I decided to just start over. I luckily had some nice-looking dark brown wood left over from a toothbrush holder project I’d done a few months before that would be perfect.

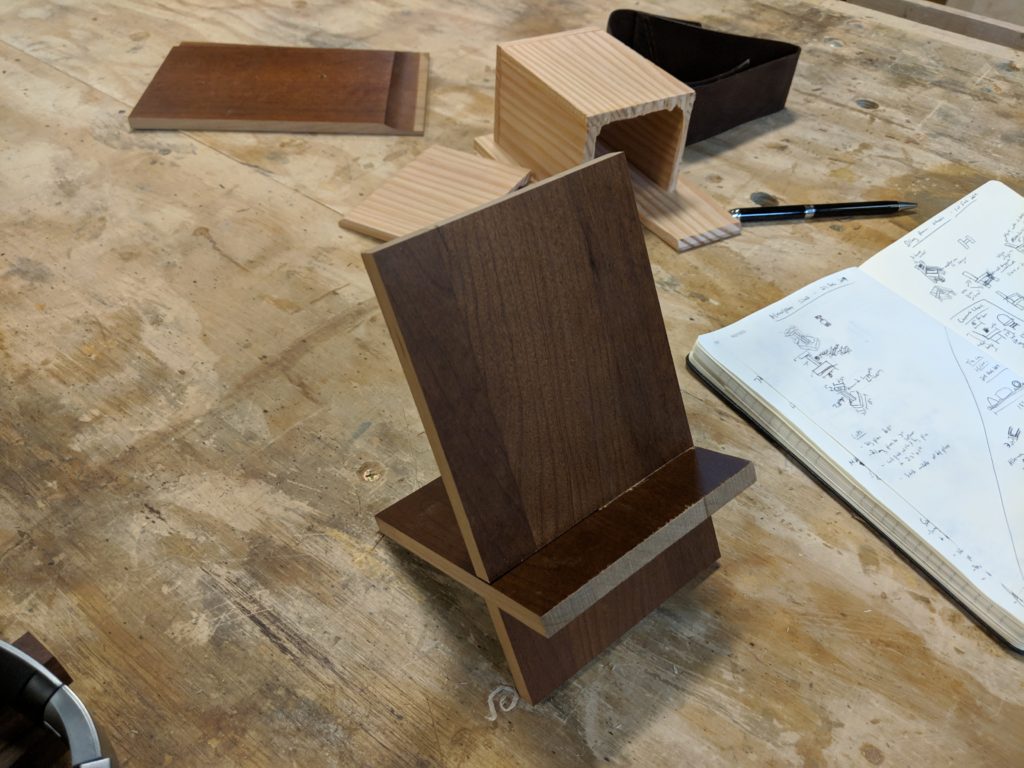
I cut the dark brown wood down to the same dimensions as the original holder and then cut notches into both sides.

I think it looks even better than the first one!

The test fit was encouraging:

Elegant as an elephant

Once the main holder part was done, I cut more pieces down to fit the cables in the back and drilled holes in the front and back to thread the power cable:

Clamped down like a quarantine town

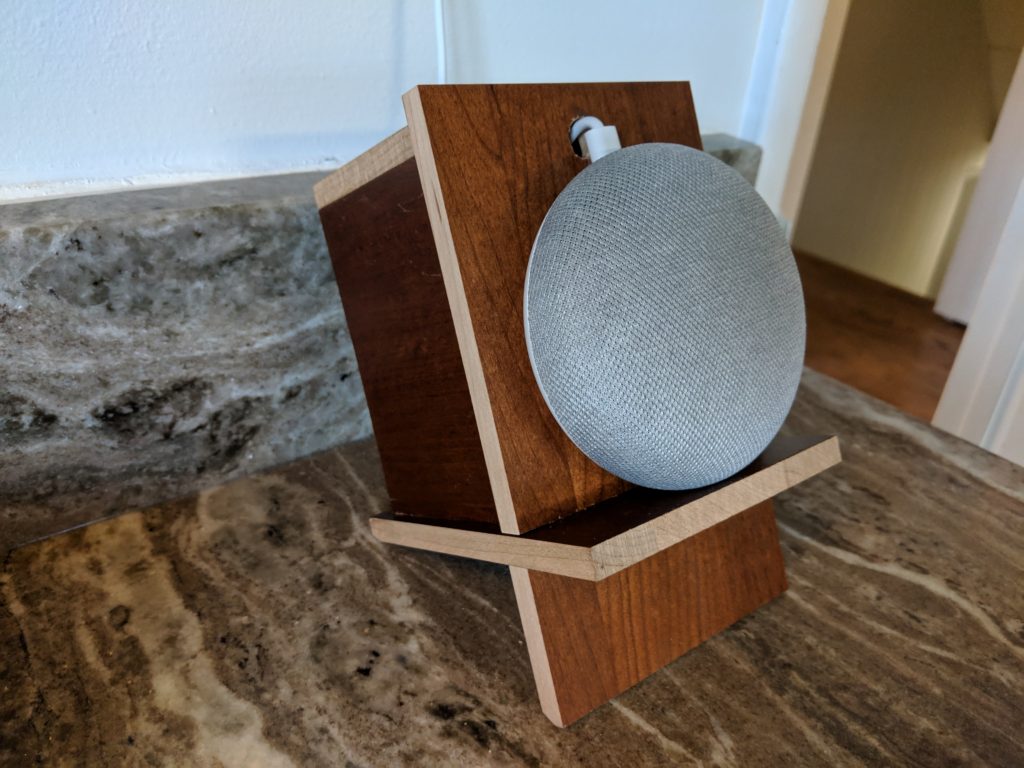
After letting it dry it was done! Here it is on its new home on the kitchen counter:

OK Google, who made the best Google Home Mini stand?

Looking good!

I’m really pleased with how it turned out, and am providing a list of the pieces I cut so you can make your own:

Cut to:#Part/Reason/Placement:Cut?
58in x 8.5in2Bottom part of stand
23.75in x 8in4Middle parts of the supports
?23.75in x 3in1Top of cable holder box on the back
3in x 4.25in2Side pieces for the cable holder box on the back
3in x 4.25in1Back piece for the cable holder box on the back

Making a Simple Miter Saw Stand from Scrap Wood

DIY Miter Saw Stand

“What good is a miter saw if you’re unable to saw?” said in the voice of Agent Smith to Neo

Last summer I was swamped with projects, including the bird cage stand and super sturdy kitchen chair. I didn’t have a ton of space to work in the garage, and was constantly moving things around to have a work surface.

For example, if I wanted to cut wood with the miter saw then I had to move the wood on my desk that was being glued together somewhere else, and later move the saw onto the floor to make room for the next stage of a separate project.

It was clear I needed a dedicated place for the miter saw, and started thinking about making a miter saw stand.

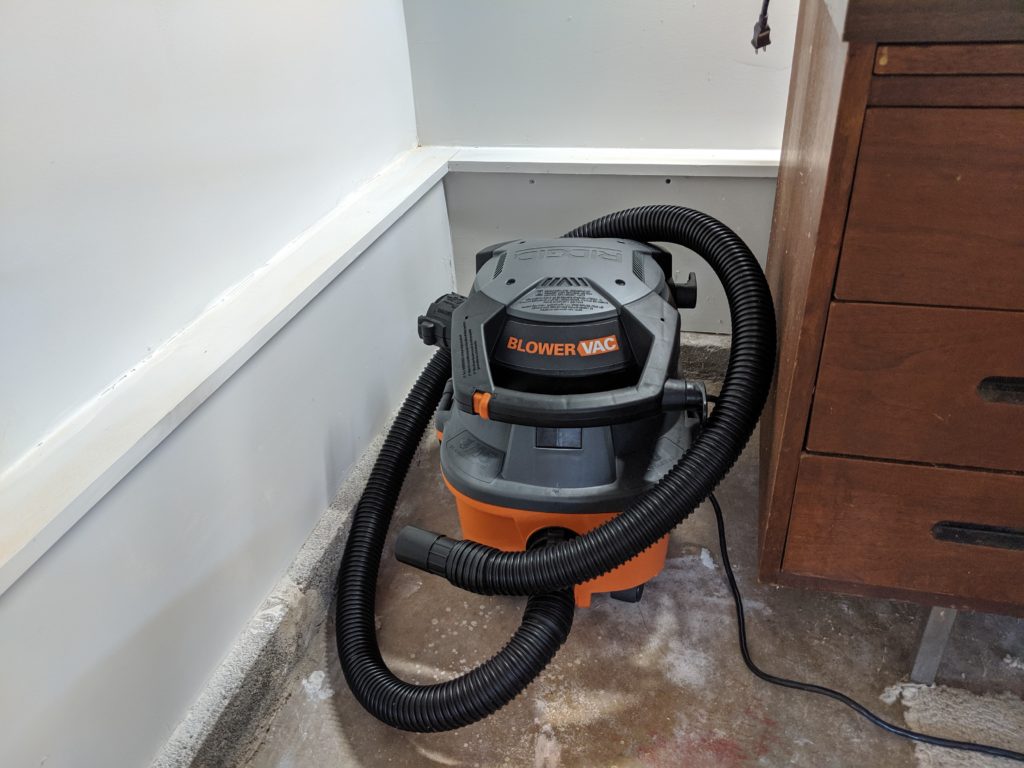
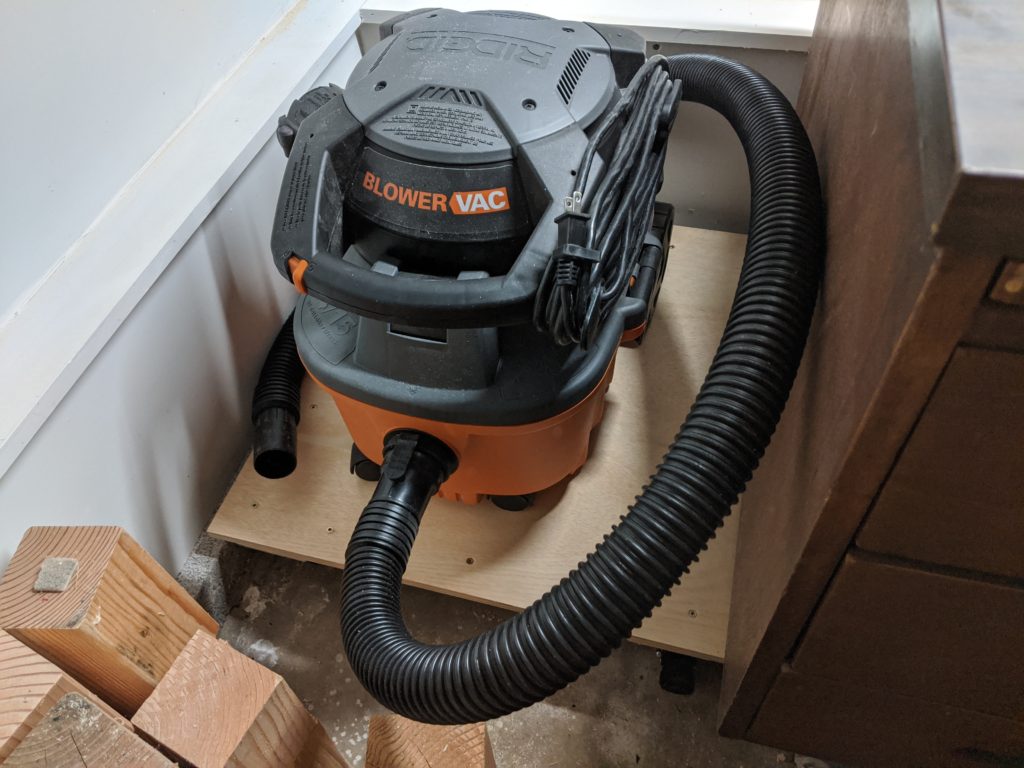
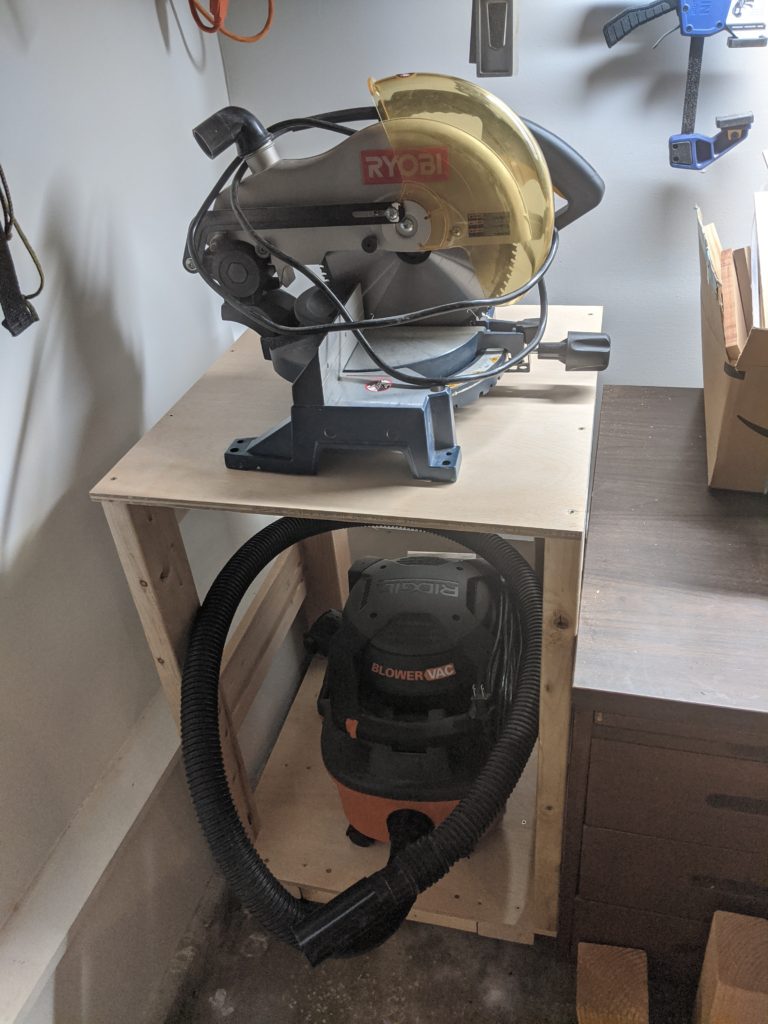
I had recently added this RIDGID shop vac to the list of things on the garage floor, and there was a perfect spot for it next to my work desk:

Fits like a cookie in my mouth

As I planned out my miter saw stand I realized I could save space by placing the shop vac under the stand. I then looked around at what other folks had done and found a few ideas for inspiration:

My other requirements were pretty simple:

  • I had to be able to remove the shop vac easily (so I could vacuum out the car or use the vacuum’s blower function after mowing the lawn)
  • be able to move the stand around for longer cuts, and
  • it had to fit in the space next to my work desk.

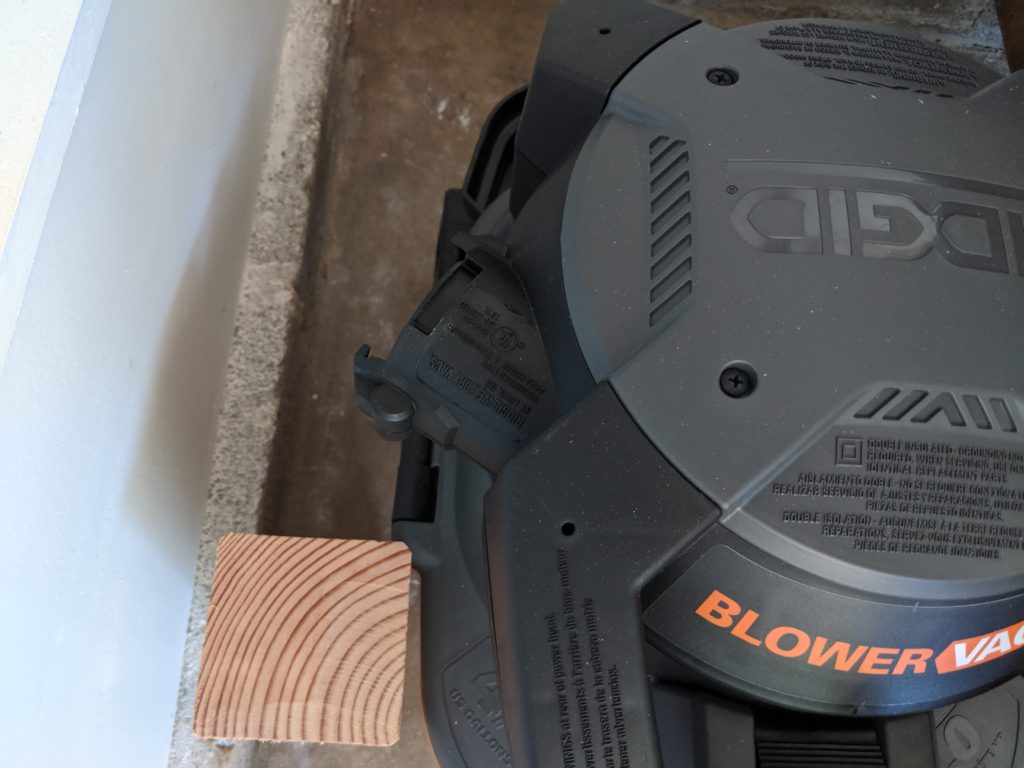
I also needed 4 inches of clearance from the bottom of the miter saw stand because of cinder blocks that stuck out partway from the garage wall (see the above picture). Since the wheels are 2.75 inches tall I decided to use 2x4s (with an actual height of 1.5 inches) bolted to plywood so the base would sit higher than the cinderblocks.

I had about 2 feet next to my work desk so I started with those dimensions and worked my way backwards.

I grabbed some extra plywood that was laying around and cut one piece to 23×22 inches for the base and another to 24×22 inches for the top (I wanted a bit more space at the top, and this gave me an extra half inch on the right and left sides).

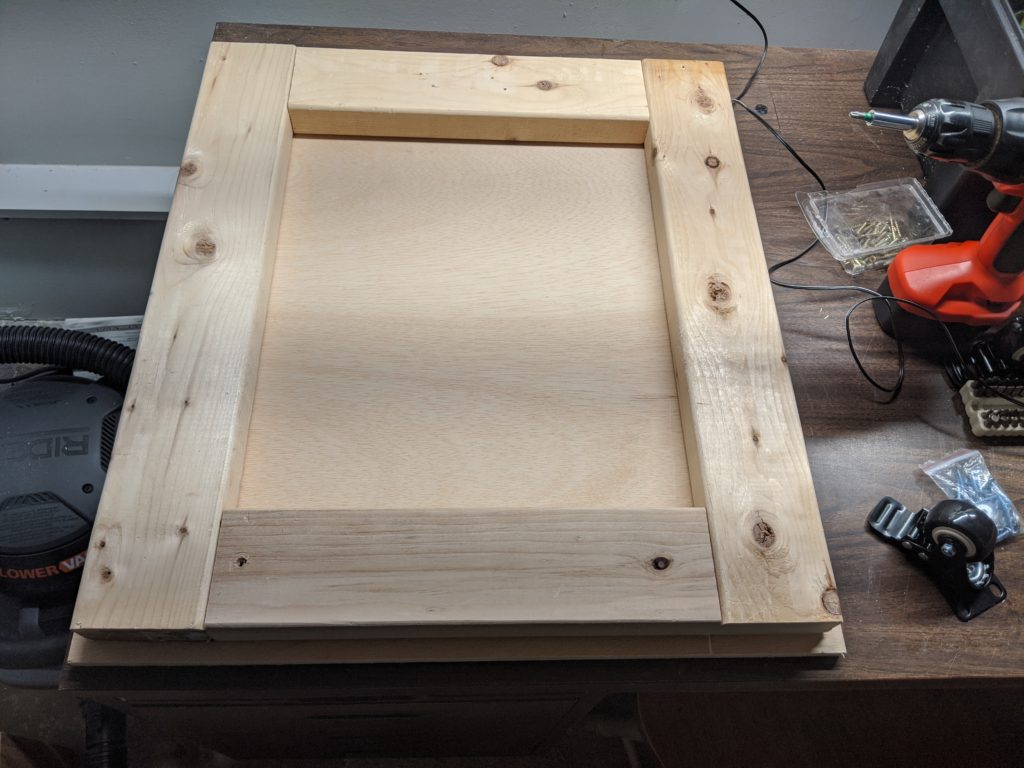
I screwed in the 2x4s to the bottom piece of plywod with Spax screws:

I screwed in from the top of the bottom piece, then flipped it over for the next step

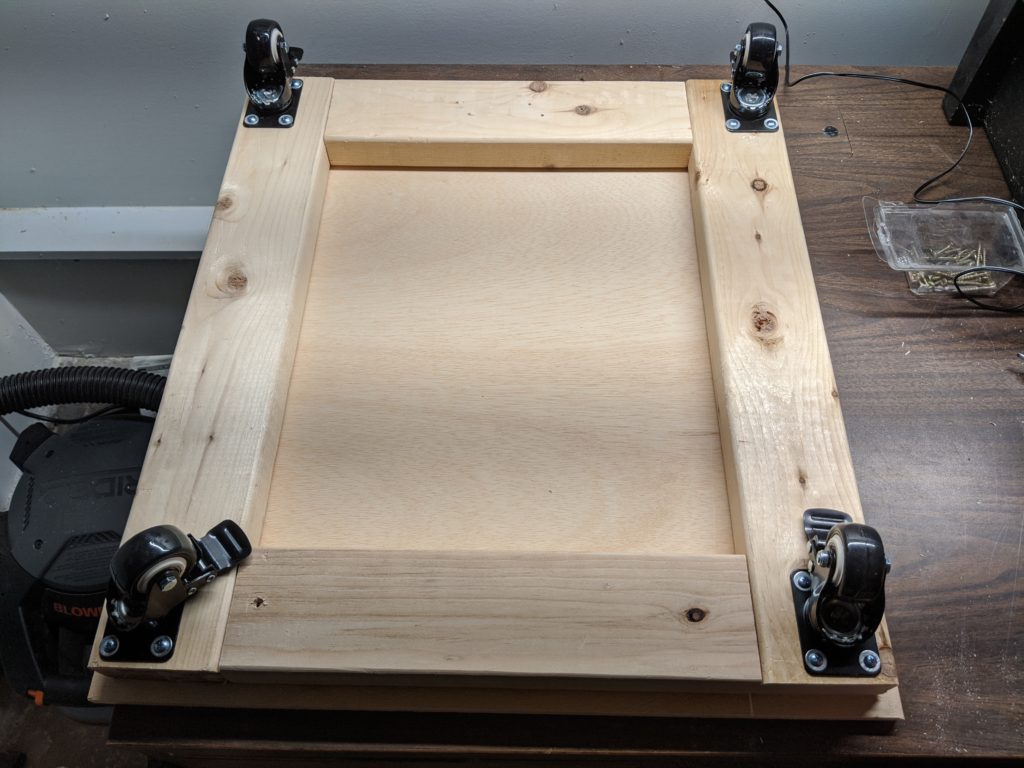
I then added these awesome rolling wheels with locks to the bottom so I could move the stand as needed:

Wheels locked and loaded

I did a test fit and things were looking good:

Rolled like butter on hot bread

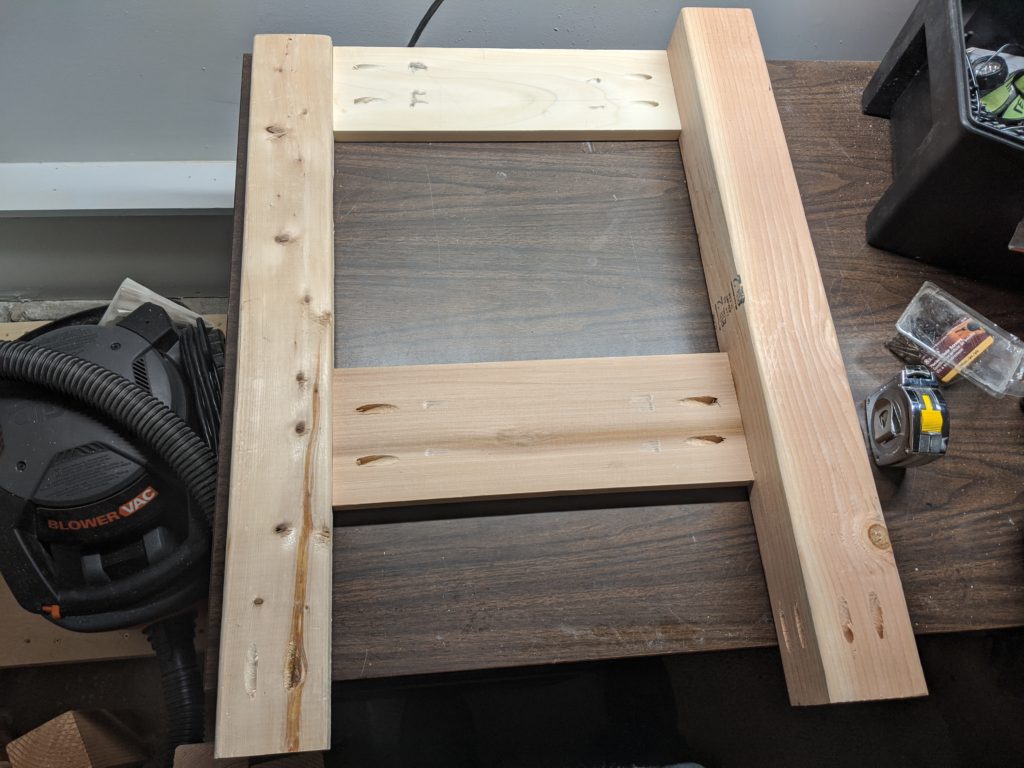
For the legs on top of the base, initially I thought I’d use 4x4s (left over from the ultimate chair project) for each corner, however there wouldn’t be enough space to take the vacuum out from the front of the stand:

Captain, I need more space!

Instead, I ended up using 4x4s in the back and 2x4s in the front which allowed me to easily get the vacuum out.

I then used pocket hole screws to connect the 4×4 legs and 2x4s with some spare 1×6 boards:

I have an unhealthy love for pocket hole screws

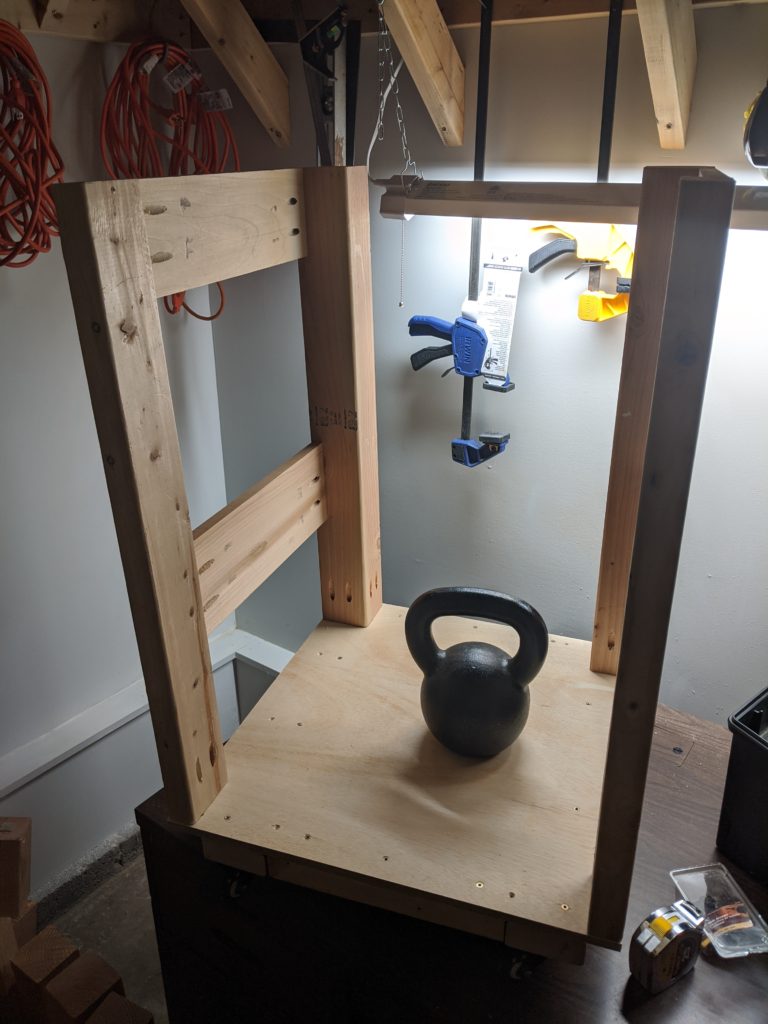
I then attached the legs using even more pocket hole screws to the base:

Hooray for kettlebells! Keeping things sturdy since the 18th century[1]
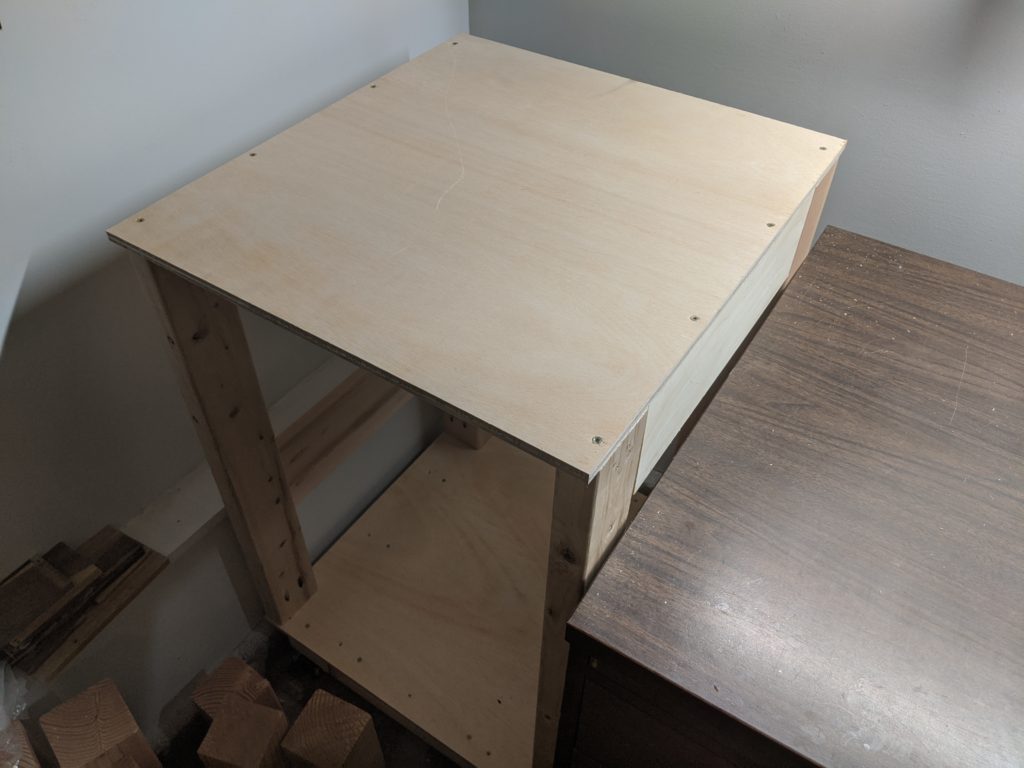
After the legs were on, I attached the top with more Spax screws[2]:

Topless no more

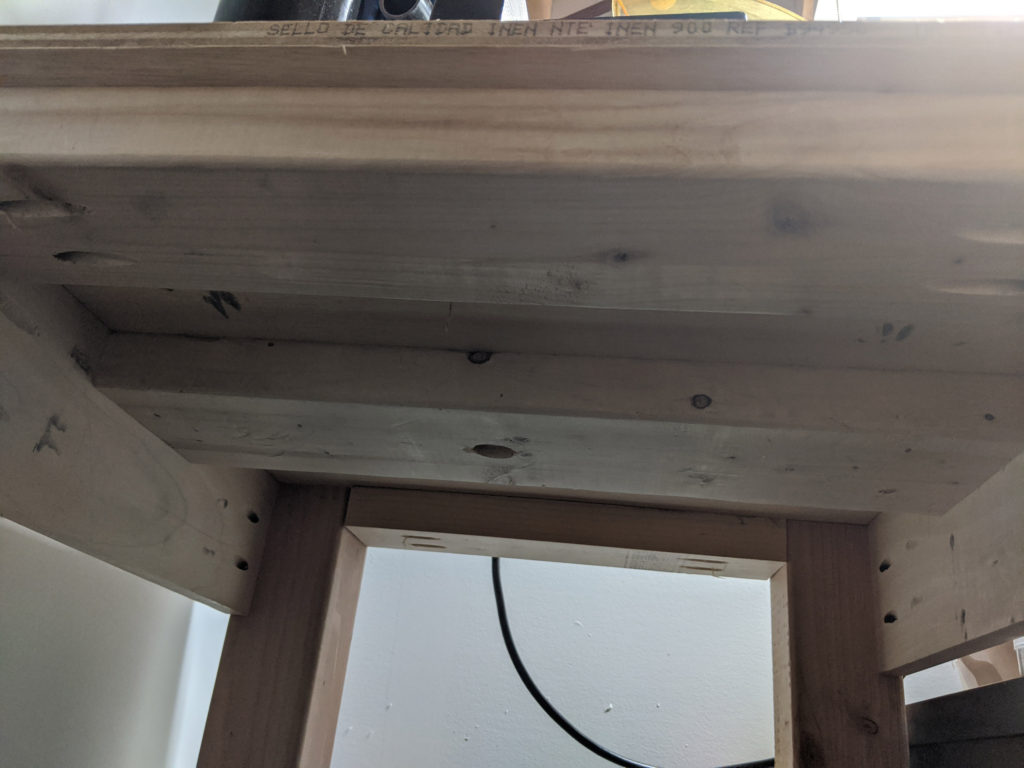
I then added some 2x4s and a scrap 2×6 underneath the top piece for additional support:

So much support

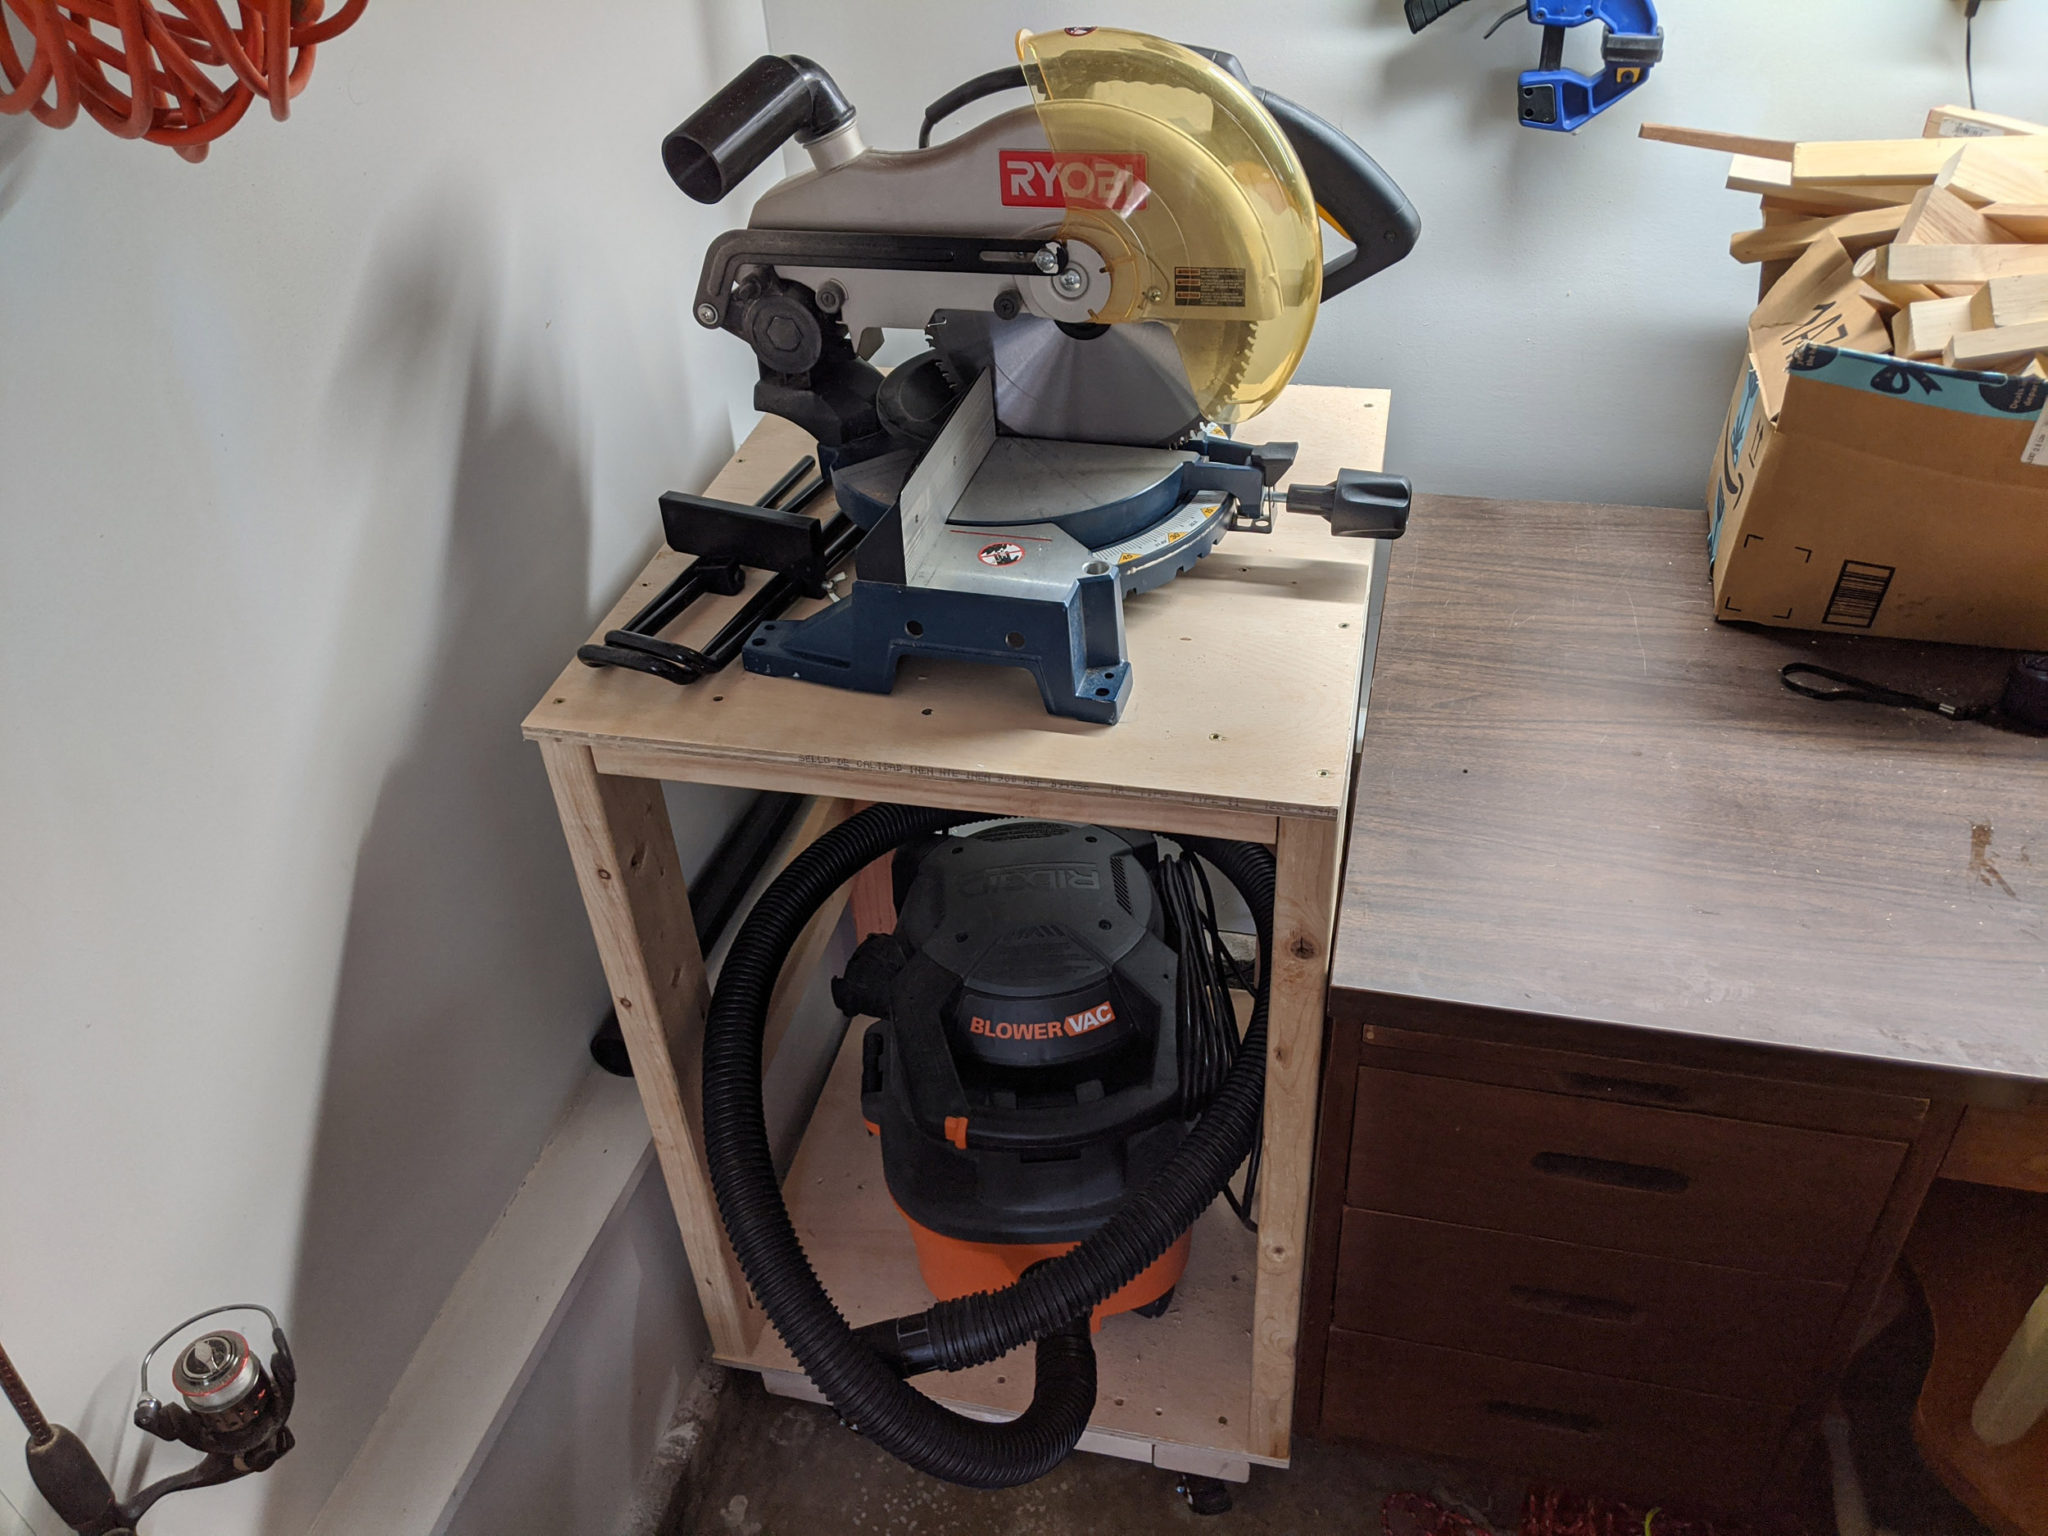
Then I placed the miter saw on the stand, tested the wheels and locking function, and it worked!
Ready to go!

I love that I could easily move the miter saw stand out to make cuts and then back into the corner when not in use.

Here’s a list of cuts so you can make it (and adjust for your own space as needed):

Cut to:#Part/Reason/Placement:Cut?
58in x 8.5in2Bottom part of stand
23.75in x 8in4Middle parts of the supports
?23.75in x 3in1Top of cable holder box on the back
3in x 4.25in2Side pieces for the cable holder box on the back
3in x 4.25in1Back piece for the cable holder box on the back

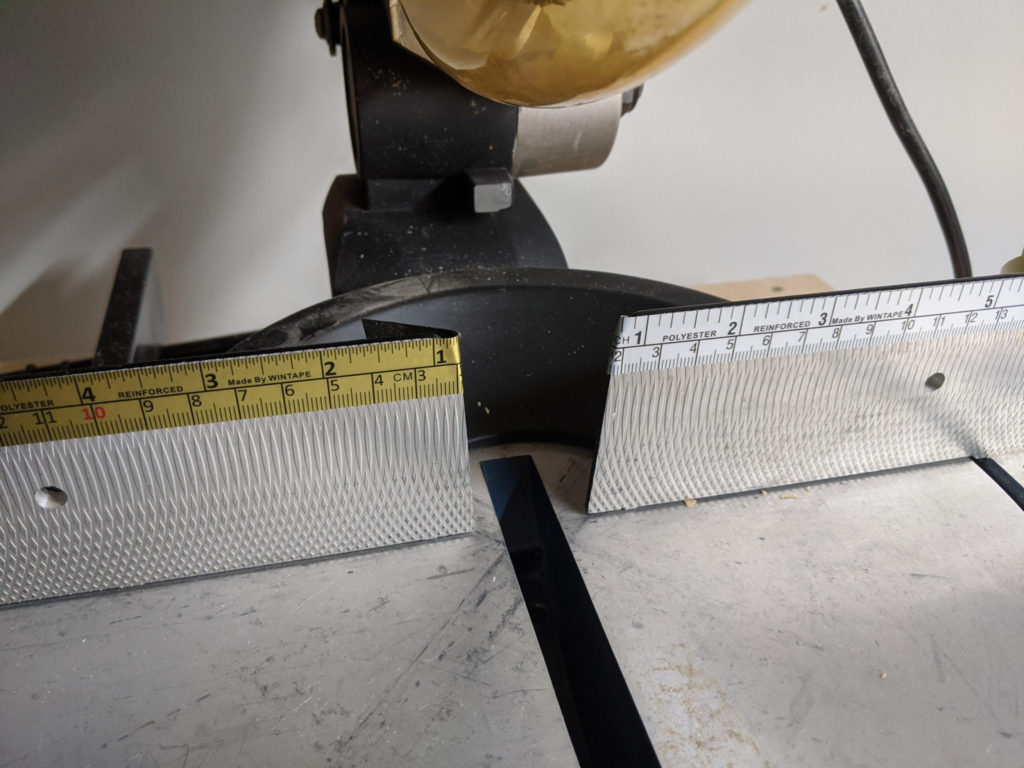
As a final detail I got some ruler tape and attached it to both sides to make measuring for quick cuts a lot easier:

Perfect

In the future I might add collapsible sides, but so far I haven’t needed them (plus the saw came with some removable side supports). If I do add collapsible sides then I’ll probably make a larger top piece so there’s space on each end for the collapsible ends to fit underneath.

Let me know what you think!

[1] It’s true: https://en.wikipedia.org/wiki/Kettlebell

[2] I love both pocket hole screws and Spax screws. I know, it’s weird.

Scrap Wood Garage Shelves

This was a fun organization project that ended up being kind of an Ultimate Scrap Challenge without even meaning to.

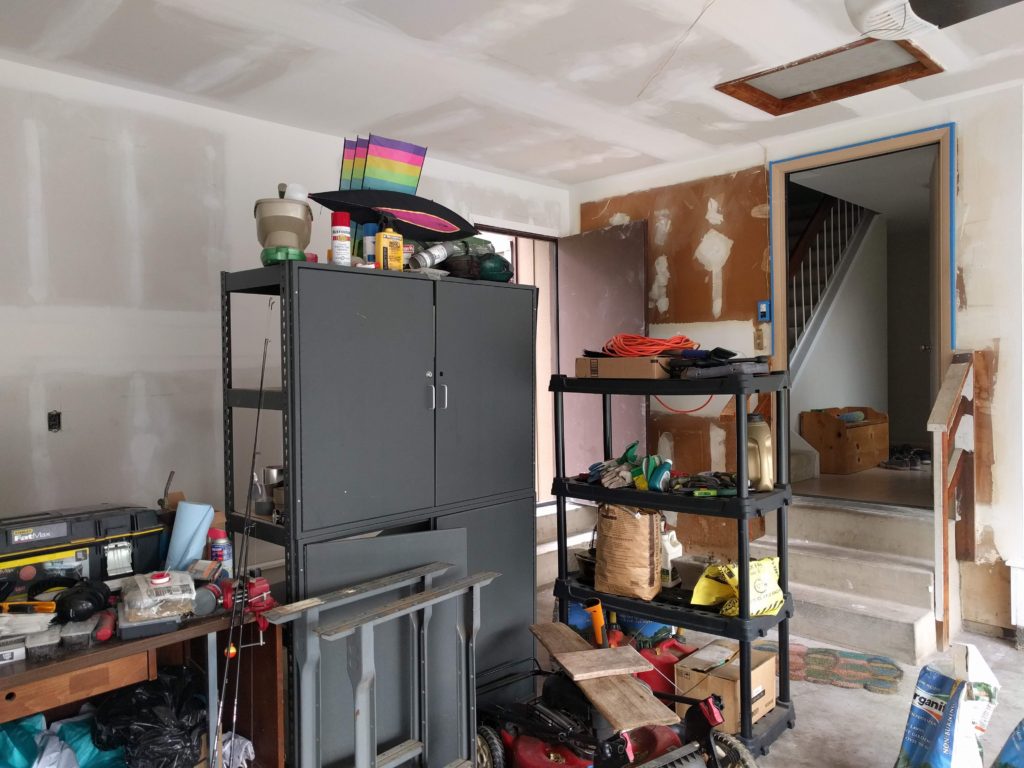
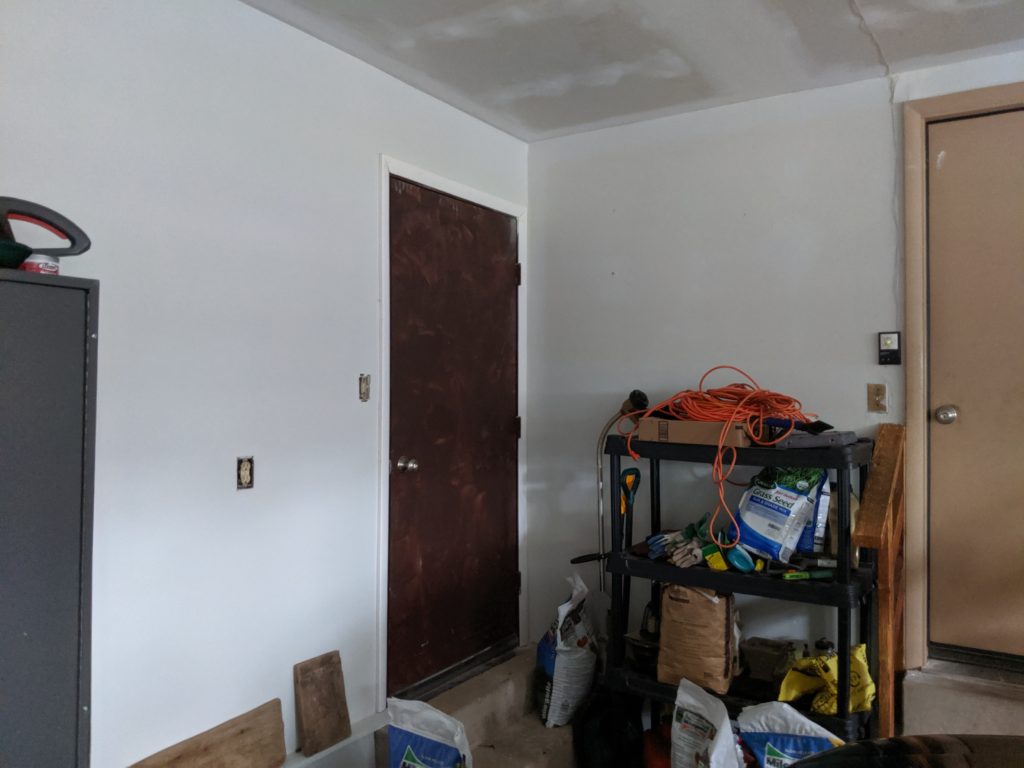
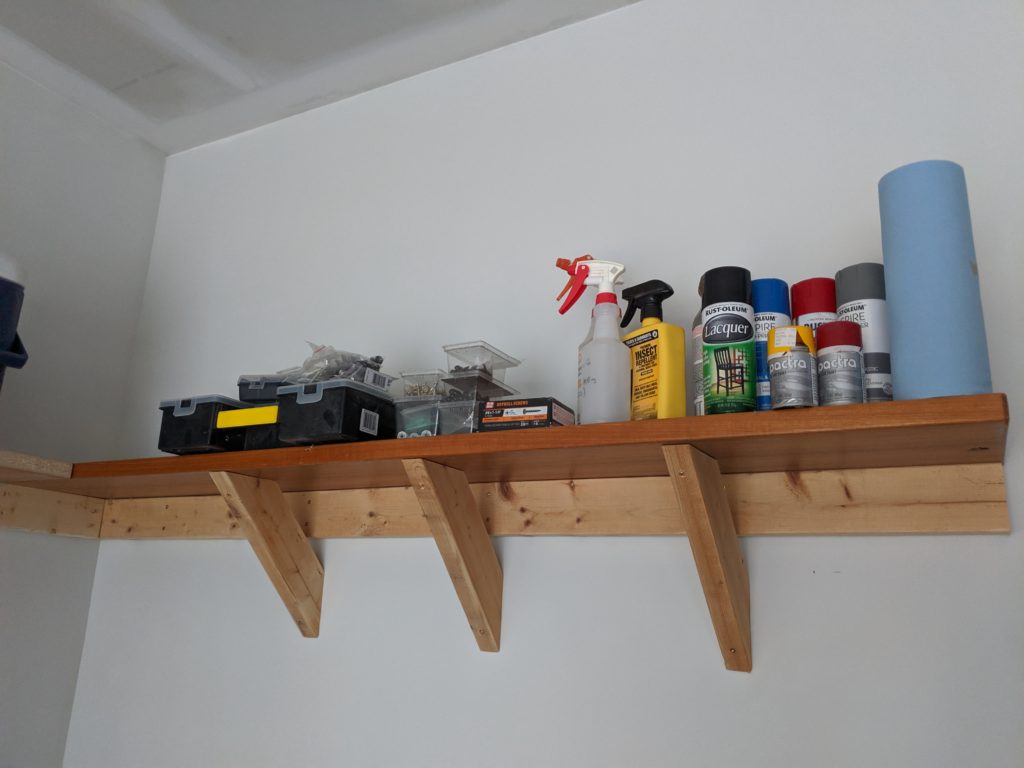
We recently put up drywall in our garage, and while painting I realized we had a storage problem: there were three standing shelf units on the floor of our garage, and that was probably two too many.[1]

Taken before we painted. What a mess!
After painting the walls- still a mess!

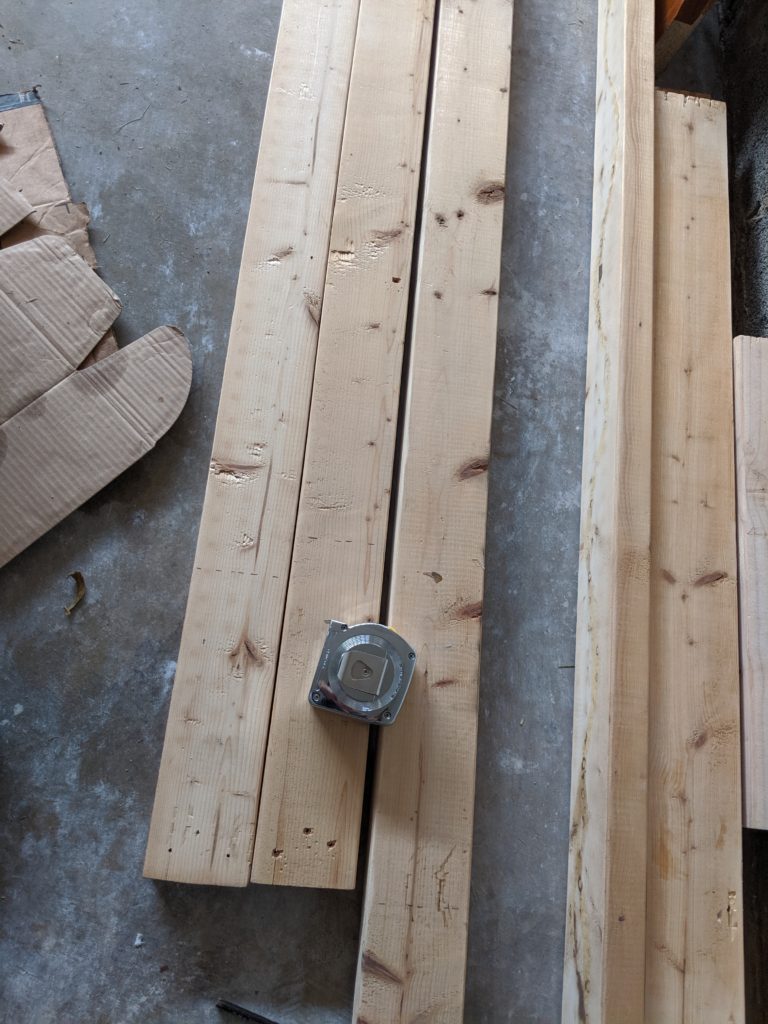
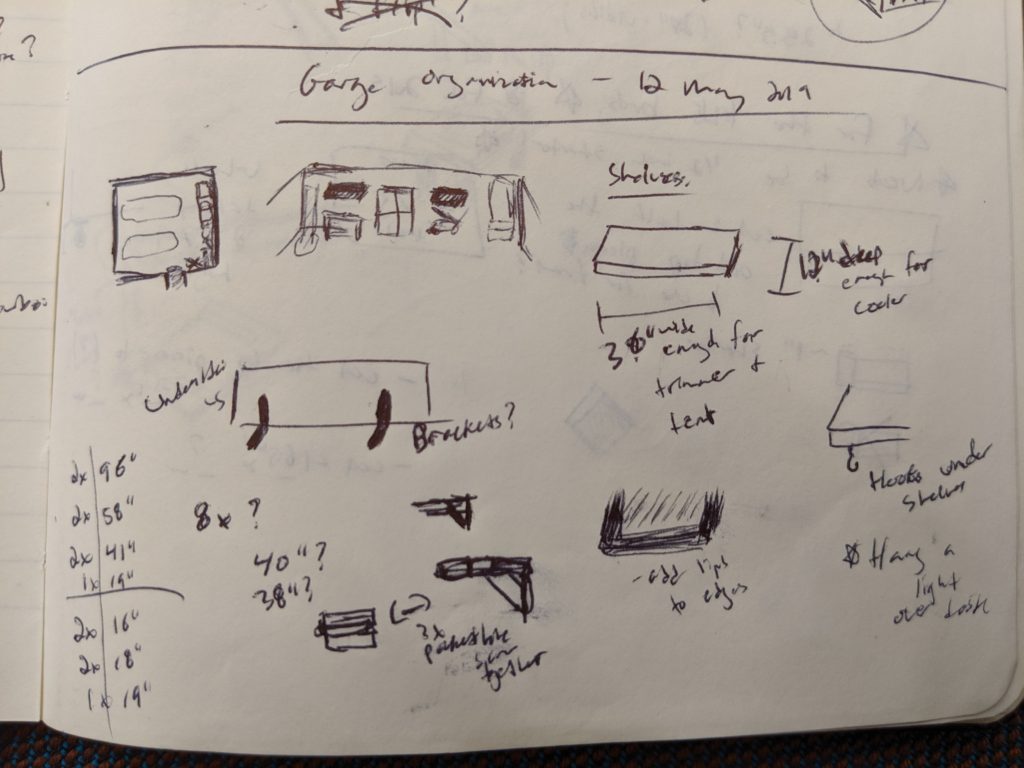
I found someone on Nextdoor giving away several 2x4s and decided I could join a few of them together with pocket hole screws and glue to make the shelves, and then use the leftover pieces as supports.

After picking up the 2x4s I noticed they’d been used in previous projects and had several nail holes and glue marks, so I made a mental note to sand them down that weekend before I started any cutting.

Can’t complain how they look when they’re free!

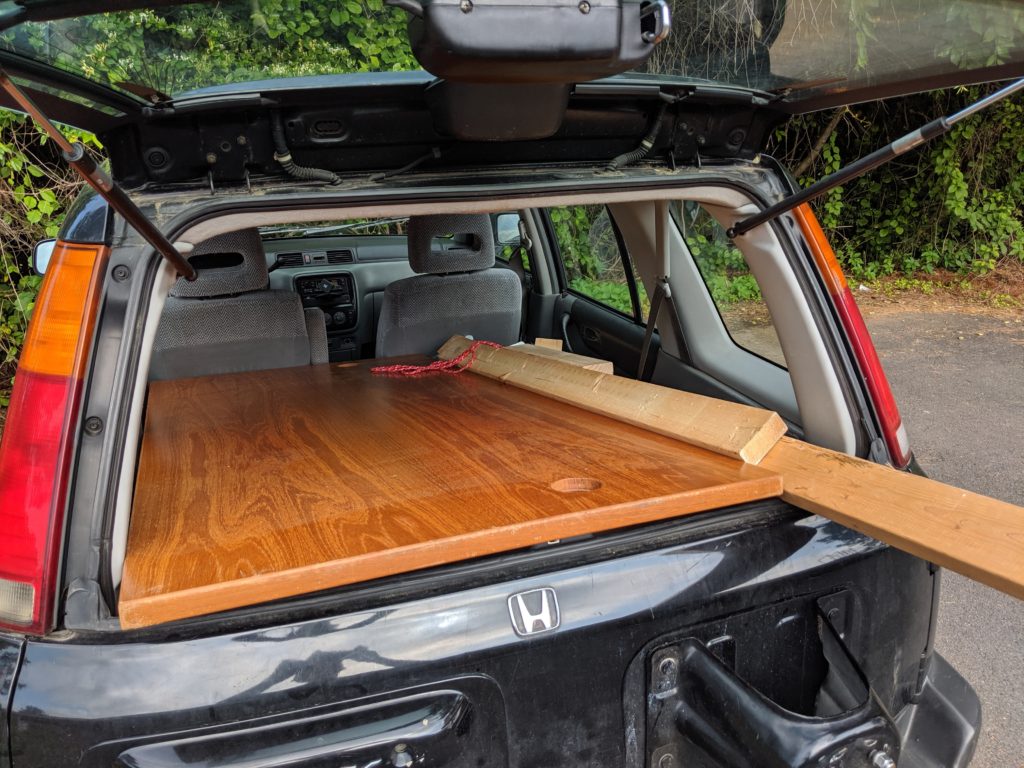
I’m glad I waited to cut them down, because the next day I saw a nice wood desktop with a “free” sign on the side of the road. I drove by two or three times before finally stopping to load it into my CRV.[2]

The table top with some of the free 2x4s in the back

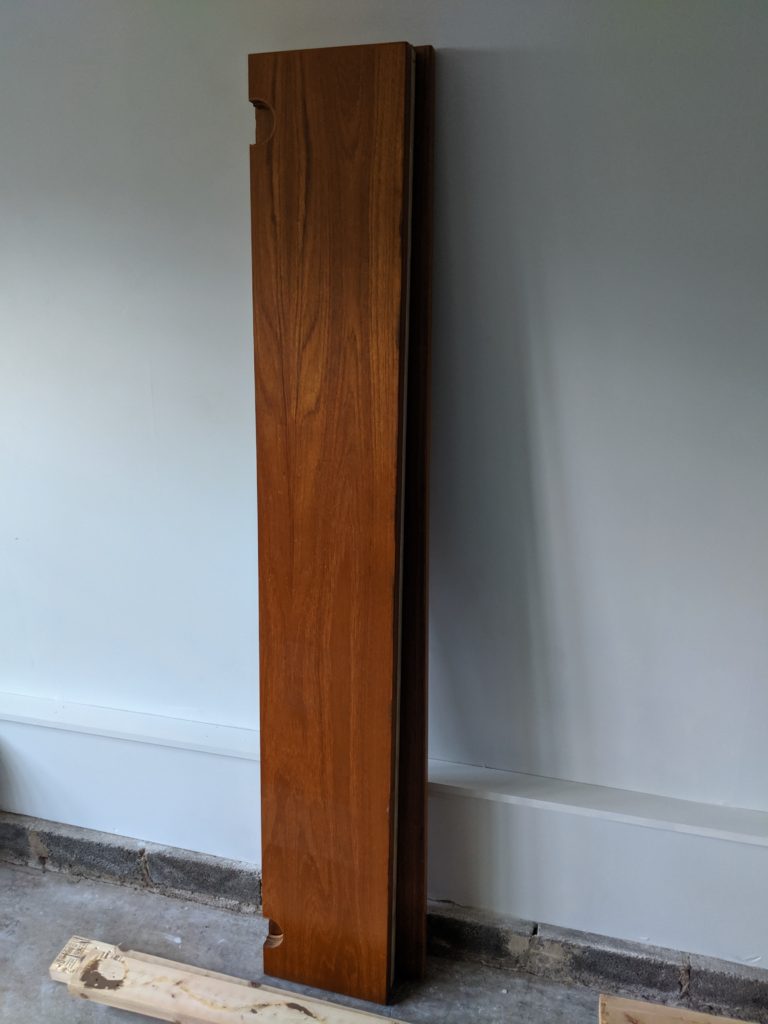
I re-did my design for the shelves to use this new wood. Instead of joining 2x4s together I decided to cut the desk wood into 3 pieces that were each 11 inches wide (the desktop was about 34 inches wide by 6 feet long):

The three pieces of 11 in x 72 in wood stacked against the beautiful new drywall

I also looked for a new way to support the shelves; initially I considered buying metal shelf brackets, but instead changed my design to use the 2x4s for supports. This way I could still use the wood I’d gotten for free, and wouldn’t have to buy brackets!

“It’s like looking inside the mind of a crazy person!” – you, probably

After some more thinking and measuring in the garage, I decided to keep the tallest (and nicest!) floor shelf unit, which meant the wall shelf to the left of that unit could be 6 feet long and the wall shelf to the right of that unit could be 4 feet long (there’s a door on the right side of the wall, so there wasn’t enough space for the extra 2 feet).

I also decided to make the left-side shelf into a corner shelf for added storage space, and have the adjoining wall’s corner shelf be 4 feet long to match the shelf on the right side of the floor unit.

Once I was comfortable with this plan I made the first round of cuts:

  • I cut one desk piece to 48 inches (for the shelf that would go to the right of the door)
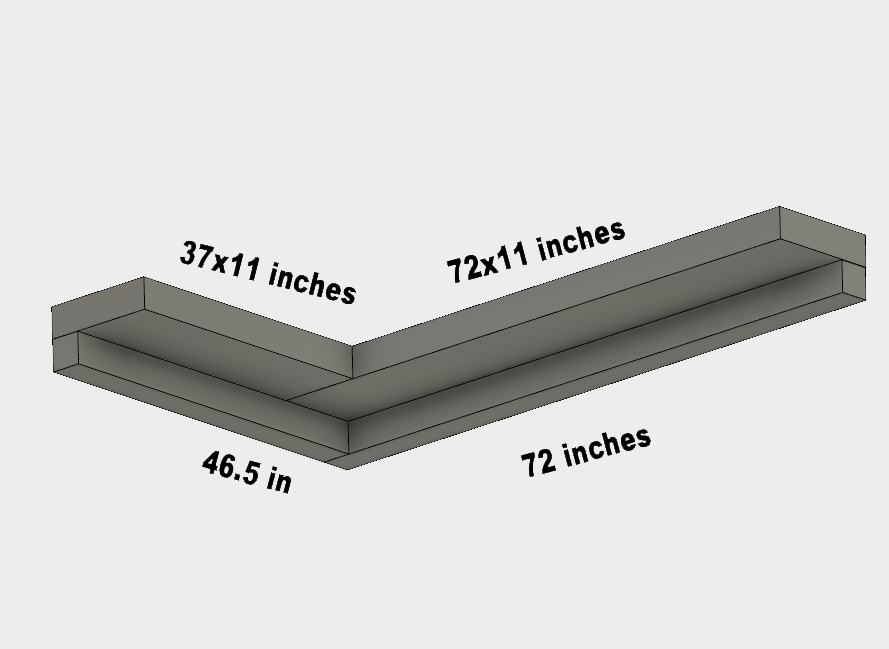
  • I cut a second desk piece to 37 inches (for the adjoining wall’s corner shelf; note that I had to accommodate 11 inches for the corner shelf it would join)
  • Also note that the third shelf piece didn’t need cutting since it was already 72 inches long

I know this corner shelf stuff is probably confusing, so I made a quick render in AutoDesk Fusion 360 to illustrate how I cut things for the corner shelf:

This image is not to scale

I then cut the 2x4s to size:

  • one at 72 inches
  • one at 48 inches
  • one at 46.5 inches (to accommodate the 1.5 inch depth of the 2×4 piece that’s in the adjoining corner)

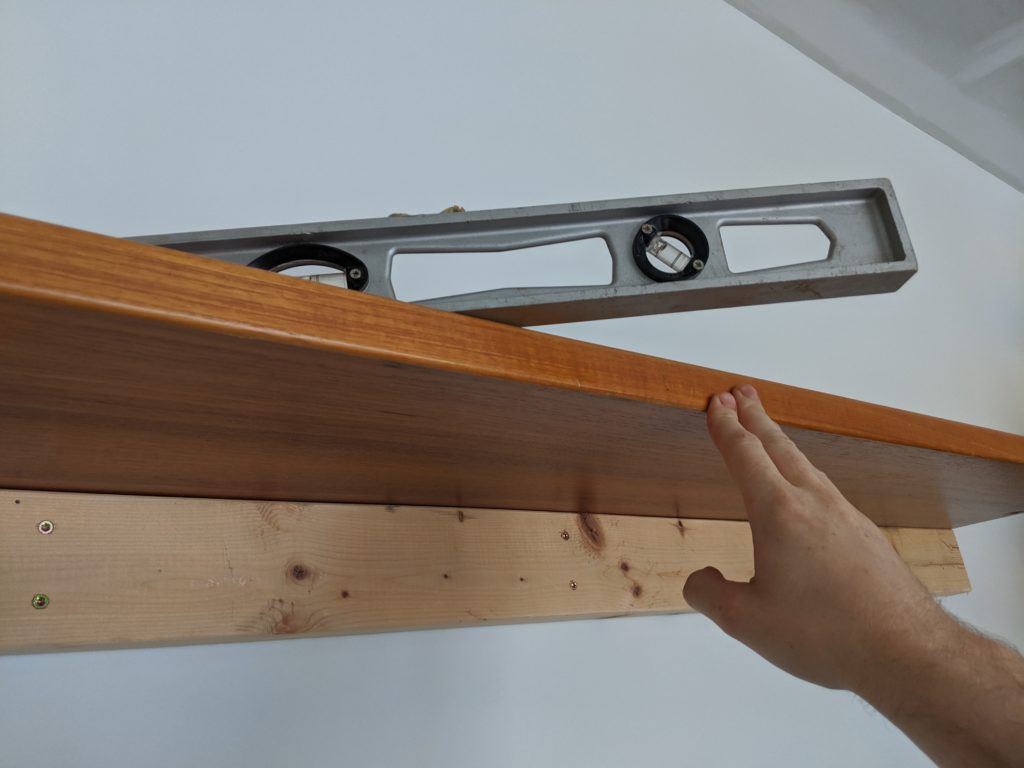
After finding studs[3] I put in screws to get the first support piece up and then screwed in the first shelf piece (use a level!)

Perfectly level, Morty!

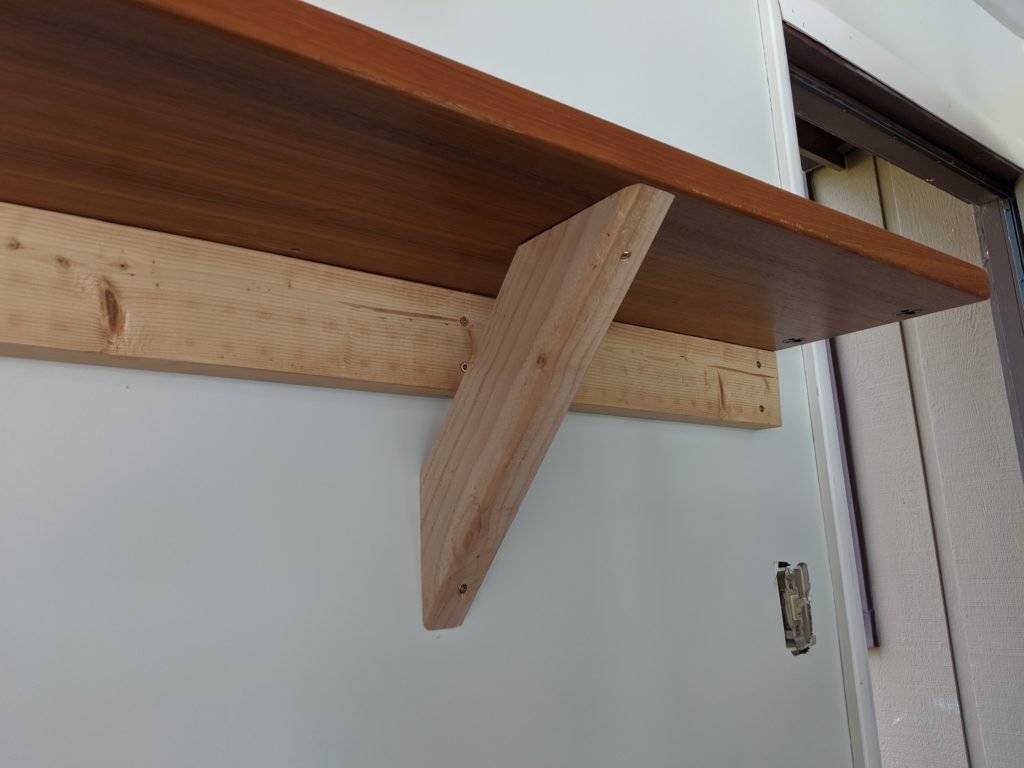
I then measured for the diagonal support pieces and cut several of those on my miter saw.

SEND IN THE SUPPORT, CAPTAIN!
First shelf up!

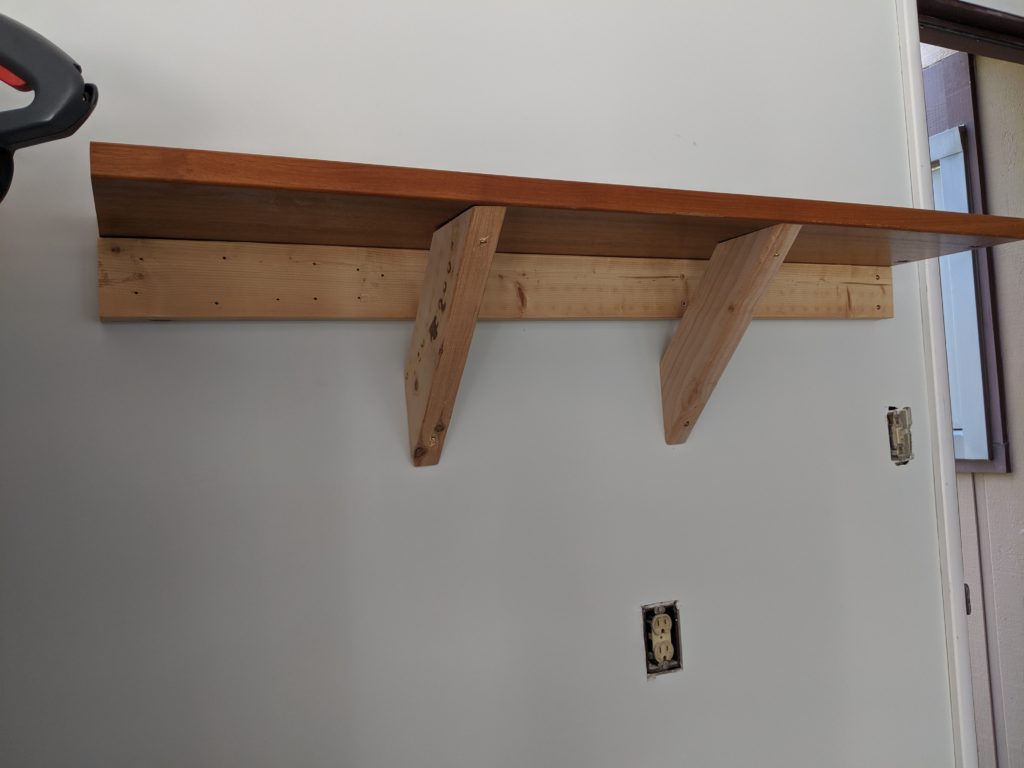
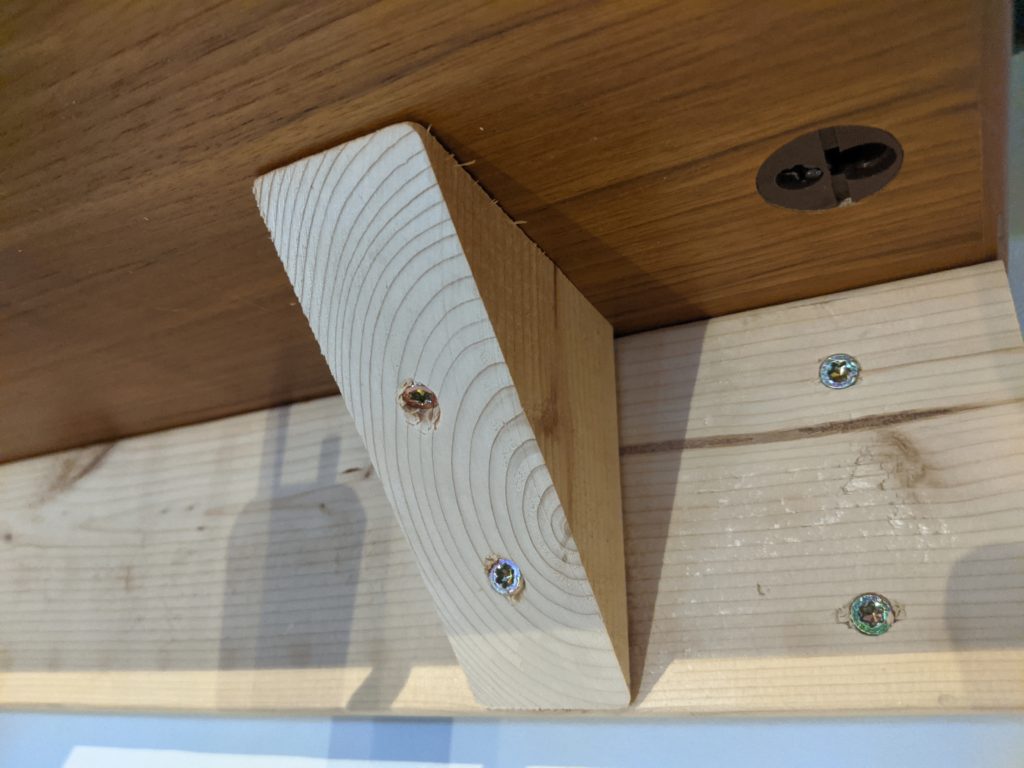
I also decided to use several leftover 45 degree-cut pieces as additional supports where the wall didn’t have studs:

Reusing these was much better than throwing them away, and it’s more stable too!

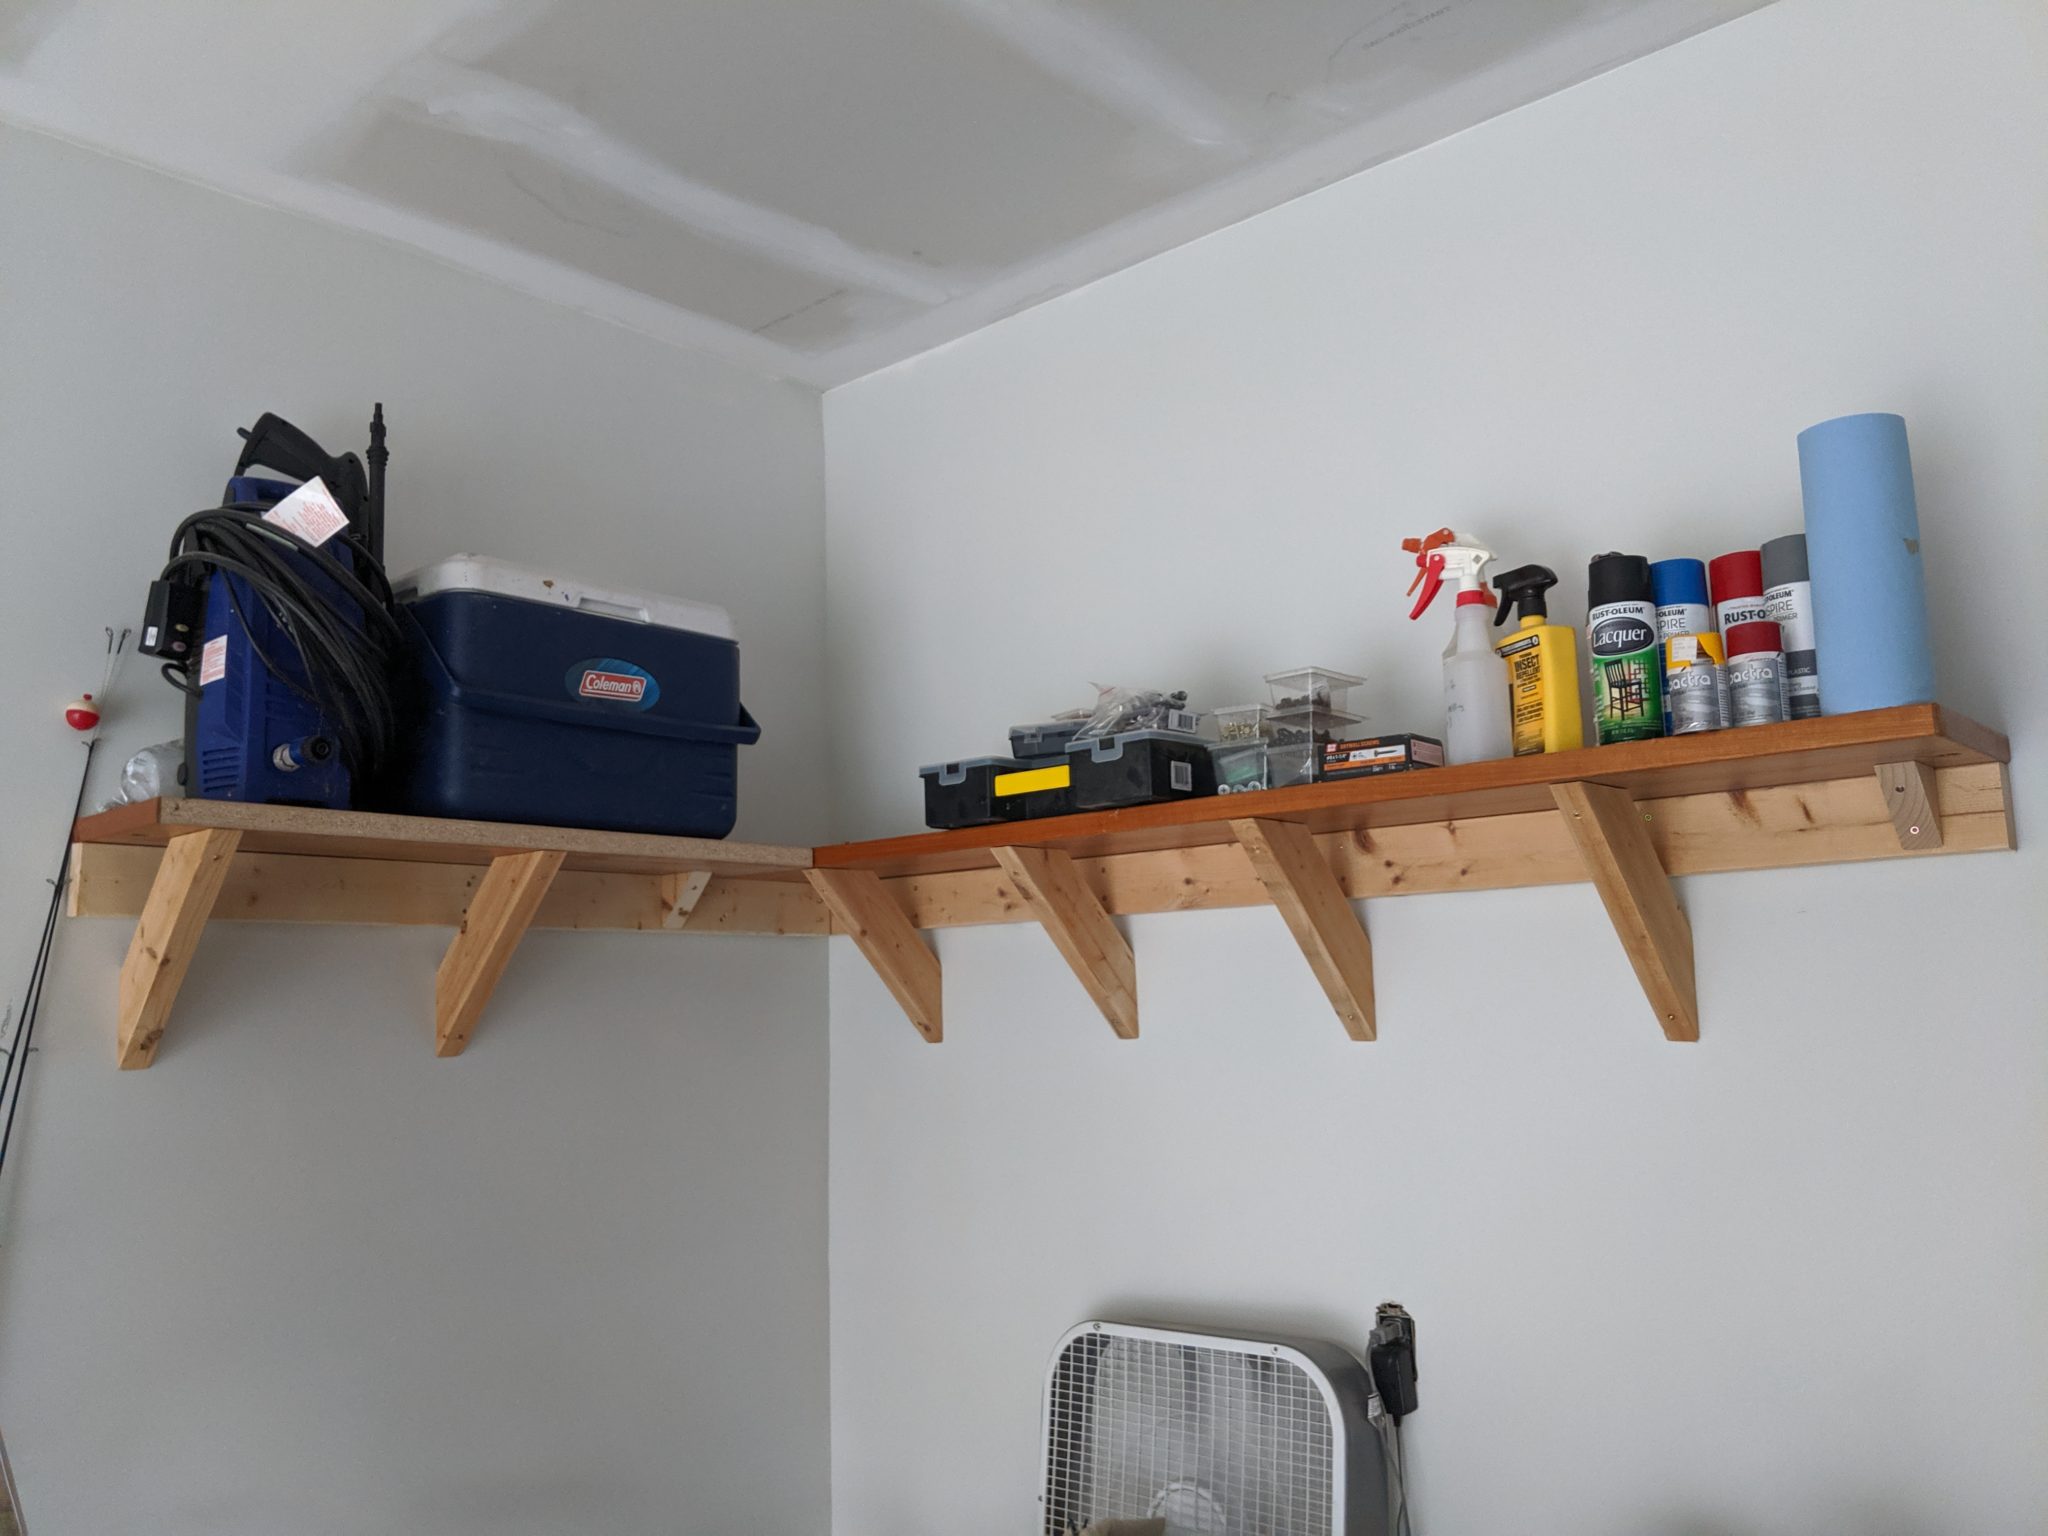
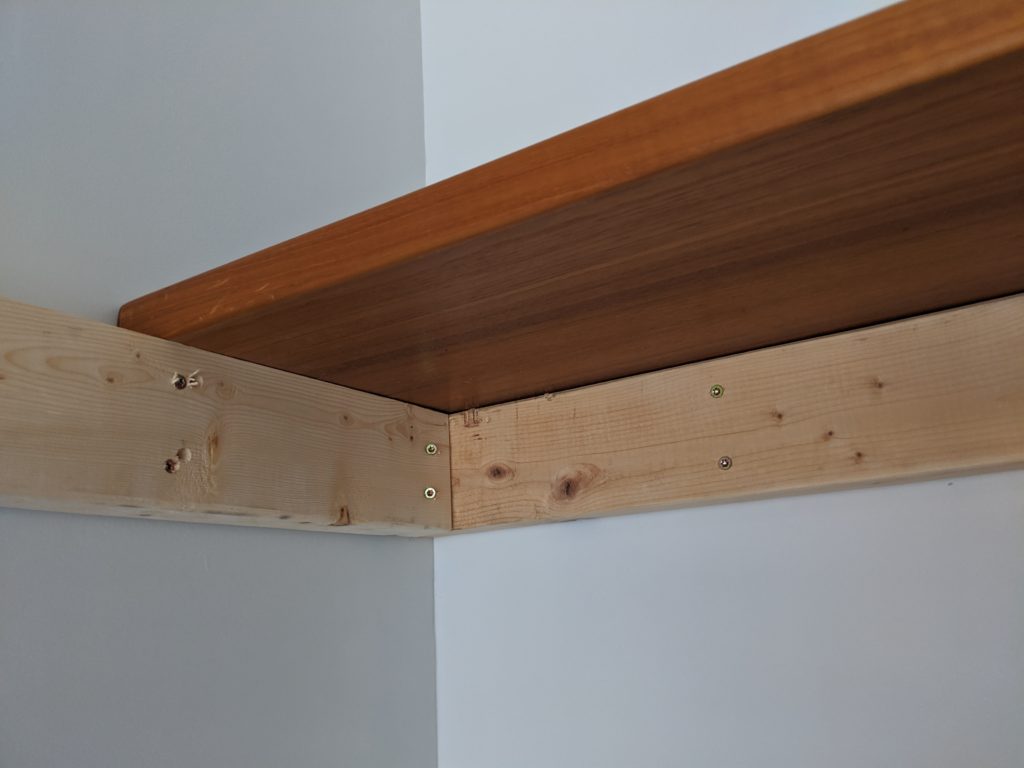
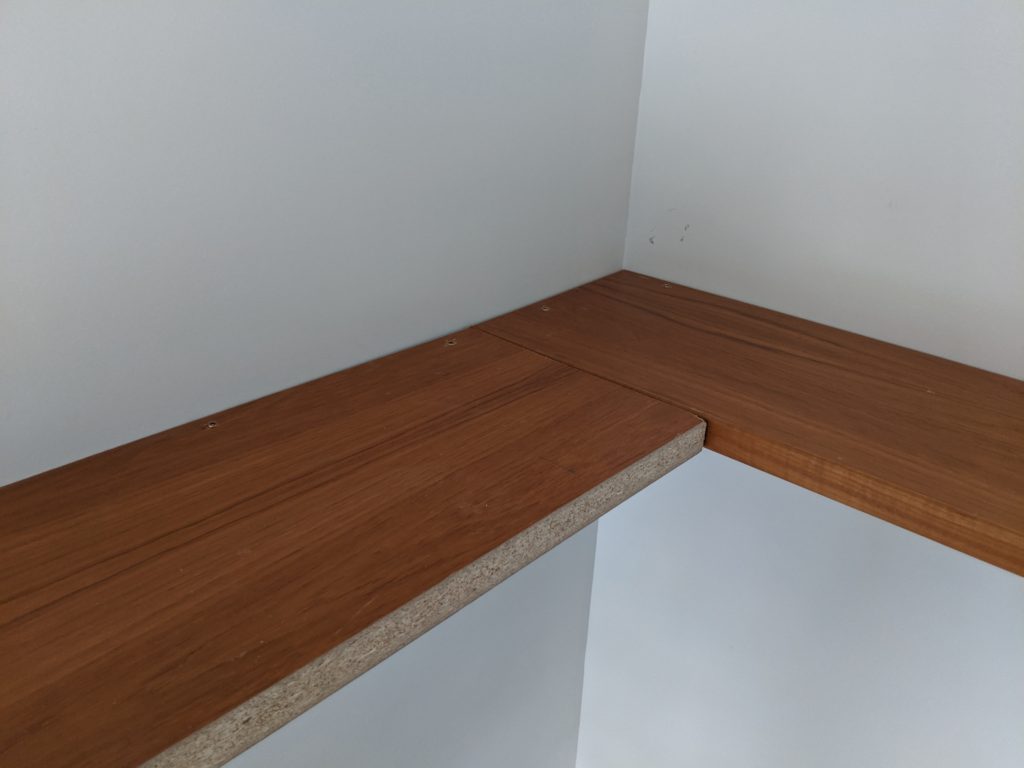
Putting up the corner shelf:

2x4s are up followed by the long desk piece
Adding the second part of the corner shelf

Once I put up the diagonal supports underneath the shelves, I got a ladder and added in additional screws from the top, both into the main 2x4s as well as the diagonal supports. This made the shelves feel a lot more solid.

The shelves looked amazing. I started putting things up and was able to clear out one of the floor shelving units!

I love being able to see things at a glance
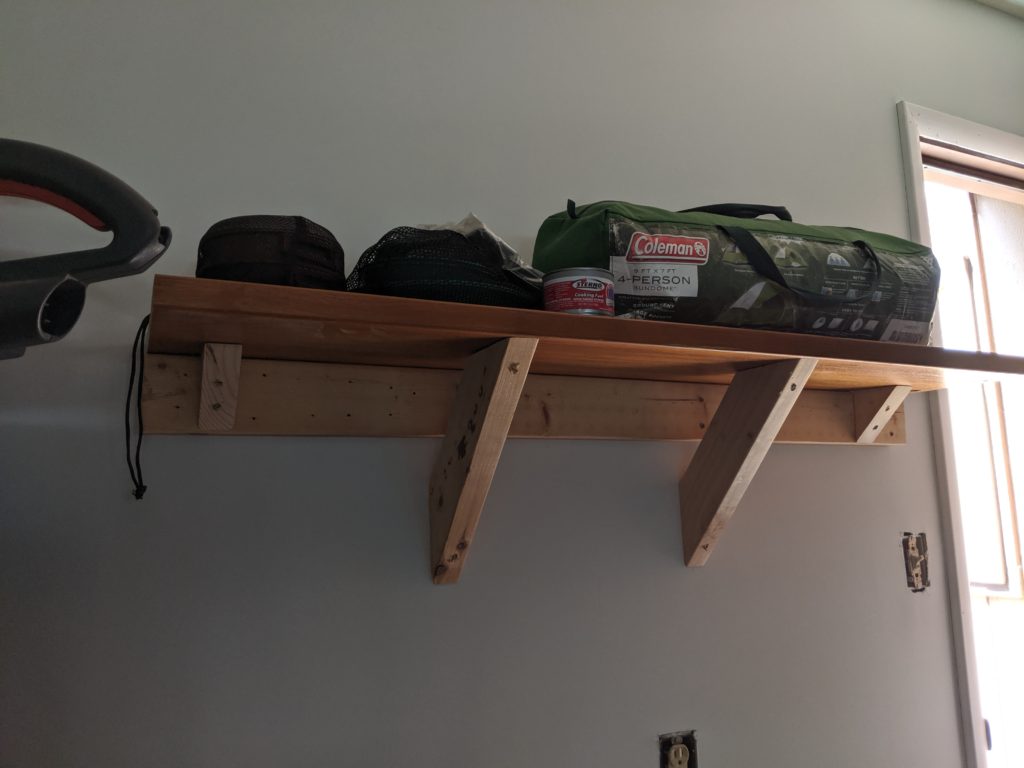
Camping gear gets a prime spot!

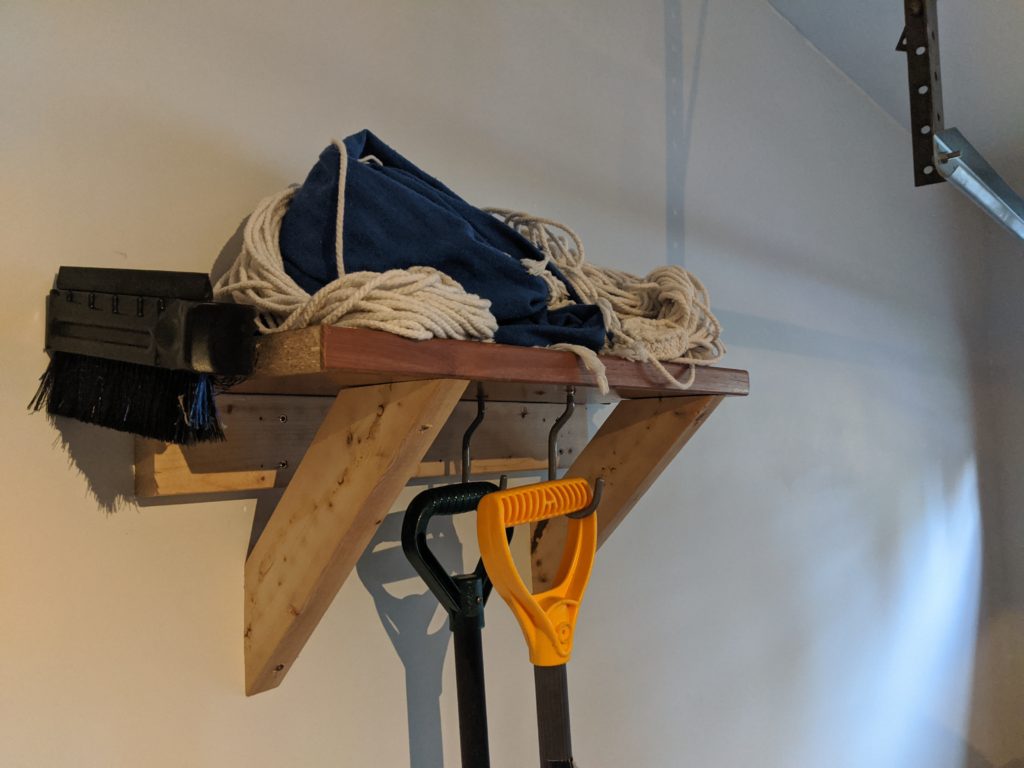
A day or two later I decided to put up two more shelves on a third wall using the leftover desk wood pieces:

One of the added shelves

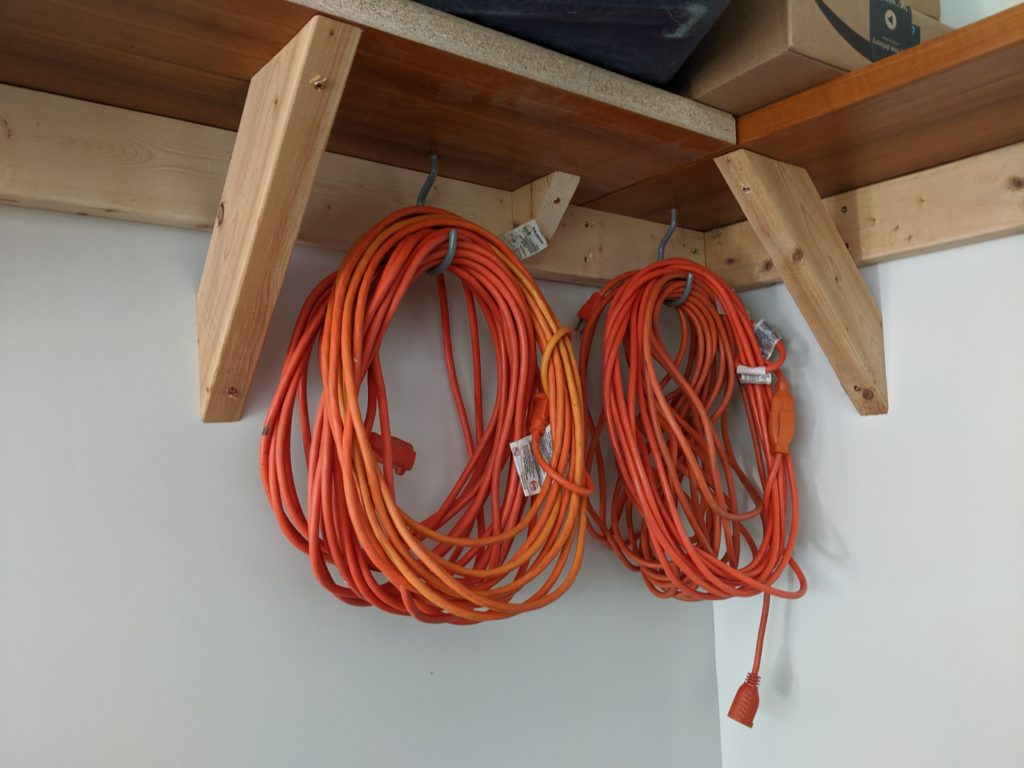
You’ll also note that I installed bike hooks and put a few more things up that way:

WE NEED MORE POWER!

As a result I was able to get rid of two large, ugly plastic shelving units and freed up a ton of floor space. The whole garage feels much roomier and organized now!

The cost? A box of 2.5 inch t-star screws[4], some hooks, and electricity for the miter saw and drill. Not too bad!

[1] Haha, he said tutu! – My daughter, probably

[2] CRVs really can fit anything. And no, I was not paid to say that by Honda…but I’m open to it!

[3] It wasn’t that hard, I just had to look in the mirror! – No one, probably

[4] A note about the torque screws I used: I wasn’t a huge fan of them. I should have made an extra trip to get Spax brand screws at Home Depot (which I’ve been very impressed with in past projects) instead of just grabbing the Power Pro brand that Lowes had in stock (no, I was not paid to say that by Spax). Compared to Spax, the screws I got didn’t sit flush with the wood, they slipped when trying to start them, and they split some of the 2x4s more than I’ve seen with Spax, so I may as well have just pre-drilled for use with normal wood screws.

Tactical Quitting: When Projects Need to Die

The title is inspired from the concept of a “tactical retreat” so eloquently expressed in this SovietWomble video [warning: strong language]

“Giving up” is usually hard for me to do.

I remember learning about the donkey in the well[1] and being taught to “endure to the end” when I was young. So once I’ve committed to doing something I tend to see it through.

My wife points out how this has manifested itself in my becoming a program manager, where I aim to deliver everything on time, with quality, no surprises.[2]

Sometimes though, you need to tactically quit a project. Especially a DIY project.

Recently I was mentally preparing myself to push through the next phase of creating the sturdiest kitchen table chairs in the world.

For context, I designed a chair to match the farmhouse table I built during my sabbatical last fall, and had built a prototype. The post linked above details that process, and I planned on making three more chairs to complete the set.

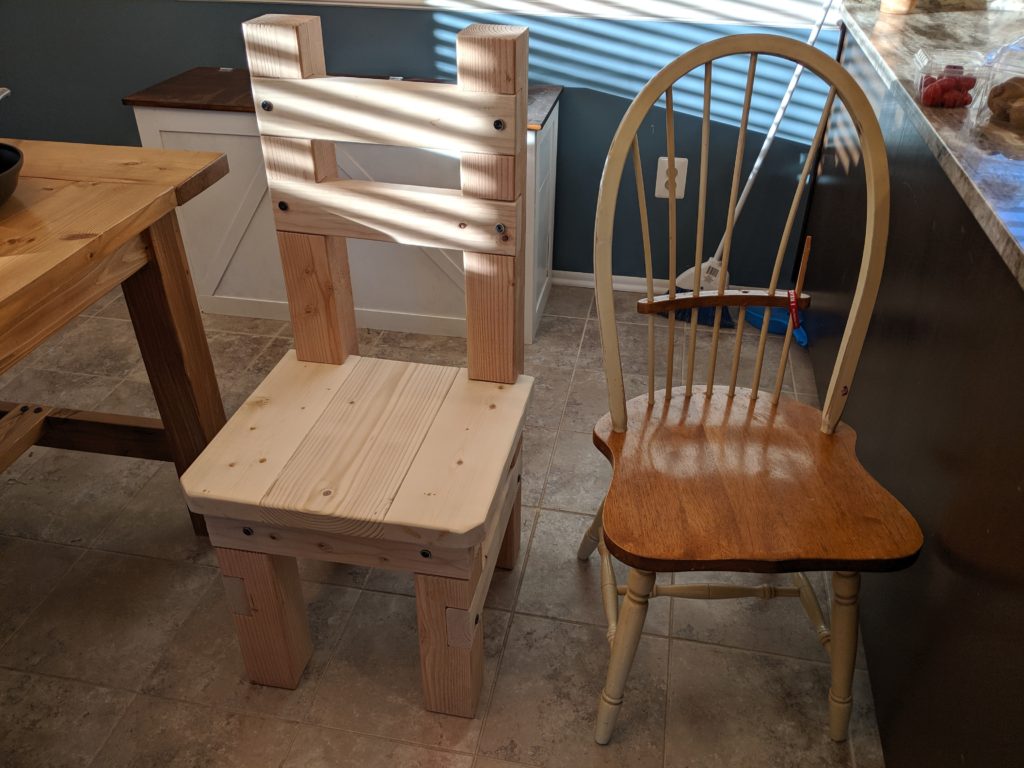
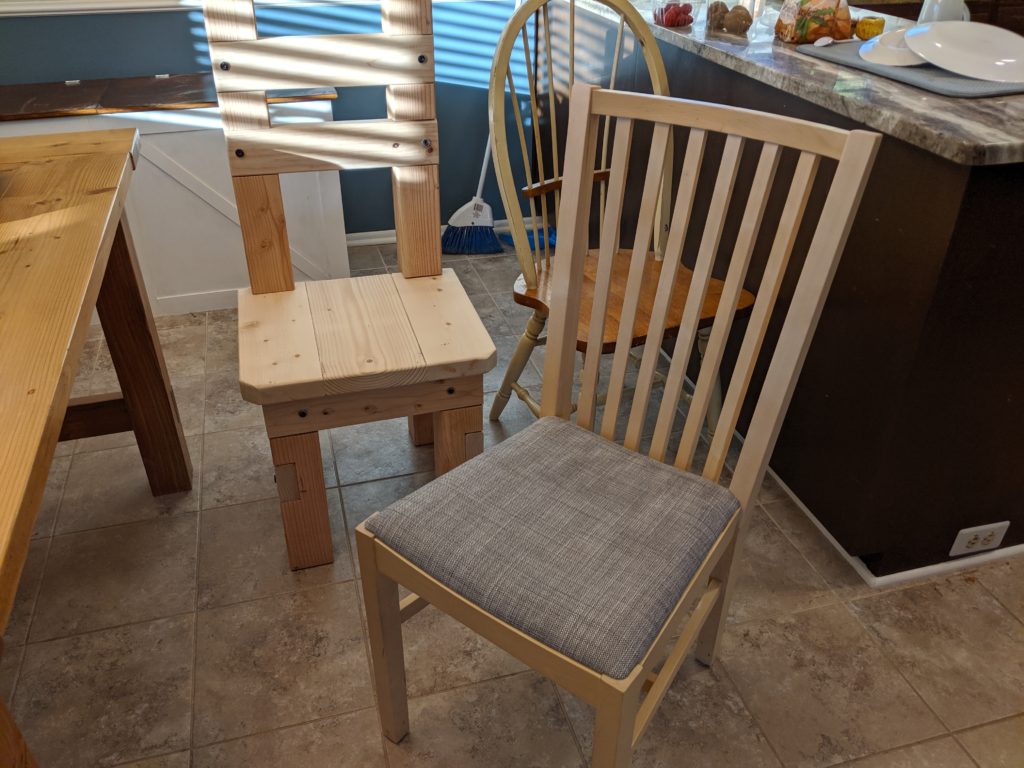
The chair I made (left) and the current kitchen chair style (right)

But even while making the prototype I was dragging my feet; as the picture shows, I didn’t finish the backrests, stain, or seal the chair. I delayed those tasks several times, and opted instead to work on a different project, clean, read, or play a game.

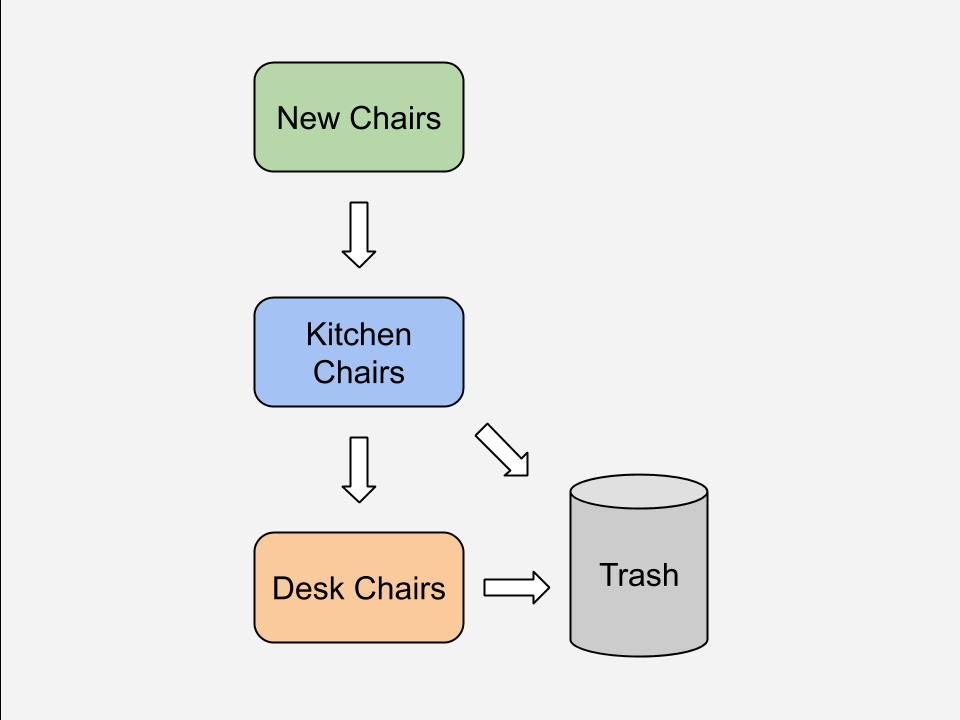
However, time was running out; my kids’ desk chairs were literally falling apart, and I realized that if I made the remaining three kitchen chairs then I could replace their desk chairs with the best current kitchen chairs and I’d take their current desk chairs to the dump with some other stuff that had piled up[3].

Was that confusing? Probably! I made a handy diagram to explain:

Beautiful

So I picked a date to complete the chairs and loaded my car with wood.

The day before my big planned wood shop day I was browsing Nextdoor’s free section. To my surprise, someone had just posted that they were giving away five beautiful Ikea chairs that were a great match for the farmhouse table I had made. Plus, it came with a nice round table we could use for board games.

I quickly emailed the owner and arranged to pick them up. Before heading out I unloaded the lumber I’d purchased for new kitchen chairs, shaking my head the entire time at my wasted effort loading the wood in the first place.

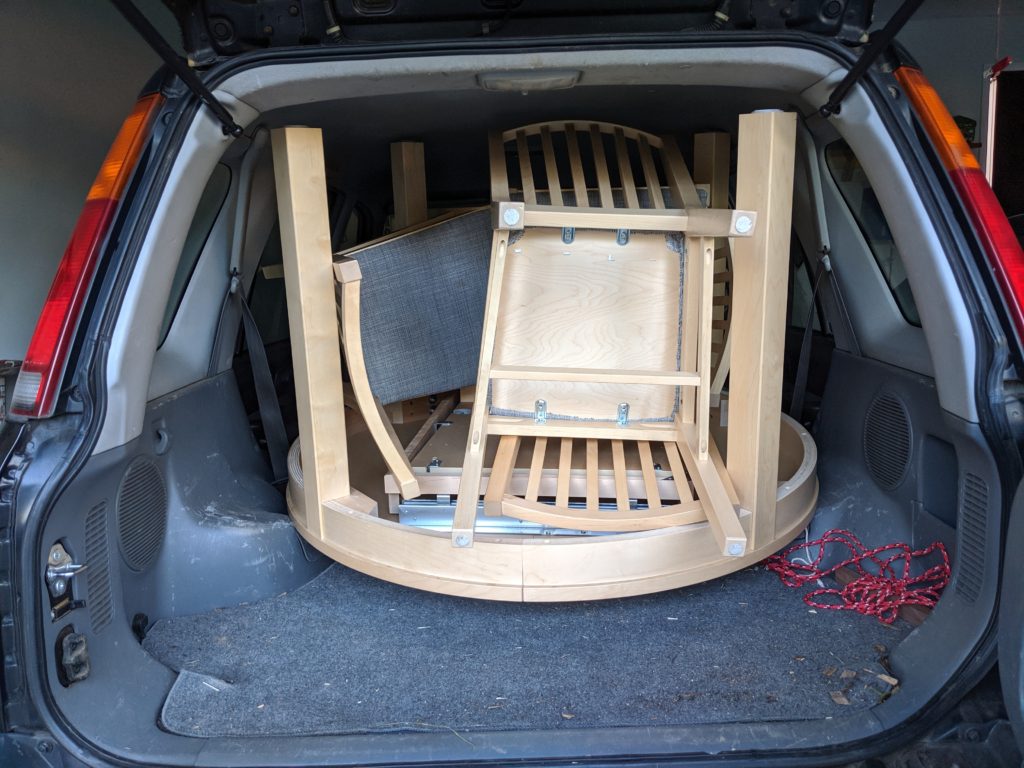
I drove over and fit the table and all five chairs in my CRV[4]. I then hurried home, way more excited than I should have been.

Room to spare!

I brought the chairs inside and quickly did the musical chairs (heh) of replacing the kitchen table chairs with the new Ikea chairs, and then replacing the kids’ desk chairs with the nicest of the kitchen chairs (see flowchart above).

Presenting the new kitchen chair; or in other words, “One chair to rule them all”

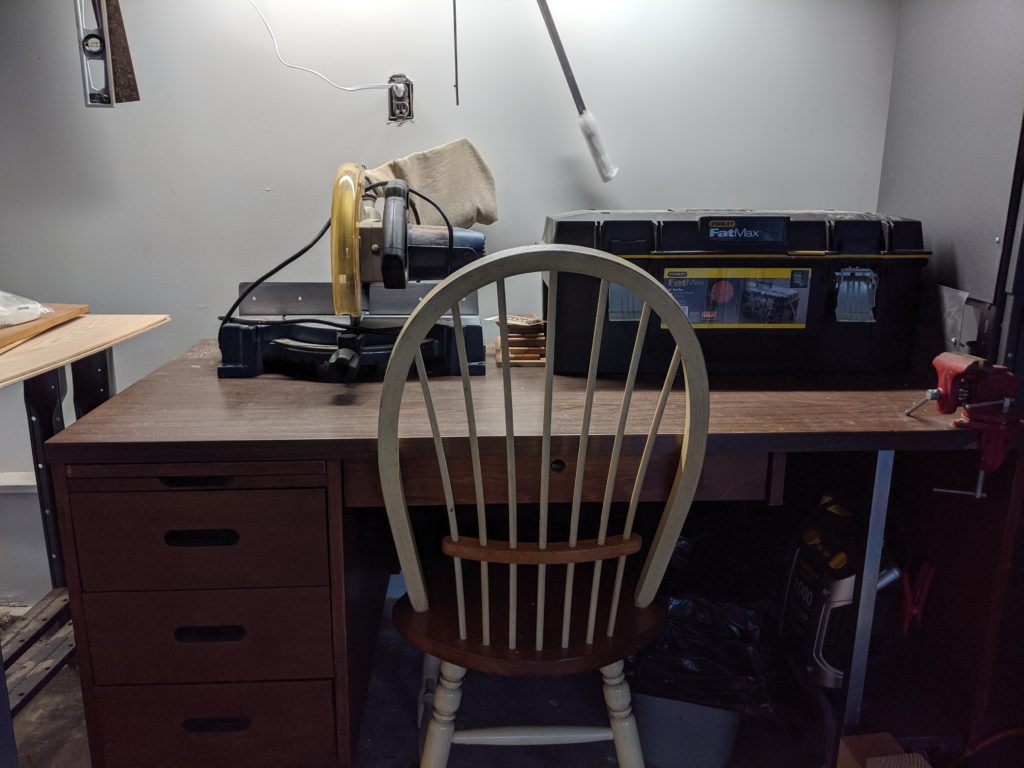
And as an added bonus, my wife got a chair for her sewing desk and I got a chair for my work table in the garage! (I made sure to give her the 5th Ikea chair since it has a padded seat, while I took the remaining old kitchen chair. Chivalry, y’all!)

My back will be forever grateful. Er, hopefully for the next few years at least.

Through it all, I couldn’t have been happier. While I wasn’t able to recoup the cost of the wood I’d purchased for the remaining three chairs because I had already made some preliminary cuts on them, I had saved myself a ton of work and could still return some unused hardware.

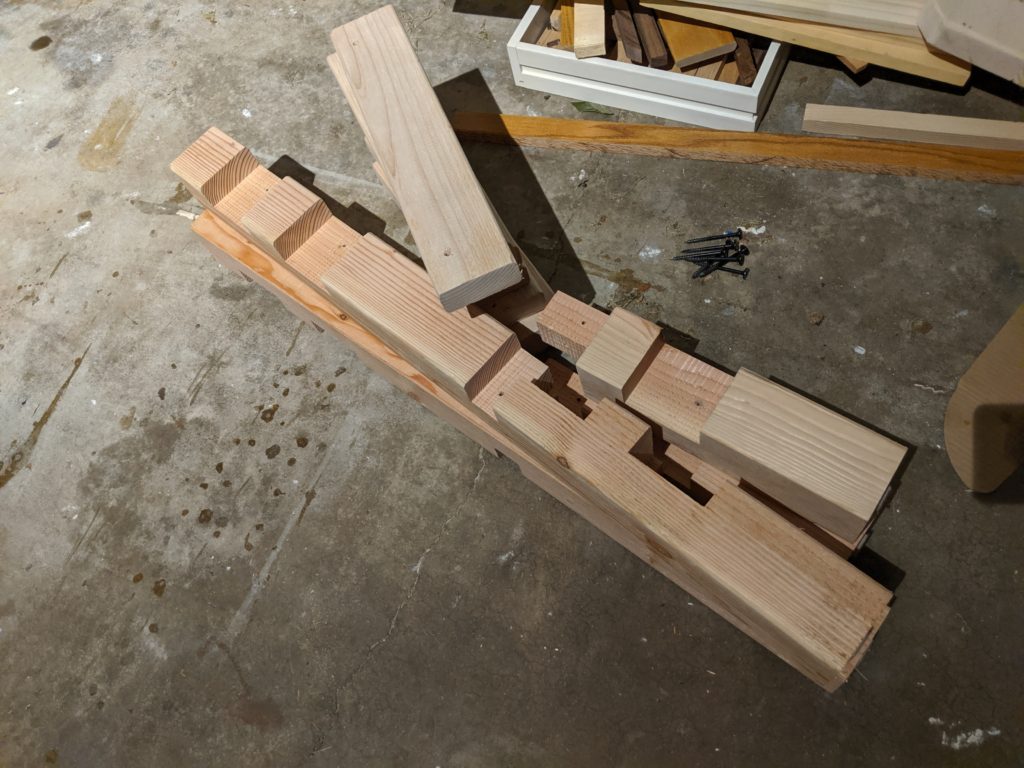
And since we didn’t need any more chairs (not even a super sturdy one) I took it apart for use in the future[5]:

I later cut out the non-dado’d 4×4 sections from the legs to use the other sections

Lessons learned? A few:

  • If you’re dragging your feet on something, pause and reflect. What’s holding you back? There may be a gut feeling telling you something’s up that your brain isn’t aware of.
  • Keep in mind the real goal of your project: is it to remove a specific pain point or to add a specific benefit? Could it be that you want to do it just because everyone else is doing it too? Is it to simply use up material, like in a scrap challenge? Or did someone mention it and you think they want it done, but you haven’t confirmed with them?
    • In this example, the real goal was to replace chairs that were falling apart, with a secondary goal of having chairs that matched the table. I ended up doing exactly that, just in a very different way than expected.
  • A tactical quit, or change, of plans may be much better than pushing through it.
  • Be flexible and think outside the box (or in this case, the chair) for solutions.

Note that there’s definitely nuance here; not everything should be quit at the first (or even first several!) roadblocks, but when you’re facing a continued slowdown it’s good to reflect on your real goals, sanity check against your priorities, consider alternate paths to reach them and then adjust as needed.

So: don’t tactically quit as your first option when a project is behind, but know that it is an option.

[1] The Donkey in the Well:

An old donkey fell into a well. She cried for help and the farmer tried to figure out what to do. After some time the farmer decided the animal was too old to rescue, and the well needed to be covered up anyway.
So he grabbed a shovel and began to throw dirt into the well. When the first load of dirt hit the donkey she cried out and looked around for a new place to stand. As she moved, the dirt fell off her back. 
As the dirt continued to enter the well, the donkey kept moving. Whenever dirt hit the donkey she shook it off and stood on top of it. As the farmer kept shoveling, the donkey kept shaking it off and taking a step up.
Pretty soon the old donkey stepped up over the edge of the well and trotted off, leaving the farmer in shock.

[2] That is a line from one of my most influential mentors at Google, and I hope to post more about it soon!

[3] I love going to the dump. It’s weird, I know; I have a whole post about my love of landfills explaining why.

[4] More evidence for the magic of CRVs!

[5] Luckily I’ve since been able to use almost all of the wood in other projects! Coming soon: a bird stand and garage bench.

The Sturdiest Kitchen Chair in the World

I set out to make a set of chairs that matched the farmhouse style kitchen table I’d made. I ended up creating the sturdiest chair in the world.

Over the past year I’ve gotten into woodworking as a hobby. During my sabbatical last fall I made a farmhouse style kitchen table, and the family loved it.

But the chairs weren’t a great fit. They didn’t match the table’s style or finish at all, plus they were starting to fall apart. I made a note to make new chairs and then forgot about it.

A few months went by and the kitchen chairs were really starting to need replacement. So I picked the project back up again.

I wanted to use the same wood (4x4s, 2x4s, 2x6s and 2x8s) in the same pattern I’d used in my farmhouse kitchen table build. Further, I wanted to assemble them the same way as I’d done with the table; namely, using pocket hole screws.[1]

The issue with that approach is we don’t move a table very much, but chairs need to move all the time in addition to reliably supporting more weight than a table. That meant having four 4x4s attached to 2x4s with pocket hole screws as originally designed was going to cause issues.

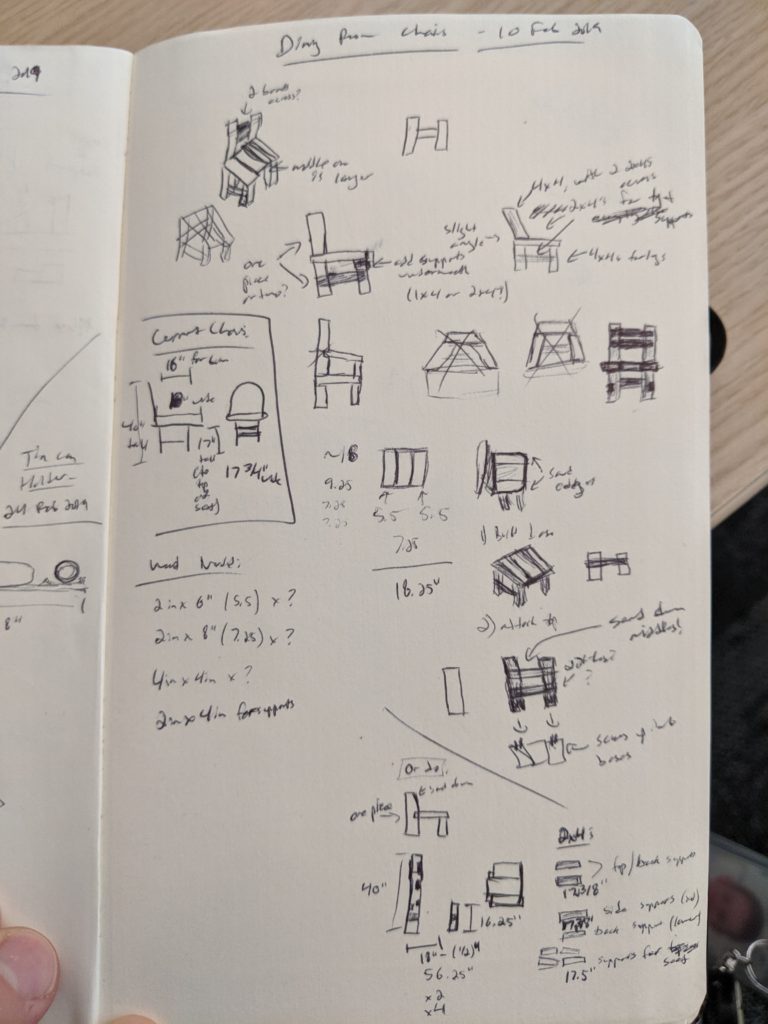
So I updated my design to use rabbet and dado cuts:

The adjusted design with dados in the 4x4s to support the 2x4s. Good luck reading my handwriting!

I didn’t know it then, but the result would be the sturdiest chair in the world.

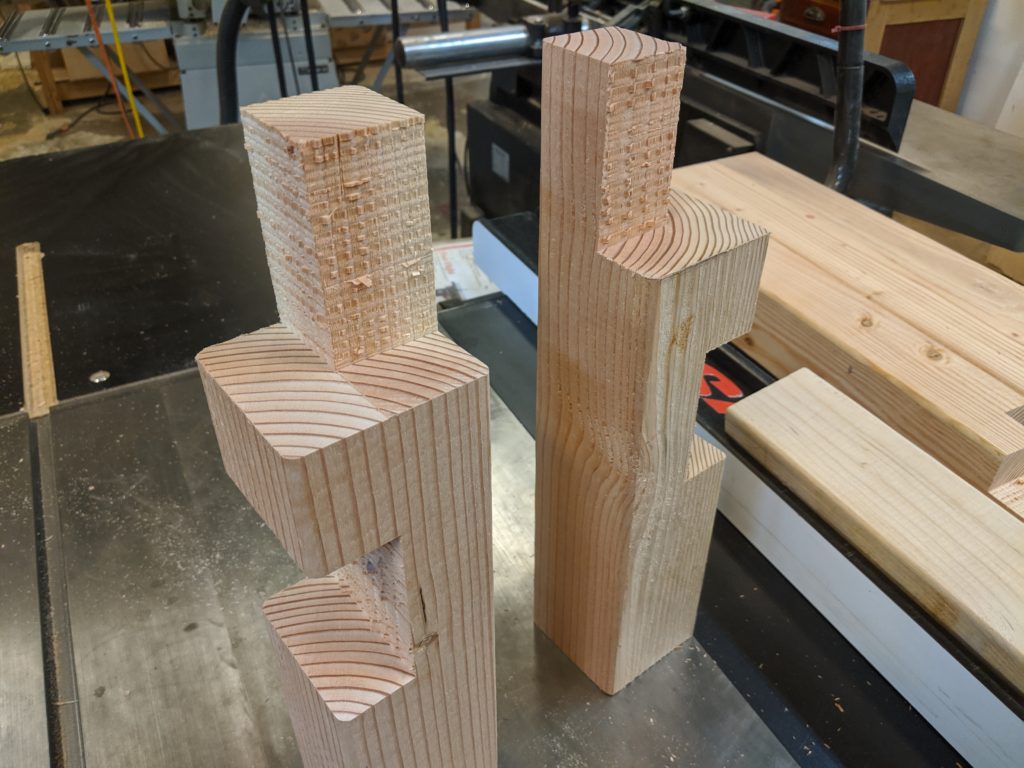
After finding usable scrap in the garage and getting the remaining materials, I went to the table saw and cut my dados and rabbets.

I promise no rabbits were harmed in the making of this project.

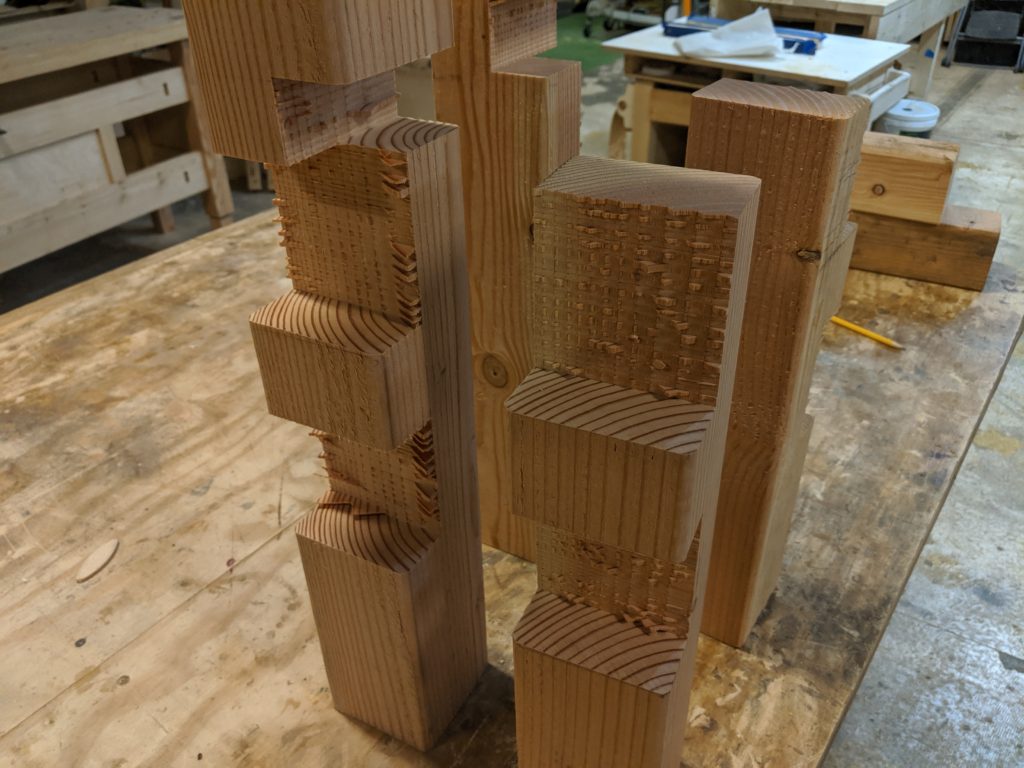
Things got a bit crazy with the back legs; I had multiple dados on each leg as well as a 3.5 inch dado right below a 1.5 inch dado (for the seat):

It kinda felt like playing Jenga or Tetris

With the legs done it was time to dry fit and correct any major issues before moving forward:

My wife is a saint for allowing me to keep the wood in the kitchen

Not bad! I had to make some adjustments to a few dado cuts but nothing major.

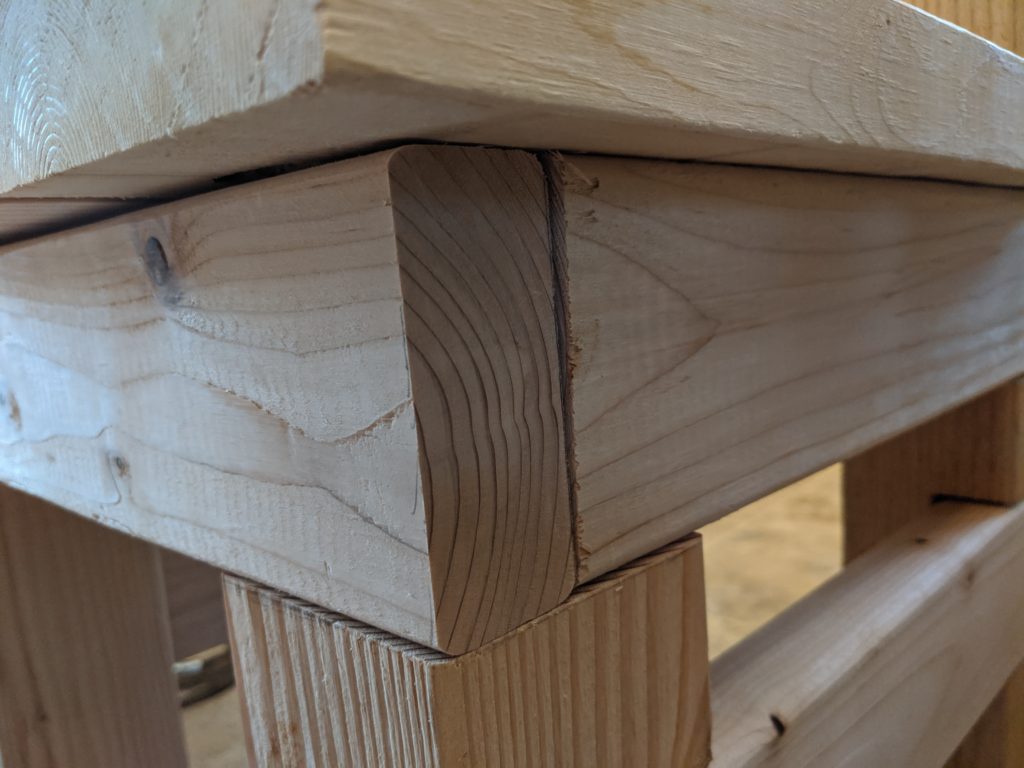
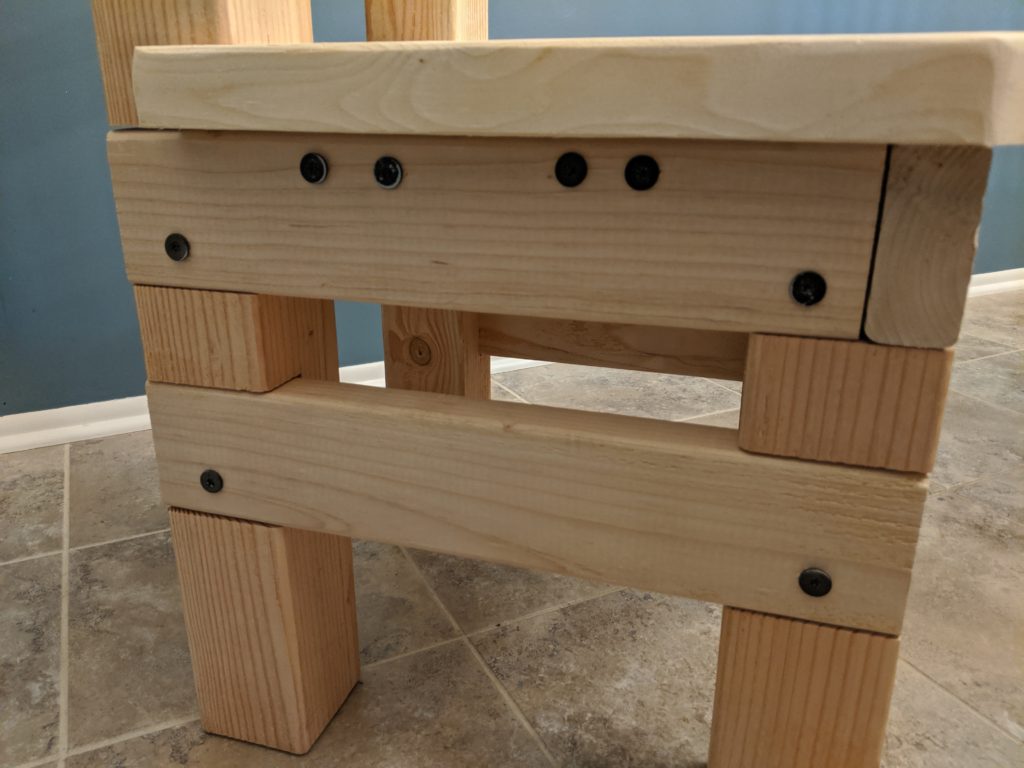
I then cut the other wood (2x4s, etc) to size. Here’s a closeup of the chair’s front right corner so you can get an idea of how I placed the top supports:

Jeeeeeeenga!

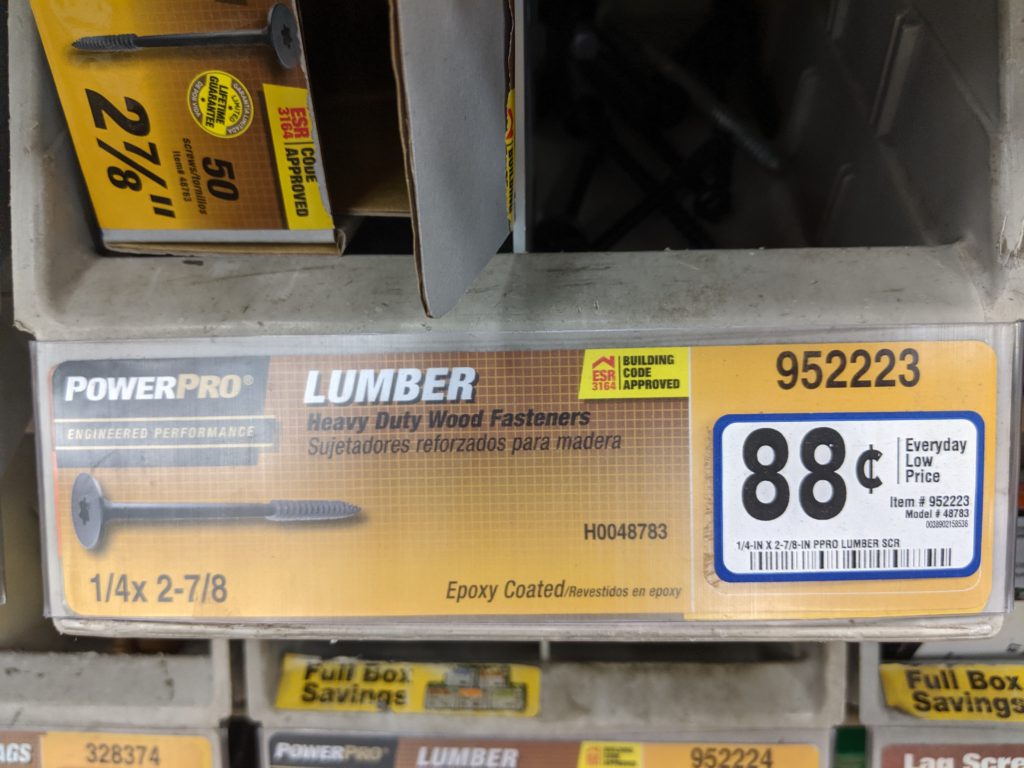
I then used these screws from Lowe’s to put things together:

A bit pricey, but they look amazing

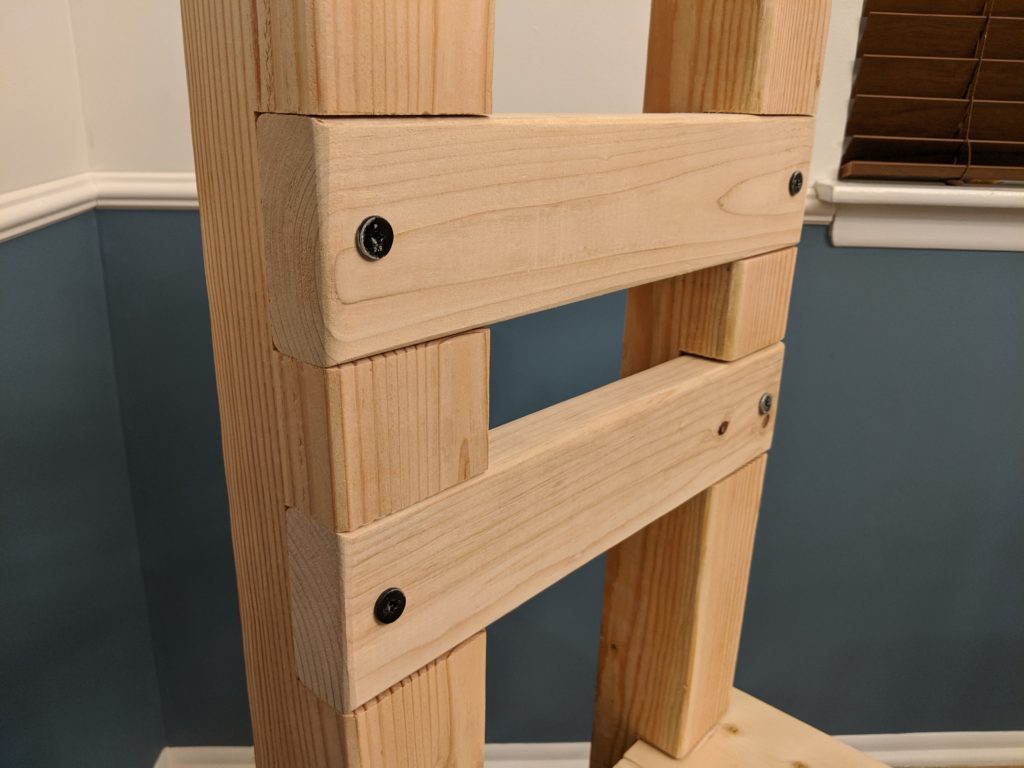
Here’s the backrest; I planned on using 2 screws on each side for each backrest piece but it ended up being really sturdy without them:

Notice the sanded edges too.

And here’s how I screwed in the sides:

Sand before you screw these in, or add painter’s tape to the screws before you sand, otherwise you’ll rub off the paint as I did.

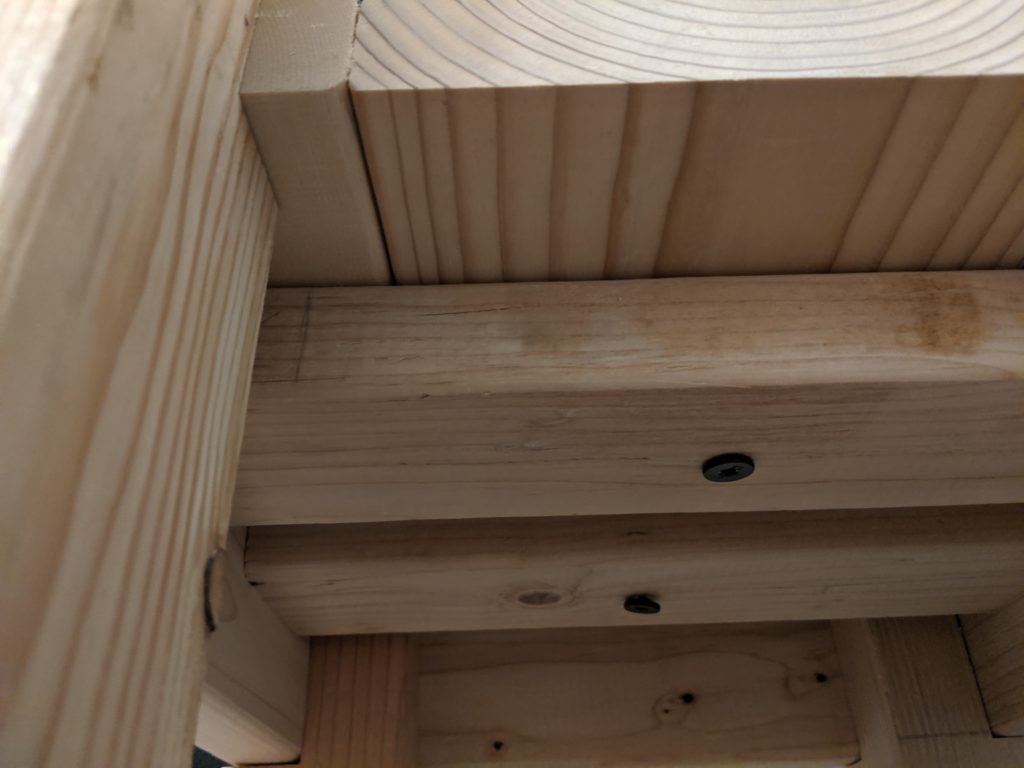
I decided to add two support pieces underneath the seat for added stability since the seat pieces were attached to each other using pocket hole screws:

Not my best job, but they worked!

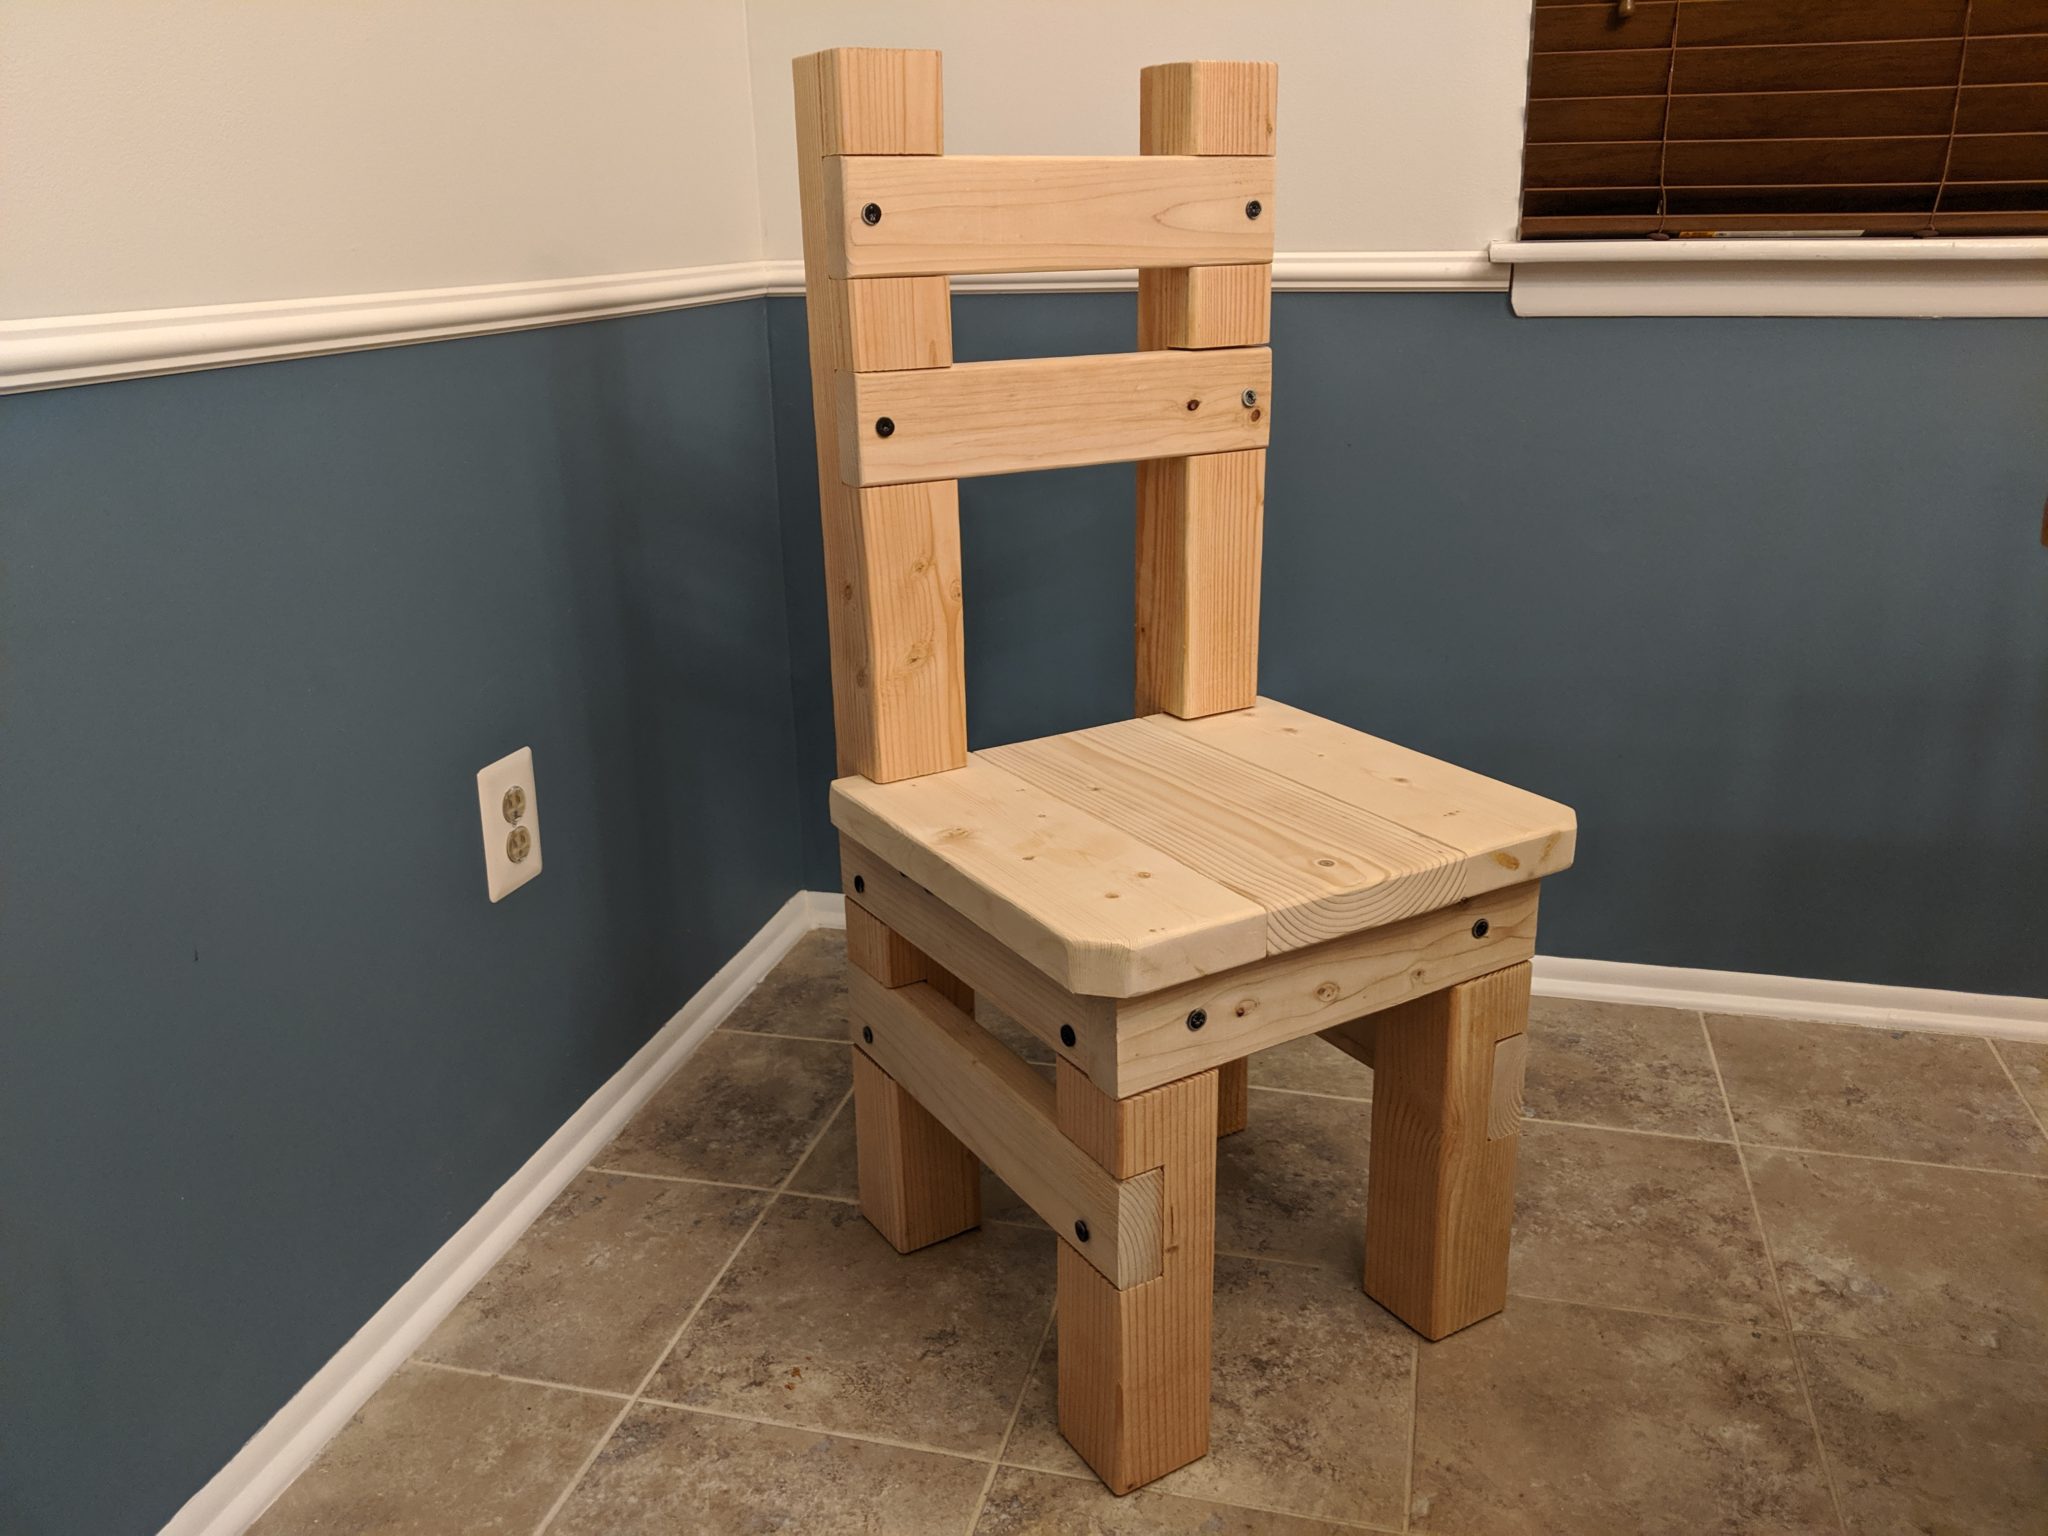
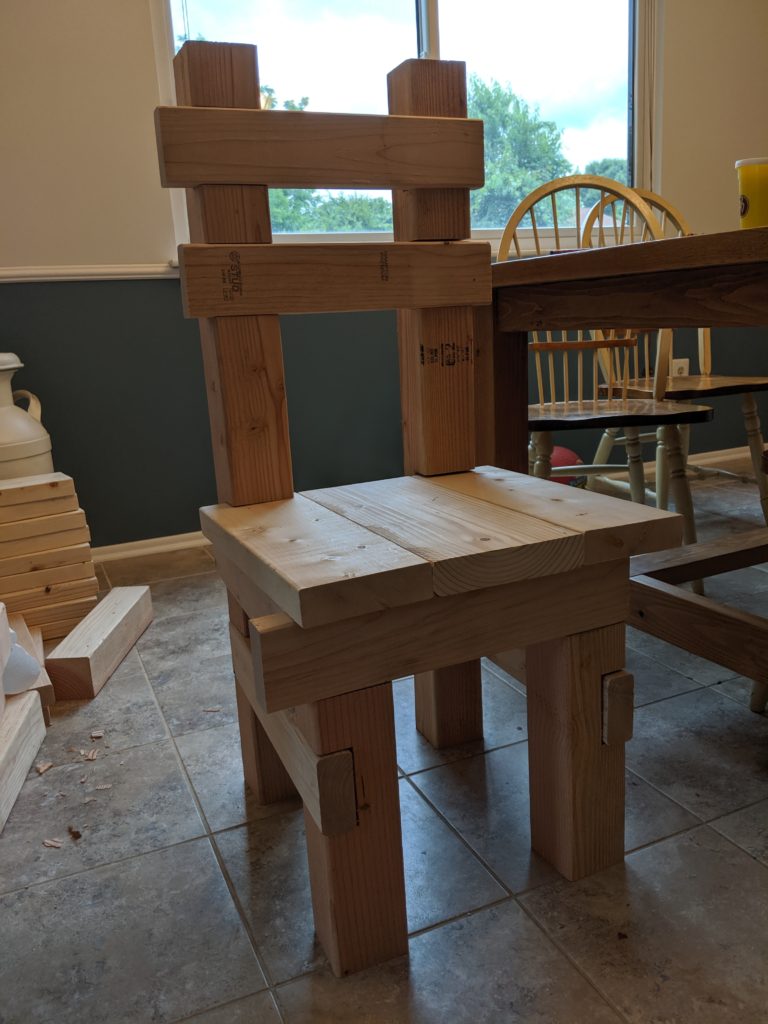
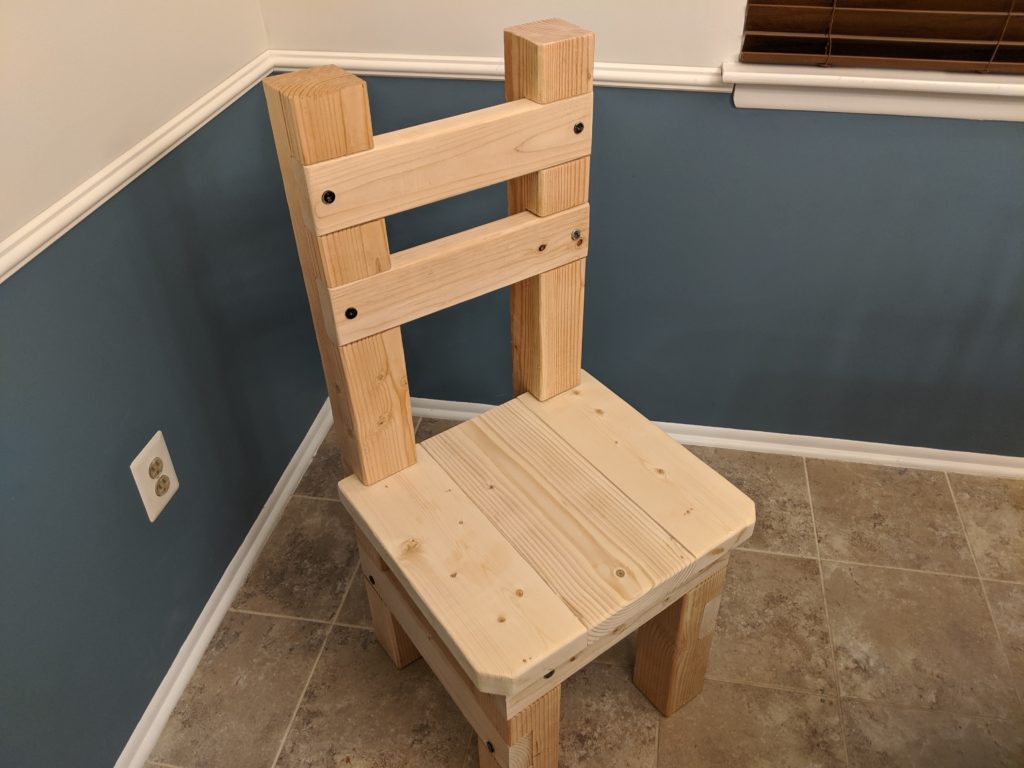
I spent extra time sanding down the edges and corners so no one would get hurt, and here is the result:

A thing of beauty

Sitting on it was actually not bad; the next step was to use the bandsaw to cut a curve in the backrest pieces to be more comfortable.

But before I could do that we got a nice surprise: someone gave us five really nice Ikea chairs!

The three chairs for comparison: Ikea in front, original in back, and the one I made on the left.

As a result, the chair I designed and made was now obsolete; I wasn’t going to turn down five free $70 chairs when I still had to make 3 more by myself.

If you are interested in building this chair for yourself, here are the cuts you need to make for each chair (along with a column you can use to check off as you make each cut):

# pieces:Wood:Cut to:Part/Reason/Placement:Cut?
32×416 inBack rests & front support
22×417.25 inSide supports on the bottom
22×415.75 inSide supports on the top
22×413 inSupports underneath the seat
24×440 inBack legs
24×416.25 inFront legs
22×616.25 inSeat top (sides)
12×816.25 inSeat top (middle)

Note that the two 2×6 and one 2×8 pieces give a total of 18.25 inches in seat width which was perfect for us, but you can adjust as needed by either using smaller wood combinations or cutting them down.

[1] I love pocket hole screws. They’re magic.