Author: jared

Small Steps for Self Improvement

It’s New Years Eve- do you know what your resolutions are?” said in the voice of the famous “It’s 10 PM, do you know where your children are?” PSA

A few weeks ago I came across a reddit thread asking “What’s something small you can start doing today to better yourself?

It’s a good question explored in thousands of books. So I grouped the most common and popular answers together into themes and paraphrased them for easier processing:

Productivity

  • The Rule of 5: if it takes less than 5 minutes to do a task when you see something, and you’re not already mid task, just get it done.
  • Make progress on *something* every day; focus on having non-zero days. See this post.
  • Start thinking in long-term (~five years), medium-term (a month to six months) and short-term strategies (one day to a week).

Mental Health

  • Stop berating yourself. Be nice to yourself!
  • What did you do today that was good? And, what good thing happened to you today? Recognize and cherish the good (no matter how small).
  • Be aware of the narratives we make up in our heads that only cause distress or anger. Example from the thread: “My friend hasn’t texted me for 3 days, she must be growing tired of our friendship!” It’s way more likely your friend is just busy as opposed to being upset at you.
  • Go for a walk, even just a short one. Has physical health benefits too!
  • Donate/throw out/sell old stuff you no longer use.

Physical Health

  • Don’t expect crazy fast results when you start dieting or working out. Have realistic expectations- it will take time and that’s OK.
  • Drink more water and less soda. (This was said a lot!)
  • Do some pushups every day (from my own experience, start with *anything* you can do, even half a pushup, and keep going every day)
  • Stretch. Seriously, do it.

Cleaning

  • When you wake up, do your bed; it will give you a sense of accomplishment to start the day.
  • Before you sleep, do your dishes; waking up with a clean kitchen is a great feeling.
  • Donate/throw out/sell old stuff you no longer use.
  • Clean out your fridge.
  • Everyday, set a timer for 10 minutes, during those 10 minutes, clean. When the timer rings you stop what you are doing.
  • If you’re in one room you get up to go to the bathroom or kitchen, take something with you (trash, a dirty dish, etc).
  • And, of course, floss.

Have more? Leave them in the comments!

Downloading YouTube videos as MP3 files with youtube-dl, ffmpeg, and batch scripts

yotube-to-mp3-download

Tired of weird websites and extensions? Use this instead!

I sometimes download trailers to mash up or music to include in my YouTube videos. I used to do this very manually, sometimes using sketchy tools or websites, and it took ages.

I found youtube-dl and that made getting the videos for editing a LOT faster. I also realized that with ffmpeg then I could download videos for their audio and then convert it directly to an mp3 file.

So, for several months I’d first run youtube-dl and then ffmpeg from the Windows Command Line before finally realizing I could write a batch script to save a lot of time.

Here are how you can do the same (and have fun in the process!):

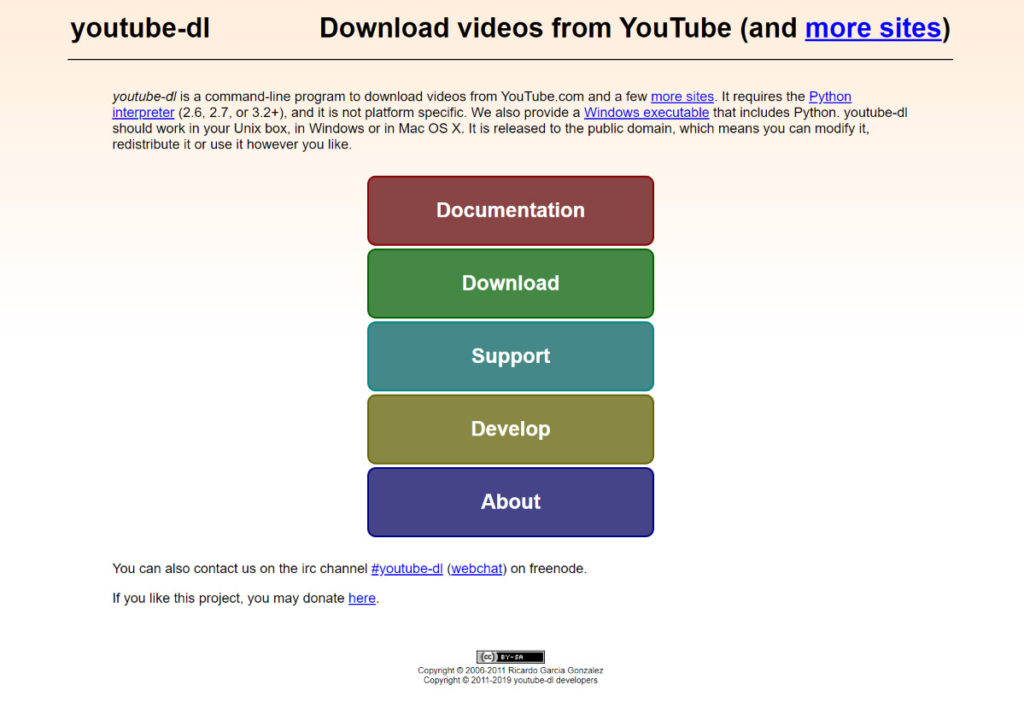
1. First, download and install youtube-dl from this github page. As the name implies, youtube-dl is great for downloading videos from YouTube. I recommend installing in your user directory so you don’t run into permissions issues (e.g., C:\Users\Jared in my case).

  • Note that when you double click the .exe installer, a Command Prompt window will pop up and then quickly disappear.

2. Next, you’ll set up ffmpeg. ffmpeg does wonders in video and audio file conversion; I use it in my video editing often (since for some reason Adobe Premier Pro is very finicky about imports).

  • To download the ffmpeg installer, go to the ffmpeg downloads page and click on the Windows logo, and then click one of the links under Windows- I recommend BtbN because they have a cleaner list of builds. The ffmpeg-master-latest-win64-gpl.zip build is what I’ve used.
  • Extract the .zip file to the same folder you used in Step 1 to install youtube-dl (i.e., your user directory).
  • After you extract the .zip file, rename the folder to just “ffmpeg” to keep things easier later on.
  • Take a look at the contents- when you open the ffmpeg folder, do you see a README file, “bin” folder, etc? If so, move on to the next bullet. If not, keep clicking into folders until you see them. Once you find them, cut and paste everything into the top-level ffmpeg folder.
  • Add the ffmpeg bin folder (e.g., C:\Users\Jared\ffmpeg\bin) to your system PATH environment variable by running Command Prompt as an Administrator and then entering the following line:
    • setx /m PATH “REPLACE_FOLDER_ADDRESS;%PATH%”
    • Note that you’d replace the REPLACE_FOLDER_ADDRESS in between the quotation marks with yours, so in my case it would be:
    • setx /m PATH “C:\Users\Jared\ffmpeg\bin;%PATH%”
  • Restart your computer.

3. Once you’ve restarted, open up a Notepad doc and paste in this code:

@echo off
:start
set /p videoid=Enter video ID:
cd YOUR_DIRECTORY_HERE
youtube-dl --extract-audio --audio-format mp3 --output "%%(title)s.%%(ext)s" http://www.youtube.com/watch?v=%videoid%
%SystemRoot%\explorer.exe YOUR_DIRECTORY_HERE
set choice=
set /p choice="Want to download another? Press 'y' and then Enter. If not, hit Enter: "
if not '%choice%'=='' set choice=%choice:~0,1%
if '%choice%'=='y' goto start
pause
  • Note that you need to replace the “YOUR_DIRECTORY_HERE” text on lines 4 and 6 to whatever directory you’ve been using, without the quotes. So in my case, line 4 would become: cd C:\Users\Jared

4. Save the file to the same folder where you have youtube-dl and ffmpeg installed (again, ideally your user directory as mentioned above). When you save the file, change the filetype dropdown from “.txt” to “All files” and then add “.bat” to the file name (e.g., youtube-to-mp3.bat)

5. Now right click on the batch file you just created and make a shortcut to it. Cut and paste that shortcut onto your desktop, or into your favorites bar, or wherever you want to easily access it.

Now when you double click the shortcut file it will run the batch file you created in Step 3 and ask for the ID of the video you want to get as an MP3 file. For example, if the video’s URL is https://www.youtube.com/watch?v=MMsmX6FgNXk then the ID is MMsmX6FgNXk

6. The mp3 file will be saved in the same directory you set in Step 4. The script will automatically open up that folder (saving you a few clicks) and then ask if you want to download another. If you do, type “y” and then Enter. If not, just hit Enter twice and it will close.

You now have a simple solution to easily download a YouTube video as an mp3 file. Enjoy!

Obligatory note: I don’t use this for illegal activity and you shouldn’t either. I’m sharing this for academic/research purposes showing an application of open source libraries with batch script process improvements.

Changelog:

  • 1.3 (7 July 2022) – Updated instructions to include ffmpeg download process changes, add more clarity on how to save the file in Step 4, as well as to let people know that the youtube-dl.exe installer is expected to open and close the CMD window quickly (thanks for the heads up Jon!)
  • 1.2 – Updated instructions to be more clear on ffmpeg installation
  • 1.1 – Added support for repeated downloads and to open the download folder location automatically
  • 1.0 – Basic downloading and converting logic

DIY Bird Cage Stand (with Storage)

Another ultimate scrap challenge success!

My kids have been asking for a pet for ages. We tried a few weeks each of a rabbit, baby chicks, bees[1], and a dog without much success, and we were almost ready to call it quits.

Then one day this summer my daughter asked to go to the pet store right next to the hardware store[2]. Because she was so sweet to have tagged along with me for the trip to the hardware store in the first place, I agreed.

After looking at fish, dogs, cats, and rodents she saw the brightly colored parakeets and fell in love. A few weeks later the family decided parakeets were the right pet for us 🙂

Meet Zapdos and Cloudy!

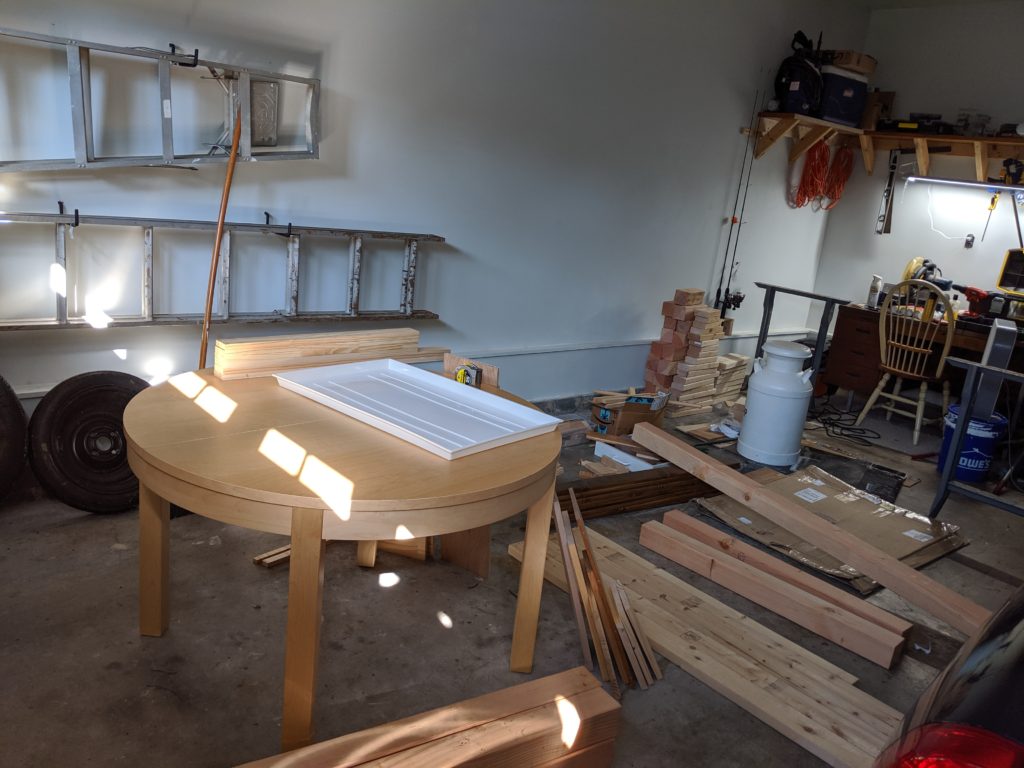
Before we got the parakeets, I ordered a wide parakeet cage and decided to build a stand for it. I had a lot of extra wood in the garage that I needed to use up anyway, so this was the perfect project to use some up:

It’s a mess, I know!

After the cage arrived I measured the width and length of the base (the white plastic rectangle in the photo above), and added 2 inches to each side for extra space. For this cage that meant the top piece would have to be 20 inches wide by 32 inches long.

For the legs I was able to re-use 4x4s that were meant for kitchen table chairs I had designed, but their project ended up being cancelled when I got several free Ikea chairs instead.

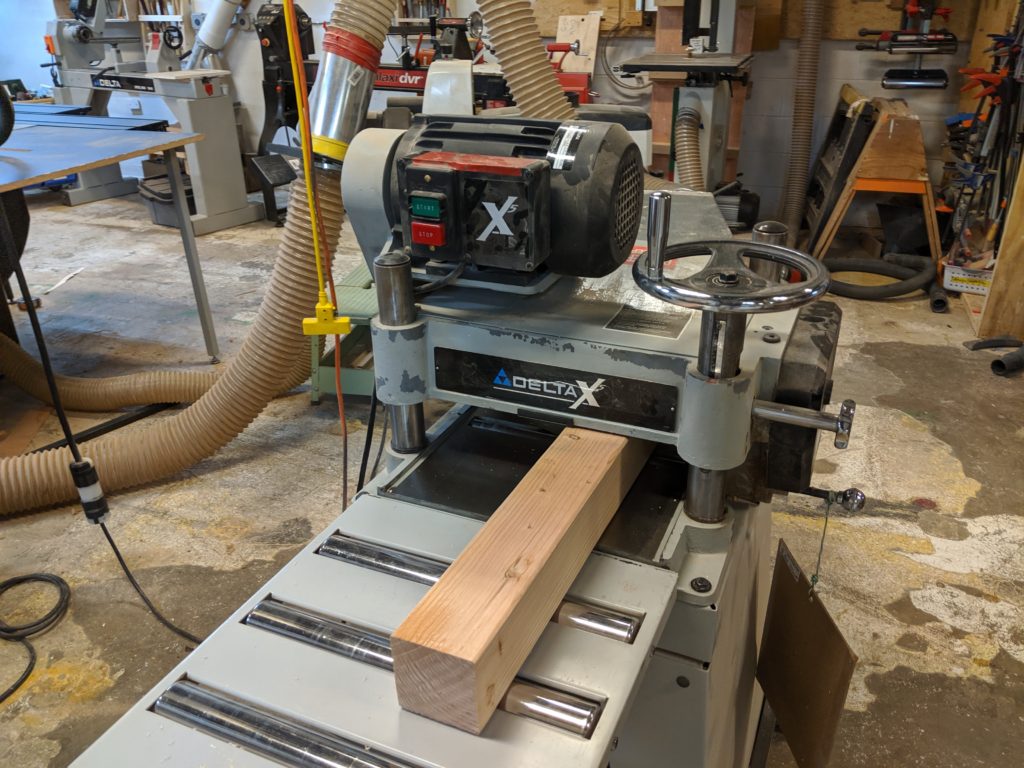
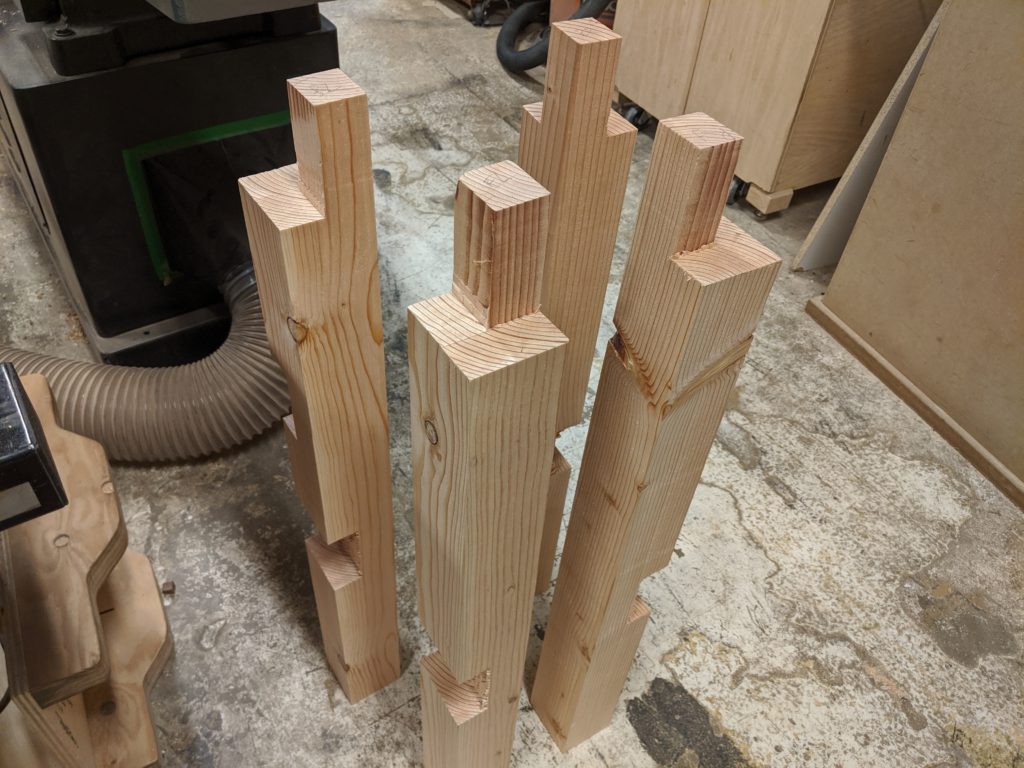
So I cut four of the leftover 4x4s to 35 inches tall each and cleaned up the sides a bit on the surface planer, taking off around .25 inches on each side.

I love planers

This made the legs look a lot nicer:

So pretty

I then cut dados and rabbets into them for all of the 2x4s that would be used for supports:

I love cutting rabbits! – Every woodworker, ever, has made this pun

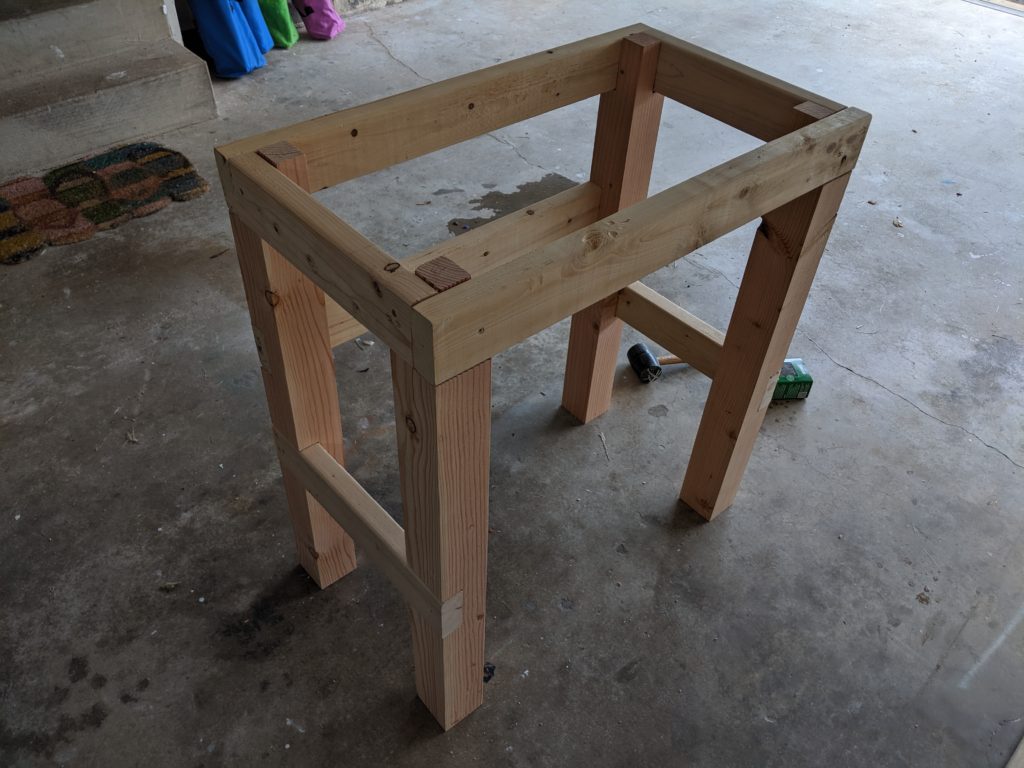
Now for cutting the support pieces. I cut two 2x4s each to 15 inches for the top side pieces, 31 inches for the top front and back pieces, 18 inches for the bottom side pieces, and one to 31 inches for the support going across the middle in the lower back section.

All the supports attached to the 4x4s

When it came time to actually make the top piece, however, I didn’t have a ton of great options. I considered joining together several 2x4s with pocket hole screws but I didn’t have enough to fit across the entire top. I also had several other boards of different widths, but I worried combining them all wouldn’t look as good as I wanted.

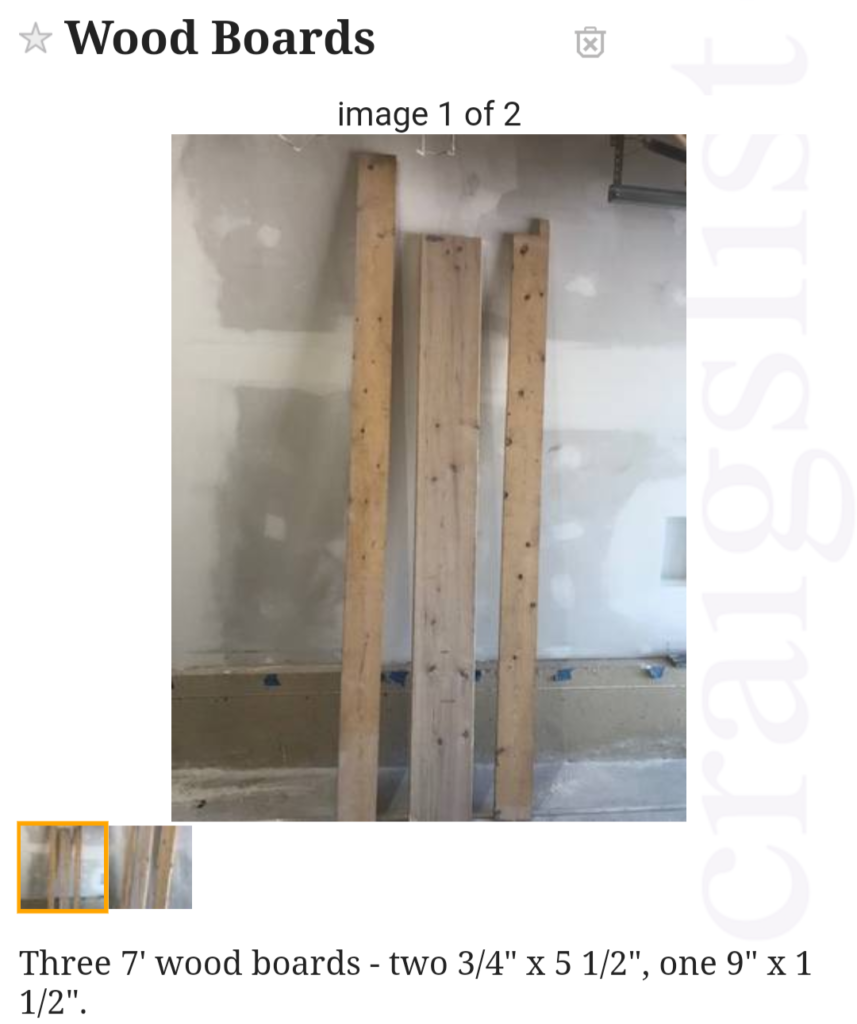
So I decided to search for free wood on Nextdoor/Craigslist and luckily saw this post:

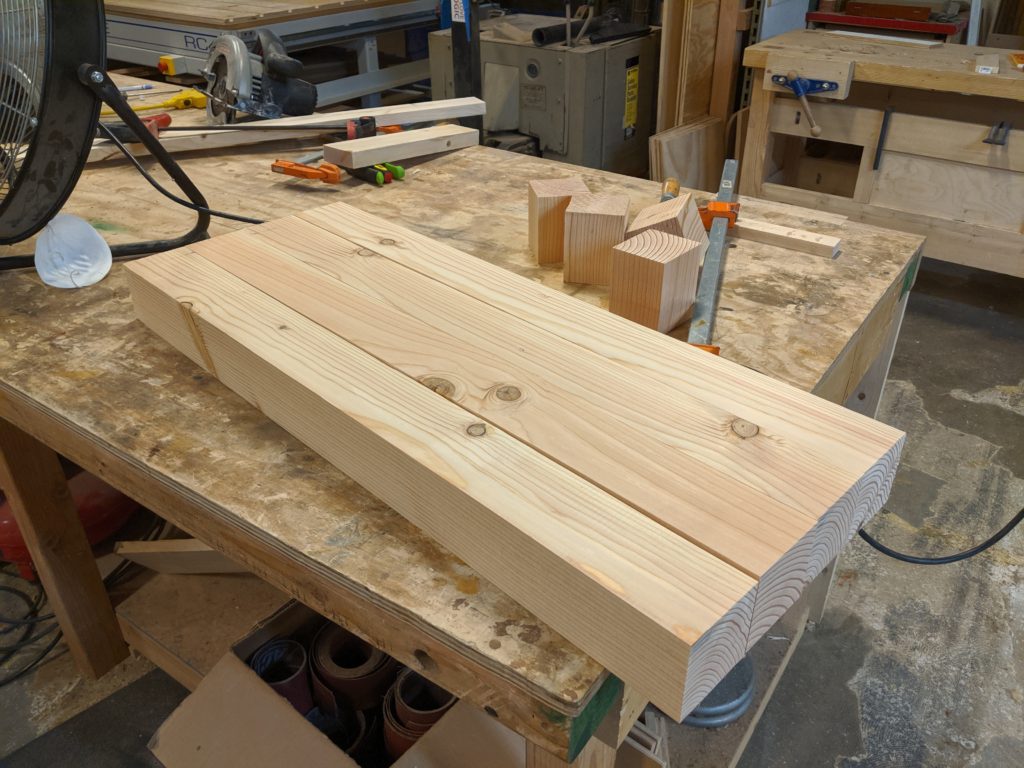
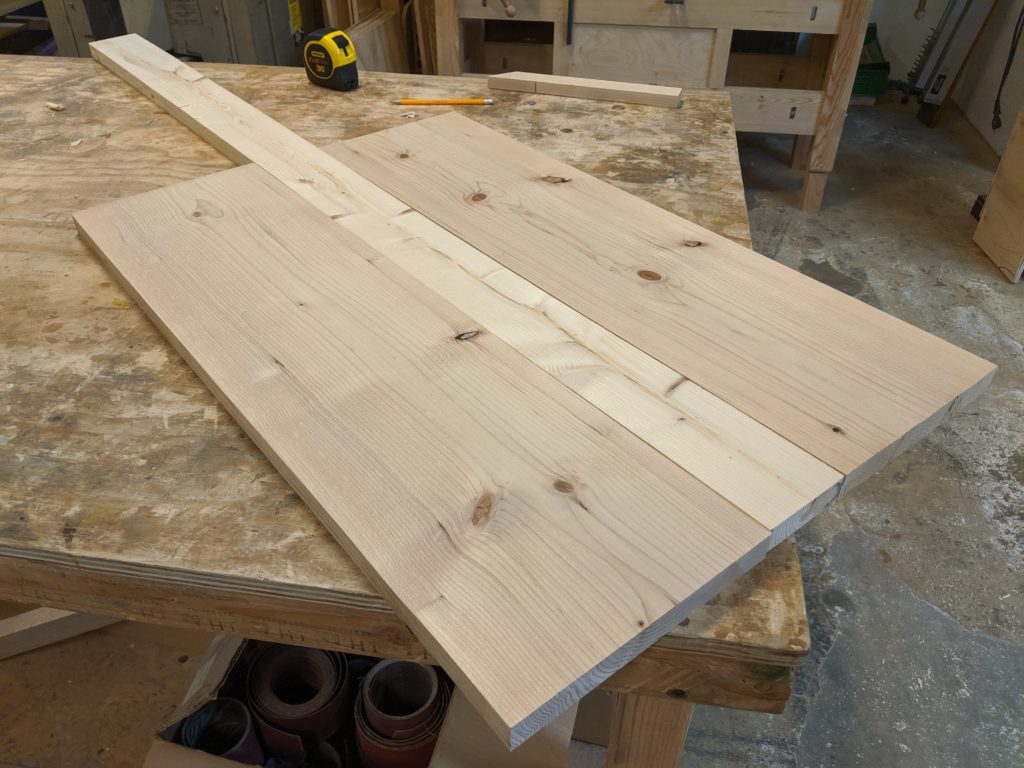
The 9 inch wide piece would be perfect for the top, so I arranged to pick the wood up and then cut that board into two pieces that were 32 inches long each, giving me 18 inches in width. I then got a 2×4 and cut it down to 2 inches wide, which gave me the full 20 inches I needed across the top when all three pieces were combined.

Looking good

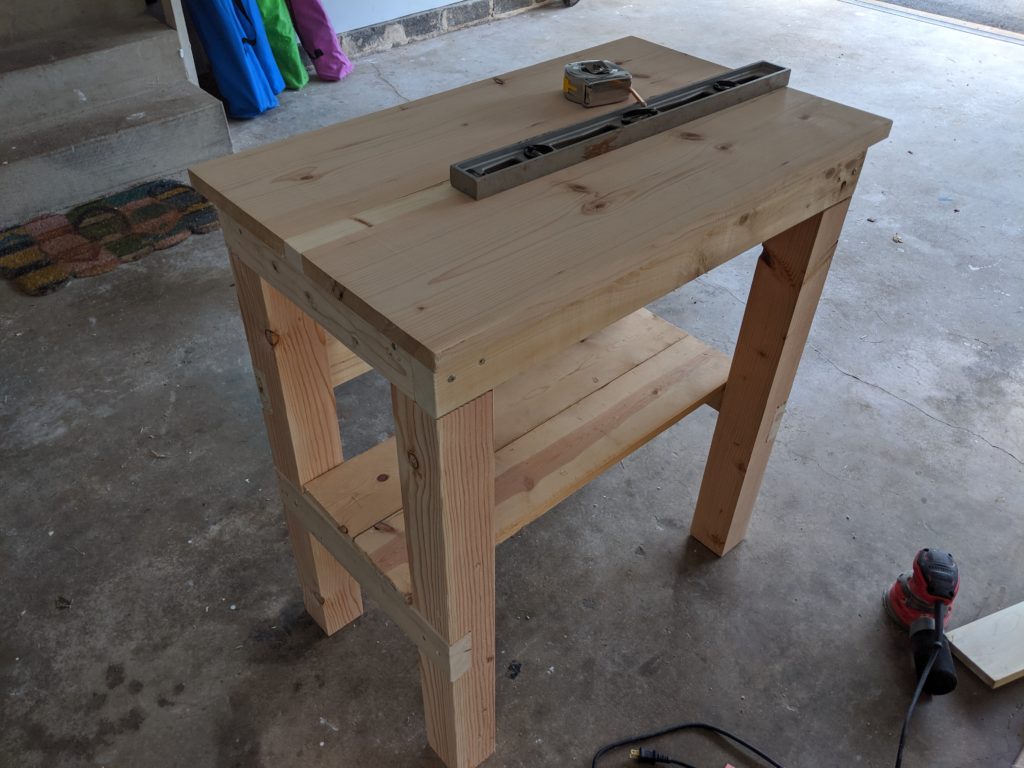
Then I planed the three top pieces to 1″ tall each (so the total stand height would be 36 inches tall), cut the 2×4 down to 32 inches to match the length needed for the top, and joined them all together for a sweet-looking top.

Top on.

I also realized I could add boards across the lower side supports pieces to serve as storage for things like bird food bags, toys, etc. There was just over 11 inches of space on the support between the legs, so I grabbed one of the 5.5 inch boards I’d gotten for free from the same Craigslist post (woot!) and cut two pieces off at 31 inches each. Now I had storage!

I might add doors and side/back boards for an enclosed storage space, but will wait and see how things go and whether it’s really necessary after we’ve had the parakeets for a while.

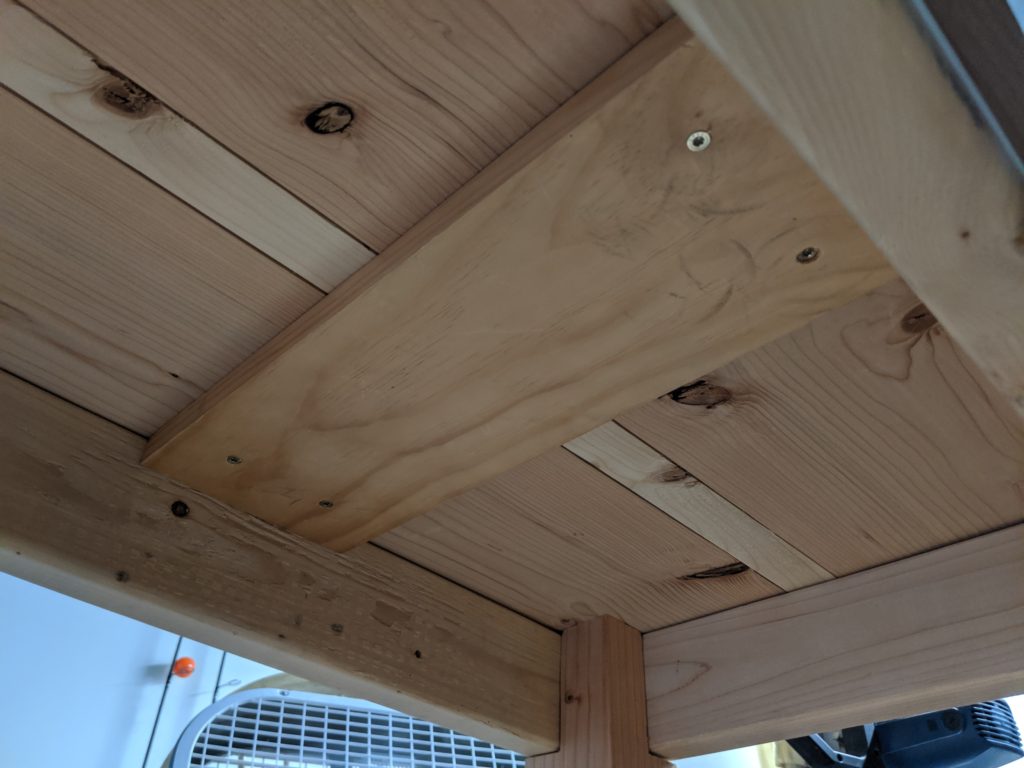
I also added a piece of wood going across the middle, underneath the top wood to serve as extra support.

Spax screws FTW

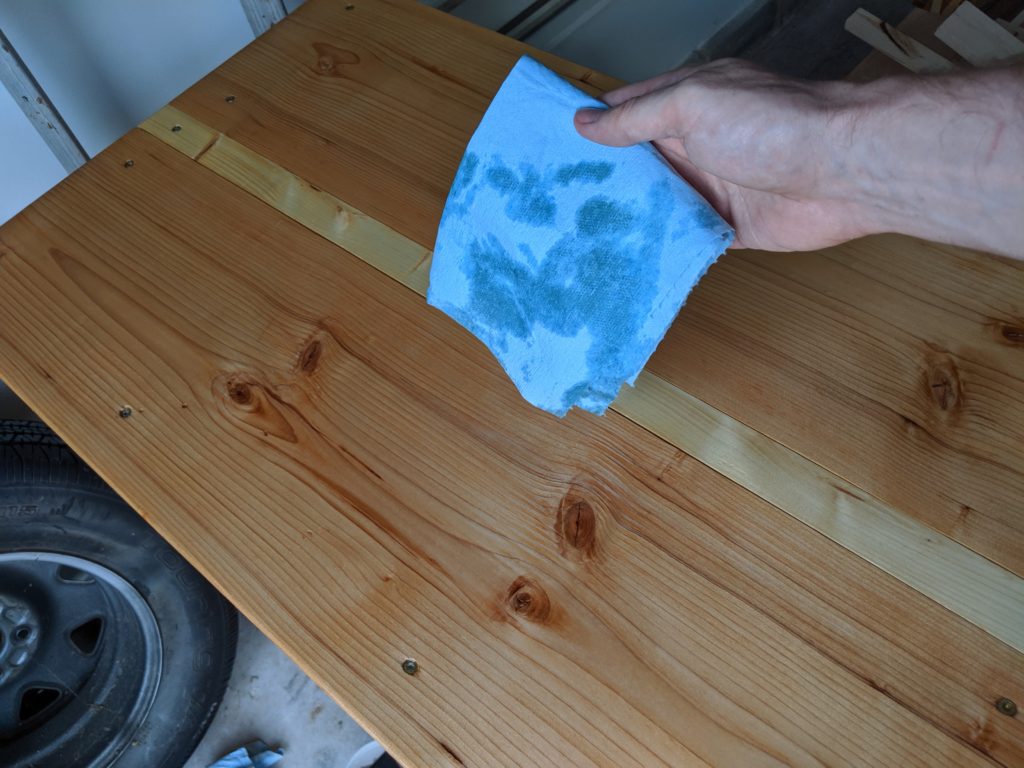
To finish it off[3], I made a mixture of equal parts boiled linseed oil, Minwax satin polyurethane, and mineral spirits. I applied three coats of that and then two coats of just the poly, and I love how it brought out the color in the wood:

Pro tip: wear gloves.

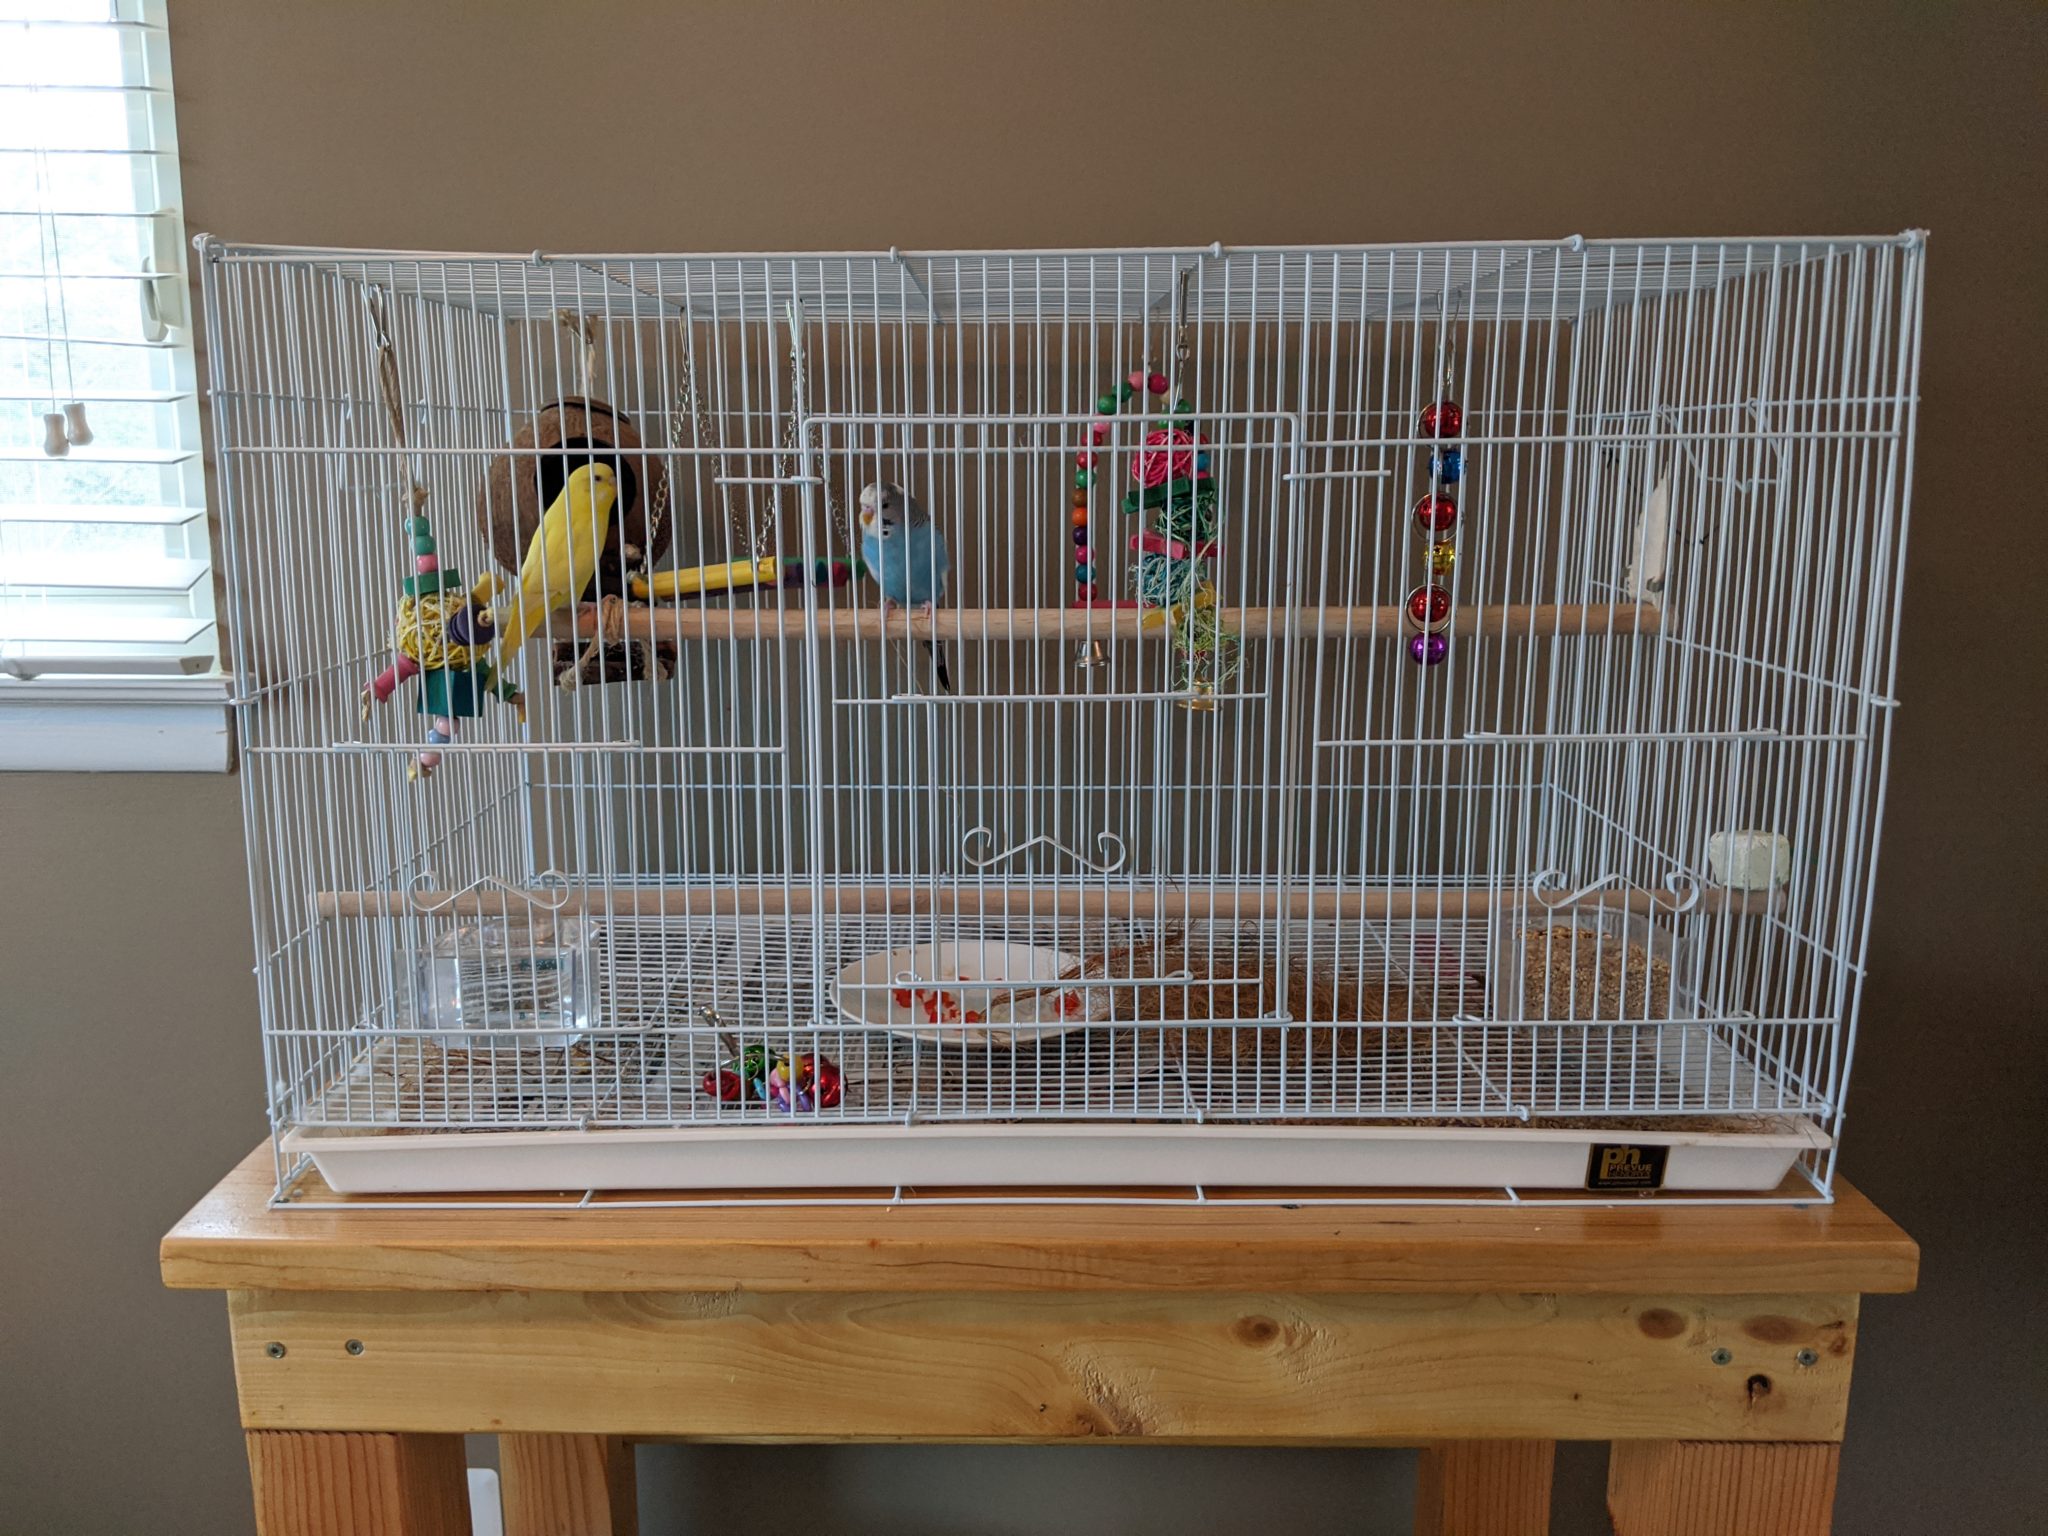
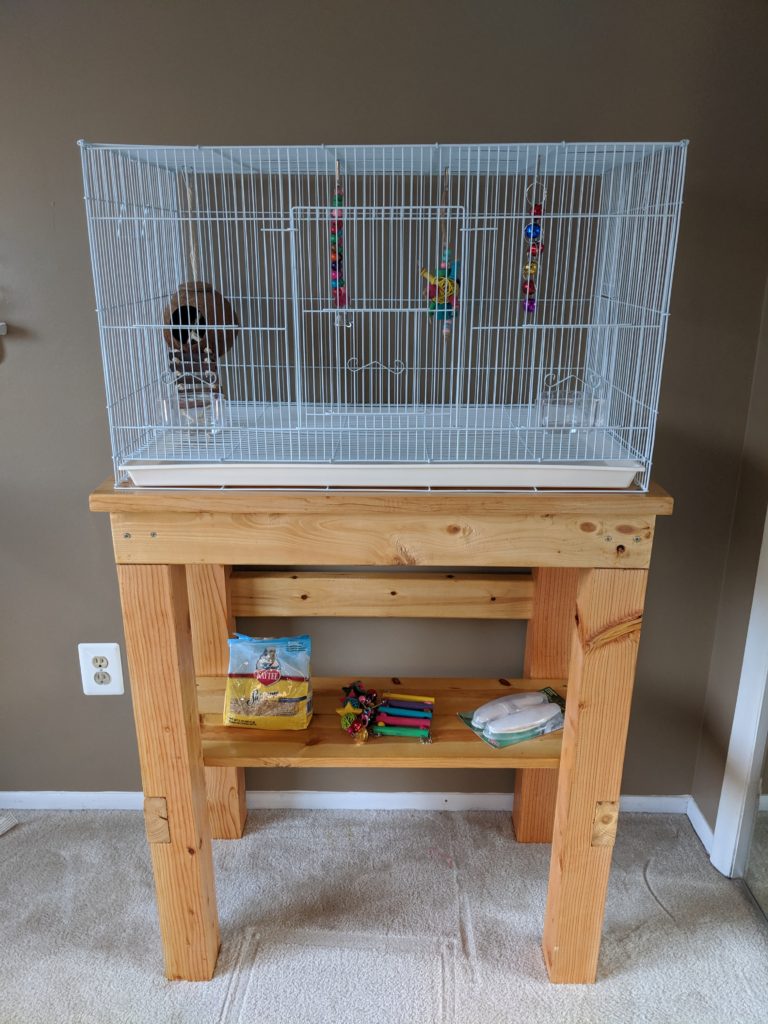
Once it was dried and we had let it air out for a few days (so as to not harm the birds), I moved it inside and set up the cage on the stand:

Ready for birds!

This was an awesome Ultimate Scrap Challenge project that didn’t cost anything other than electricity, screws (which I already had), and gas to pick up some free wood. The result was an amazing bird stand which should last a long time.

If you are interested in building this for yourself, here are the cuts you need to make (along with a column you can use to check off as you make each cut):

Cut to:#Part/Reason/Placement:Cut?
58in x 8.5in2Bottom part of stand
23.75in x 8in4Middle parts of the supports
?23.75in x 3in1Top of cable holder box on the back
3in x 4.25in2Side pieces for the cable holder box on the back
3in x 4.25in1Back piece for the cable holder box on the back

[1] Yep. My kids would catch bumblebees and make little homes for them. Adorable!

[2] I’m curious to know which store was there first, and why the second store decided to set up shop by the other.

[3] Pun intended

Recession Indicator Dashboard

This is my attempt at a dashboard showing key recession indicator signals. It’s not very good.

Signals and Noise – Some Background

“Recession” became the topic of an aggressive news cycle in August 2019. I found this fascinating; in the years before the music finally stopped[1] on Lehman Day in 2008, no one forecasted the beginning of The Great Recession with a high degree of timeline specificity, so now everyone’s convinced the next one’s right around the corner?

In the months since that news cycle the stock market has repeatedly seen new highs and recession fears have faded from the foreground, and almost as quickly as the predictions of doom came they disappeared.

That makes me wonder: how could we try forecasting a recession with a high degree of timeline specificity?

There are huge caveats to this: no one can know exactly when a recession will start, how severe it will be, or how long it will last. So given those caveats, I’m interested in teasing out as much information in advance of a recession as possible while (hopefully) cutting down as much noise as possible.

Most articles from August cited only a yield curve inversion as a solid recession indicator, and didn’t note that there’s a lot more nuance involved (e.g., which yield curve(s) inverted? And for how long?) or that other signals that could be potential recession signals.

So I decided to make a recession dashboard that tracks recession indicators. My goal is to pull in this data programmatically so it’s always current, however in the interim I’ll pull it in manually where needed (the gray rows at the bottom).

Dashboard

This recession dashboard is an embedded Google Sheet that fetches updates on a daily timer, mostly from Nasdaq (you all are amazing!). The first ~dozen rows are pulled dynamically but the rest aren’t supported yet (I’m also only using the free version) so I’ll investigate pulling that data in from another data source and update the backend soon.

Breakdown of Recession Indicator Signals

I mentioned nuance and noise above, and there’s plenty of that to go along with these signals. So this is my breakdown/rationale for each one:

  • Yield Curve Inversion (10y2y): This is the classic yield curve inversion signal that blew up in August. Lots has been written about this.
  • Yield Curve Inversion: 10y3m: Potentially more reliable near-term indicator than the 10y2y.
  • Unemployment: It’s typically a lagging indicator, however weakness in employment could predict an upcoming slowdown.
  • Nonfarm Wages/Payroll: Another lagging indicator; if wages are down since people are laid off, then it can cause a downward spiral.
  • Retail Sales: Slowdowns here can ripple elsewhere.
  • Consumer Sentiment: If consumers are spooked, they’ll spend less. If they spend less, companies earn less and may lay people off.
  • Service Sector: Large amount of the US economy is this sector, so slowdowns will impact other areas.
  • Corporate earnings growth/EPS:
  • Price of oil: If it shoots up quickly or sustains elevated prices then doing business and buying things becomes more expensive, which may lead to spending slowdowns.
  • Price of copper: If it’s down it can mean that fewer materials are being purchased for things like construction
  • ISM: Below 50 means contraction, but since manufacturing makes up less of the US economy than before, typically below 40 means a recession could be coming.
  • PMI: How supply chain managers view things; below 50 means contraction but not necessarily recession
  • Cass Freight Index: If fewer shipments are being made, demand for goods or corporate spending could be down.
  • Emerging Markets: This indicates smaller countries are slowing down. Typically some bellweather countries like South Korea are an early indicator of problems.
  • Economic Policy Uncertainty Index: Could become a self-fulfilling prophecy.
  • Fed’s Excess Reserve Rate: The rate the Federal Reserve pays to banks for their excess cash reserves; down means they pay the banks less, which may indicate the Fed wants fewer excess reserves from banks in order to encourage greater liquidity in the market.
  • Goldman’s Analyst Index: Overall indication of direction
  • Bearish Sector Rotation: Are investments moving into utilities, consumer staples, real estate, and healthcare? These are typically more “safe” investments.
  • Russell 2000: If down, indicates smaller companies are slowing their growth/earnings. Typically they feel contraction before larger companies.
  • Risk spreads: Tighter spreads mean worse conditions
  • Crazy news: Uncertainty or surprises mean emotional investors will make bad decisions, and likely make bad news worse
  • Baltic Dry Index: Upward spikes indicate higher shipping costs and recession

I intend to fine tune this list over time, but for now it will suffice. If I’ve missed something or mischaracterized something let me know!

Recession Dashboard Code

Getting updates to the signals automatically is all done via Google Apps Script. I’ve set up a trigger to run the code and update the information once a day (note: most of the underlying data isn’t updated every single day, but this way updates are grabbed without having to worry about setting up monthly vs quarterly etc triggers).

I’ve also added some logic in the cells on Column E for “Up or Down” movements being good or bad omens, as well as color coding to make the chart update a lot simpler.

NOTE: You’ll see “quandl” used in the code below. That’s because when I wrote the code the source of my data was a company called Quandl; however, they were acquired by Nasdaq in September 2021. I updated the API call so it works with the new domain, but left the function and variable names the same.

Here’s the Apps Script code:

function queryQuandl(signal) {

  var APIKey = 'YOUR_KEY_HERE';
  
  var url = 'https://data.nasdaq.com/api/v3/datasets/'+ signal + '.json?limit=2&collapse=monthly&api_key=' + APIKey;
  
  // Make the request
  var response = UrlFetchApp.fetch(url);
  var contents = response.getContentText();
  var json = JSON.parse(contents);
  
  return json;
   
}

function updateData() {
  
  var sheet = SpreadsheetApp.getActive().getSheetByName("Sheet1");
  
  var numRows = sheet.getLastRow();
  
  // Get the Quandl data code
  var stockList = sheet.getRange(3, 8, numRows).getValues();
  
  for(var i=0; i<numRows-8; i++){
  
    var quandlData = queryQuandl(stockList[i]);
    
    var currentValue = quandlData.dataset.data[0][1];
    var previousValue = quandlData.dataset.data[1][1];
      
    sheet.getRange(i+3, 3).setValue(currentValue);
    
    if (previousValue > currentValue) {
      sheet.getRange(i+3, 4).setValue("Down");
    } else if (previousValue == currentValue) {
      sheet.getRange(i+3, 4).setValue("Flat");
    } else {
      sheet.getRange(i+3, 4).setValue("Up");
    }
    
  }
  
}

The updateData function grabs items from the spreadsheet, calls the queryQuandl function to get a response from Quandl, then writes the value and directional change to the appropriate cells.

Note too that you’ll need a free Nasdaq account to replace the placeholder key on line 3 with your own. Otherwise, this won’t work for you 🙂

September 2021 Update: Adding an Indicator History Log

I added a new tab on the dashboard sheet called “Log” as well as new code to keep a history each day’s aggregate results so the indicators can be tracked over time.

Here’s the code for history logging:

function logSignals(){

  // Get the sheets
  var sheet1 = SpreadsheetApp.getActive().getSheetByName("Sheet1");
  var sheet2 = SpreadsheetApp.getActive().getSheetByName("Log");

  // Add a new row
  sheet2.insertRowBefore(2).getRange(1, 1, 1);

  // Set the date
  var date = new Date;

  sheet2.getRange(2,1).setValue(date);

  // Start setting up the signal logging
  // Not using this as not all signals are automatically pulled in
  //var numRows = sheet.getLastRow(); // subtract the first two rows as they aren't signals

  var signals = sheet1.getRange(3,5,16).getValues(); // the 16 would be numRows

  // Start counting the signals
  var yesSignals = 0;
  var noSignals = 0;

  for(var i=0; i<signals.length; i++){  

    if(signals[i] == "Yes"){
      var yesSignals = yesSignals+1;
    } else {
      var noSignals = noSignals+1;
    }

  }

  // Logging the signals
  sheet2.getRange(2,2).setValue(yesSignals);
  sheet2.getRange(2,3).setValue(noSignals);

  // Copy the percent formula
  var percentFormula = "=((B2/(B2+C2))*100)";
  sheet2.getRange(2,4).setFormula(percentFormula); //Copy the formula
  
}

Then add a call to logSignals(); at the end of your updateData function and you’re good to go!

2008 Correlations, Today

I added this section to highlight a few select articles I think merit more attention since they remind me of what happened in the lead-up to the 2008 financial crisis (according to “After the Music Stopped” by Alan Blinder and “The Alchemists” by Neil Irwin).

This isn’t meant to be a dump of “doom and gloom,” and I know that negative headlines are found almost everywhere you look, but there are corners of the economy I wasn’t aware of and others might not know too that could result in a similar Great Recession event:

I’ll add to this list over time, too.

Comments on my recession dashboard? Am I missing anything or misunderstanding a signal? Let me know!

[1] After The Music Stopped by Alan Blinder is an incredible (and surprisingly humorous at times) look into the before, during, and after of the financial crisis.

Factfulness by Hans Rosling [Book Review]

A good wakeup call to the good that is going on in the world; starts a bit dry and slow but succeeds in presenting concrete solutions for improving how we think about the world.

Background Info

I’m 99% sure I heard about Factfulness from someone on the Tim Ferriss podcast, but I can’t remember who. Regardless, after pulling up my local library’s online catalog and finding one copy available I almost giddily smashed the HOLD button. With my mouse cursor.

The book’s promise is to improve how we think by presenting facts that contradict popular narratives, as well as sharing methods for making better decisions. On the cover, Bill Gates claims Factfulness is “an indispensable guide to thinking clearly about the world.”
The book begins with the reader being quizzed on the overall status of issues in the world. Following the results, the author promises to take the reader on a journey of improving one’s critical thinking abilities. He mentions how his son and daughter-in-law helped him make better visualizations to tell the story and get his audience to act on it. I was about 30% correct on the quiz, so I was excited to learn and improve my thought processes.

However, after about 70 pages I was ready to give up. The presentation was pretty dry and stuffy, and I hadn’t seen any evidence of the promised visualizations that would make the data easier to act on. I felt the author kept building up and building up without delivering on his promises.

So one night as I set the book down I had a sudden thought: there was probably a TED talk by this guy I could watch instead of reading the book! (See, my critical thinking ability was improved!)

My guess was correct; there is a TED talk by Hans Rosling so I watched it, got inspired to dig in deeper, and went back to the book.

I got through it eventually, and here are my thoughts on each chapter:

Chapter Summary

The Gap Instinct

  • Be aware that most news articles and studies talk about huge gaps, when in reality the gaps in most of the world are shrinking, or nonexistent.

The Negativity Instinct

  • People talk about bad things more often, so we don’t see the good going on (see also Mean World Syndrome). Even when bad things do happen they often aren’t as bad as they used to be (he cites data showing deaths from natural disasters going down drastically, despite media coverage going the other way).
  • We’re more likely to think that things are bad now but used to be good before.

Straight Line

  • Things don’t go in straight lines forever (looking at you, stock market!) Trends follow various shapes, slopes, curves, etc. Look for patterns and expect change.

Fear

  • This seemed redundant with Negativity Instinct, but it’s more focused on scary events. Just remember that the world isn’t as scary as you think, and that the risks of highly publicized events (shark attack, plane crash) aren’t as high as they seem.
  • One good bit of advice was the wait to make decisions until the panic subsides.

Size

  • Watch out for huge or tiny numbers. Try to control, convert, and compare; e.g., define a “rate per person” when evaluating something across different countries
  • Good discussion about the 80/20 rule (aka Pareto’s Law); look for the items that will give you the most output (a lesson I’d previously learned from the Tim Ferris book/blog)

Generalization

  • Split large groups into smaller categories so you don’t overgeneralize. Saying or hearing “40% of Americans are obese” is like saying 40% of fish taste better with lemon- but which fish taste better with lemon? Find the distribution of obesity across age, state, income, education, job, activity level, etc. and keep digging (just be careful about correlation vs causation if you try to make declarative statements).
  • Groups can have differences inside them, as well as similarities across multiple groups.
  • Majority is an overused term that could be anywhere between 51 and 99 percent.
  • (This one I thought was particularly good) Beware of vivid examples. I took a few classes on rhetoric in college and giving an example can persuade your audience; don’t let one example speak for an entire data set.
  • (Another really good one) Don’t assume all people are idiots. Be humble and ask why someone thought it would be smart to do [insert thing you think is dumb here] and you might be surprised.

Destiny

  • Change happens slowly, so don’t write off a group because of an experience from years ago.
  • Culture changes, and will continue to change. Think about your grandparents’ view of the world compared to young people today.

Single Perspective

  • This was the BEST chapter in the book. If you can only read one chapter, read this one. Period.
  • I’ll add my own take to say: you’re more wrong than you know, since most likely you’re only taking your own perspective on things, or you’re taking the perspective of someone who only has his or her own perspective of it. Broaden your sources, and admit when you don’t know things,
  • Don’t try to apply your skill set to all problem sets. Your skills are most likely only good for a certain set of problems; e.g., you wouldn’t want a dentist changing your tires, right? Look at what professionals in other fields are saying and both cross-examine and -pollinate.

Blame

  • Watch out when one person “is to blame” (good or bad!) for something (similar to the above, when one story/example is used to define a group). People are both simple (in that we have the same needs and are pretty predictable) as well as complex (in that we have unique cultural contexts and often behave illogically), and an issue can extend beyond an individual.
  • Look for the system, not the hero or villain.

Urgency

  • If you’re pressed for something, ask for more time. It’s hard to analyze objectively when you’re in flight-or-fight mode.
  • Ask for data, and then vet it. Make sure it’s relevant and accurate.
  • There are too many fortune tellers, from the stock market to the doomsday preppers. A good rule of thumb is to be aware of any prediction that doesn’t acknowledge it could be wrong for n reasons.
  • Finally, small improvements are usually more effective than drastic ones. This applies to both personal habits (looking at you, New Years Resolutions) as well as organizational change or the wealth of a nation (yo, Adam Smith!)

Factfulness in Practice

  • This was the final, summary chapter, and I thought it well put together. I especially enjoyed the list of “things we should teach our children.” Humility (that we could be wrong about things) and curiosity (seeking out right information) are critically important attributes for us and our future generations.
  • Use dollarstreet.org to show kids the differences between countries, not stereotypes or news footage.

Final Thoughts

Overall, Factfulness is a good case study for presenting a better world than what is constantly sold to us by the news, social media, and latest gossip. If you can get past the initial dryness and apply its lessons then you’ll be a change agent in your profession, home, and hopefully the world.

Would I recommend just watching the TED talk and leaving it at that? Probably not. Get the book at your local library and peruse the stories and summaries and you’re more likely to have the ideas and lessons stick with you. I found the pictures of differences between standard of living levels (1 through 4) especially enlightening.

Scrap Wood Garage Shelves

This was a fun organization project that ended up being kind of an Ultimate Scrap Challenge without even meaning to.

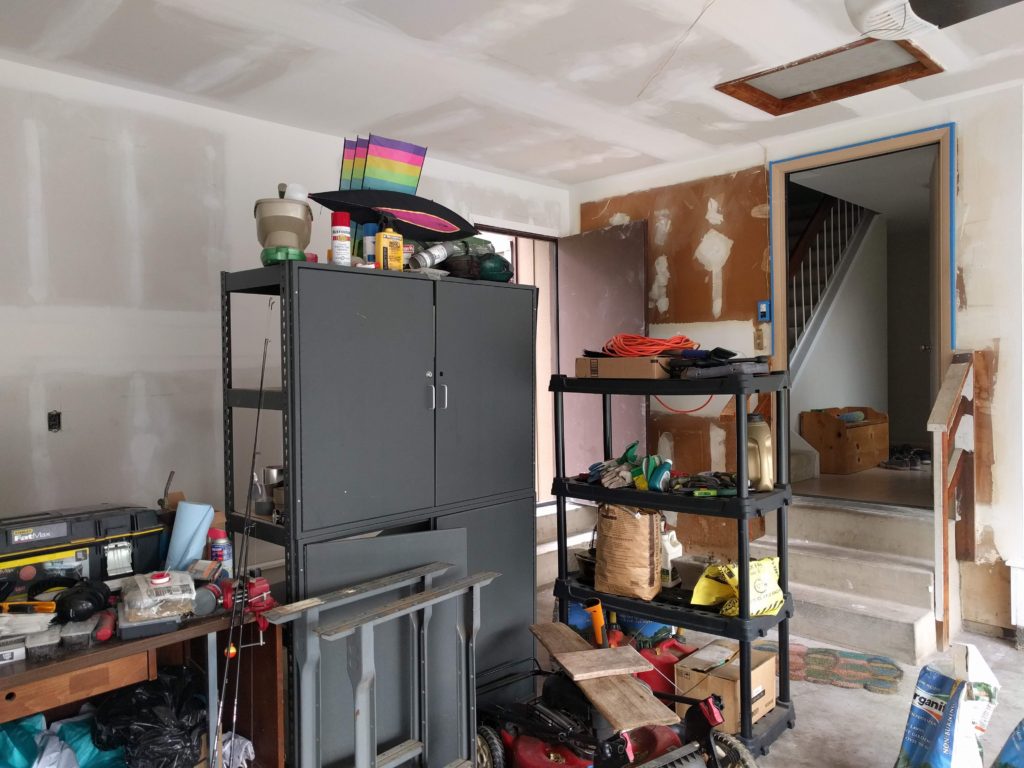
We recently put up drywall in our garage, and while painting I realized we had a storage problem: there were three standing shelf units on the floor of our garage, and that was probably two too many.[1]

Taken before we painted. What a mess!
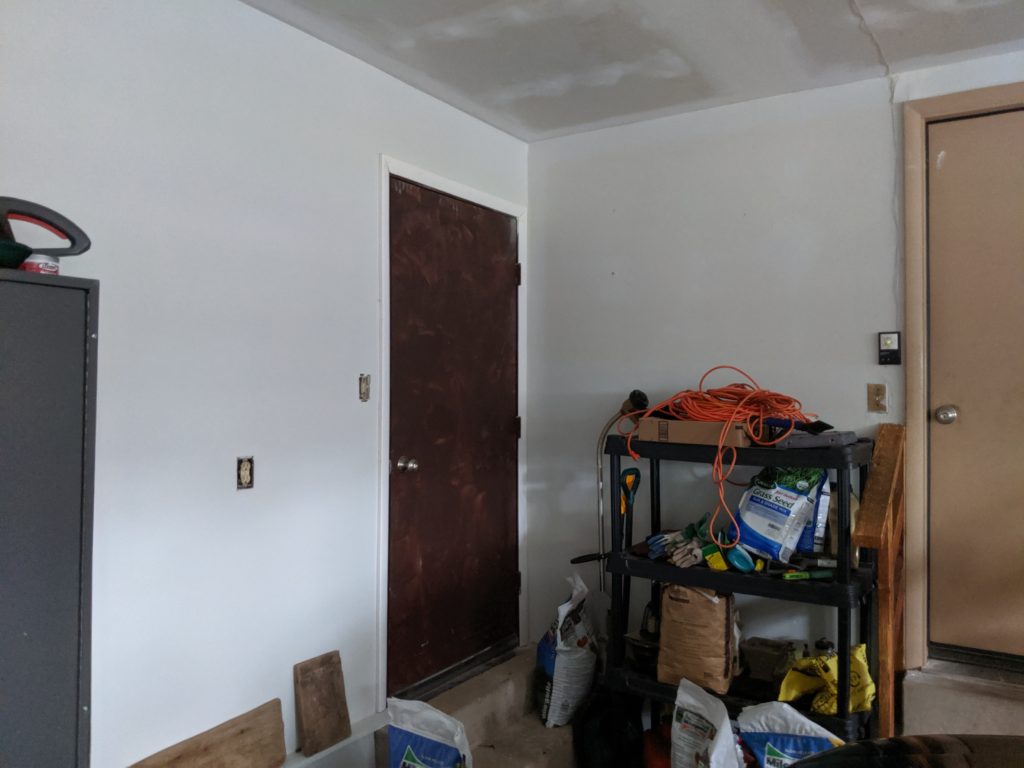
After painting the walls- still a mess!

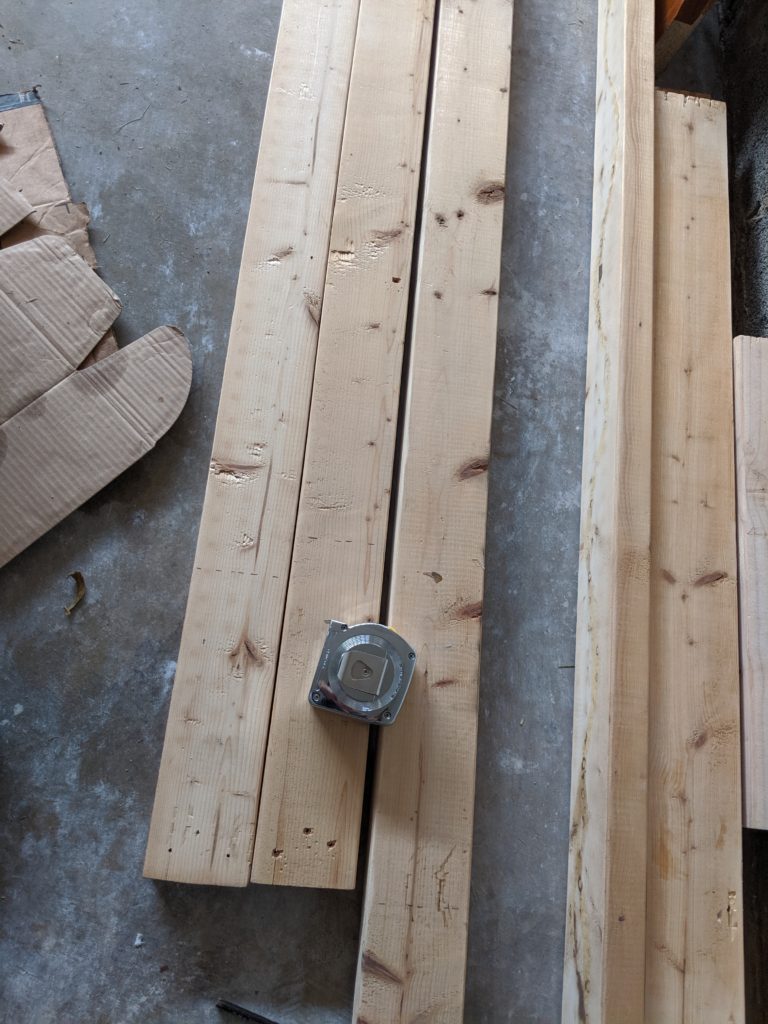
I found someone on Nextdoor giving away several 2x4s and decided I could join a few of them together with pocket hole screws and glue to make the shelves, and then use the leftover pieces as supports.

After picking up the 2x4s I noticed they’d been used in previous projects and had several nail holes and glue marks, so I made a mental note to sand them down that weekend before I started any cutting.

Can’t complain how they look when they’re free!

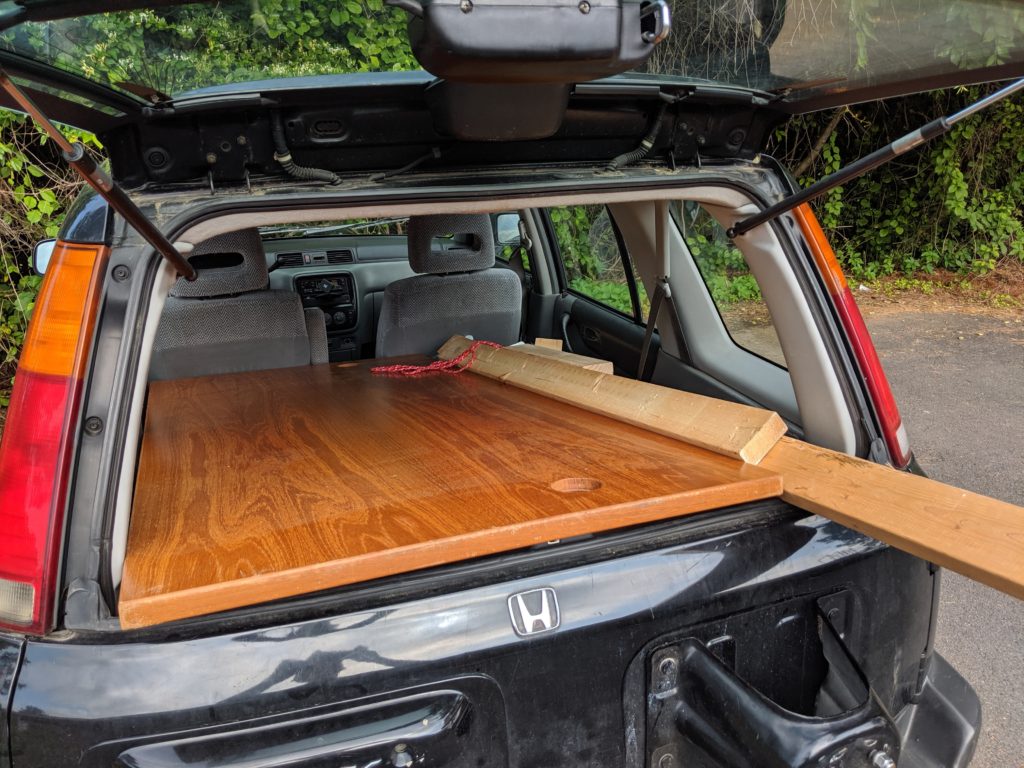
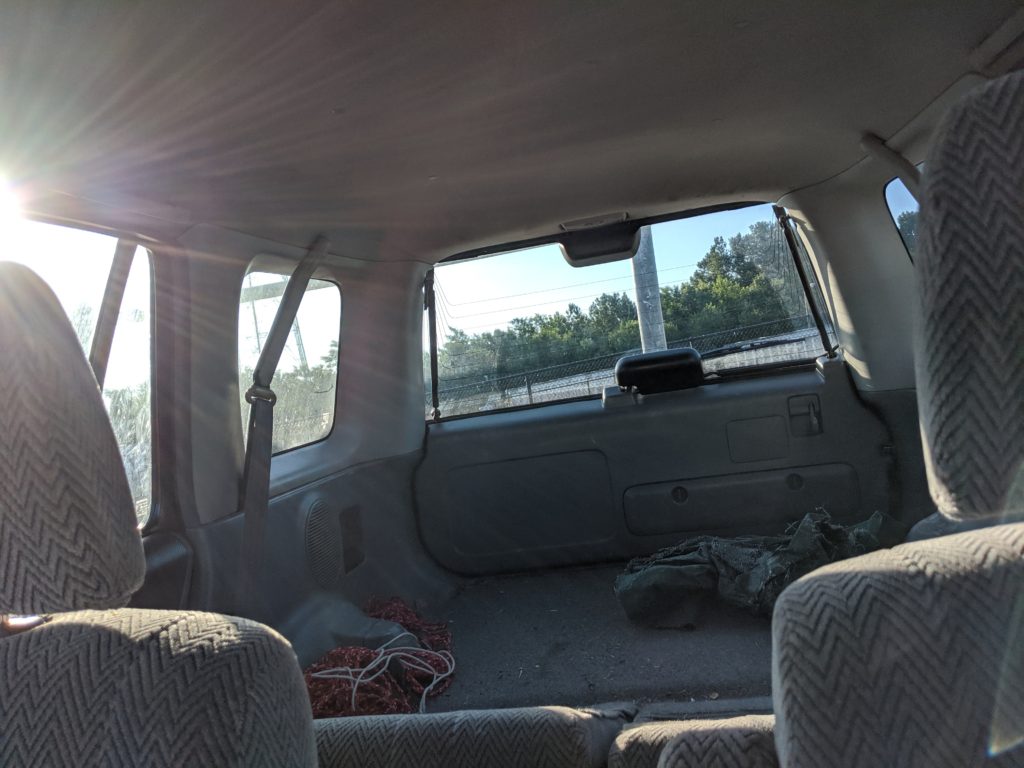
I’m glad I waited to cut them down, because the next day I saw a nice wood desktop with a “free” sign on the side of the road. I drove by two or three times before finally stopping to load it into my CRV.[2]

The table top with some of the free 2x4s in the back

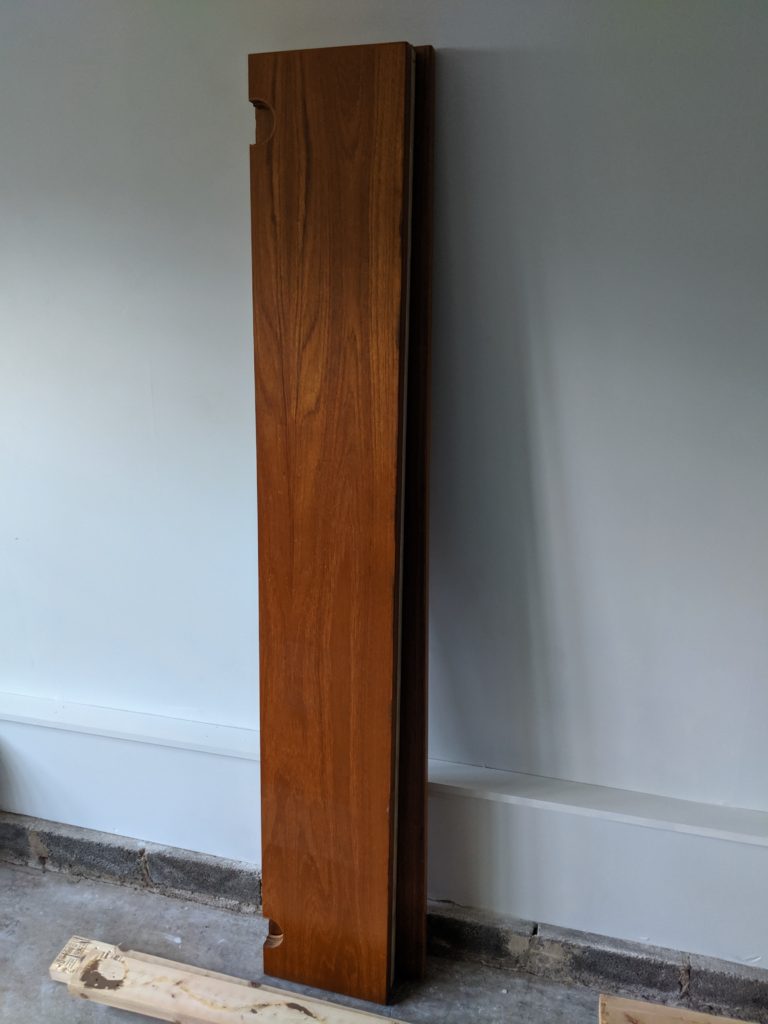
I re-did my design for the shelves to use this new wood. Instead of joining 2x4s together I decided to cut the desk wood into 3 pieces that were each 11 inches wide (the desktop was about 34 inches wide by 6 feet long):

The three pieces of 11 in x 72 in wood stacked against the beautiful new drywall

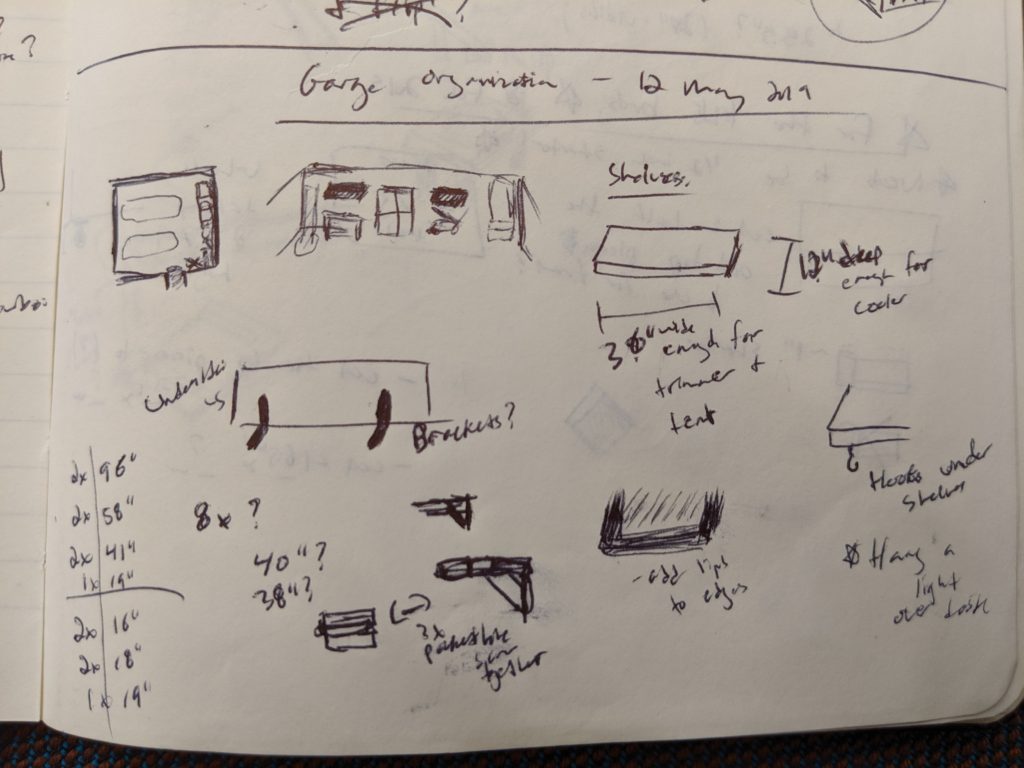
I also looked for a new way to support the shelves; initially I considered buying metal shelf brackets, but instead changed my design to use the 2x4s for supports. This way I could still use the wood I’d gotten for free, and wouldn’t have to buy brackets!

“It’s like looking inside the mind of a crazy person!” – you, probably

After some more thinking and measuring in the garage, I decided to keep the tallest (and nicest!) floor shelf unit, which meant the wall shelf to the left of that unit could be 6 feet long and the wall shelf to the right of that unit could be 4 feet long (there’s a door on the right side of the wall, so there wasn’t enough space for the extra 2 feet).

I also decided to make the left-side shelf into a corner shelf for added storage space, and have the adjoining wall’s corner shelf be 4 feet long to match the shelf on the right side of the floor unit.

Once I was comfortable with this plan I made the first round of cuts:

  • I cut one desk piece to 48 inches (for the shelf that would go to the right of the door)
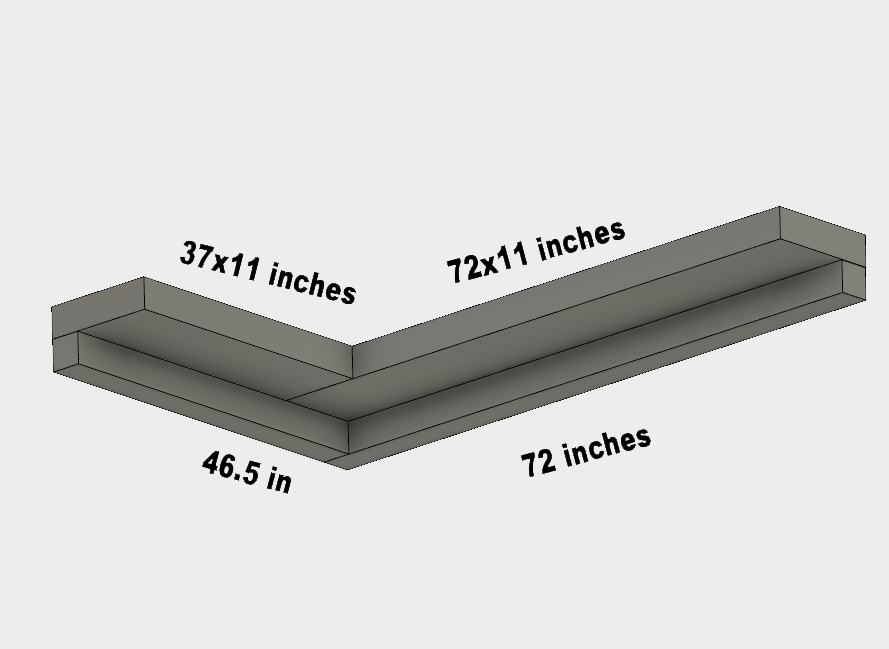
  • I cut a second desk piece to 37 inches (for the adjoining wall’s corner shelf; note that I had to accommodate 11 inches for the corner shelf it would join)
  • Also note that the third shelf piece didn’t need cutting since it was already 72 inches long

I know this corner shelf stuff is probably confusing, so I made a quick render in AutoDesk Fusion 360 to illustrate how I cut things for the corner shelf:

This image is not to scale

I then cut the 2x4s to size:

  • one at 72 inches
  • one at 48 inches
  • one at 46.5 inches (to accommodate the 1.5 inch depth of the 2×4 piece that’s in the adjoining corner)

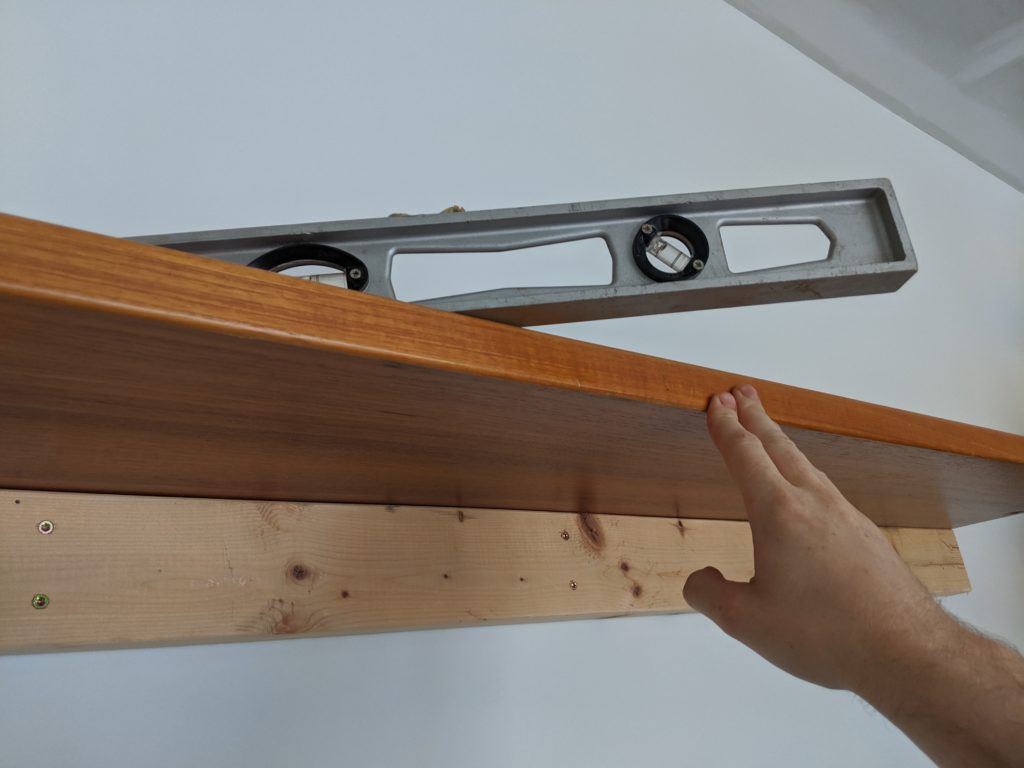
After finding studs[3] I put in screws to get the first support piece up and then screwed in the first shelf piece (use a level!)

Perfectly level, Morty!

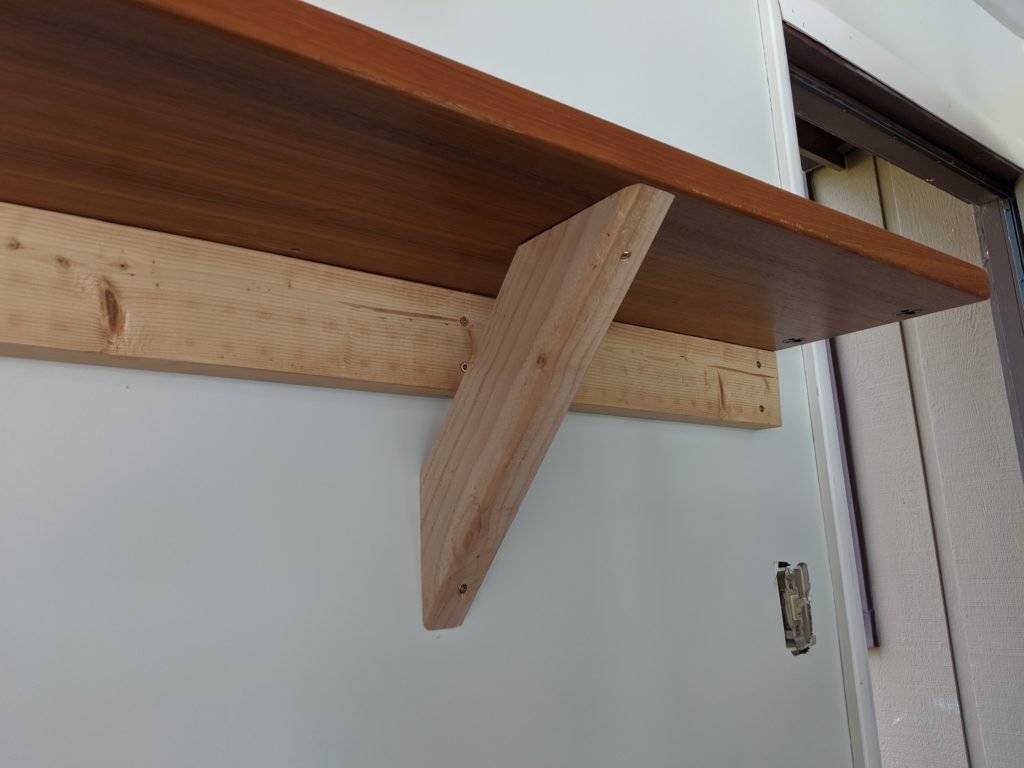
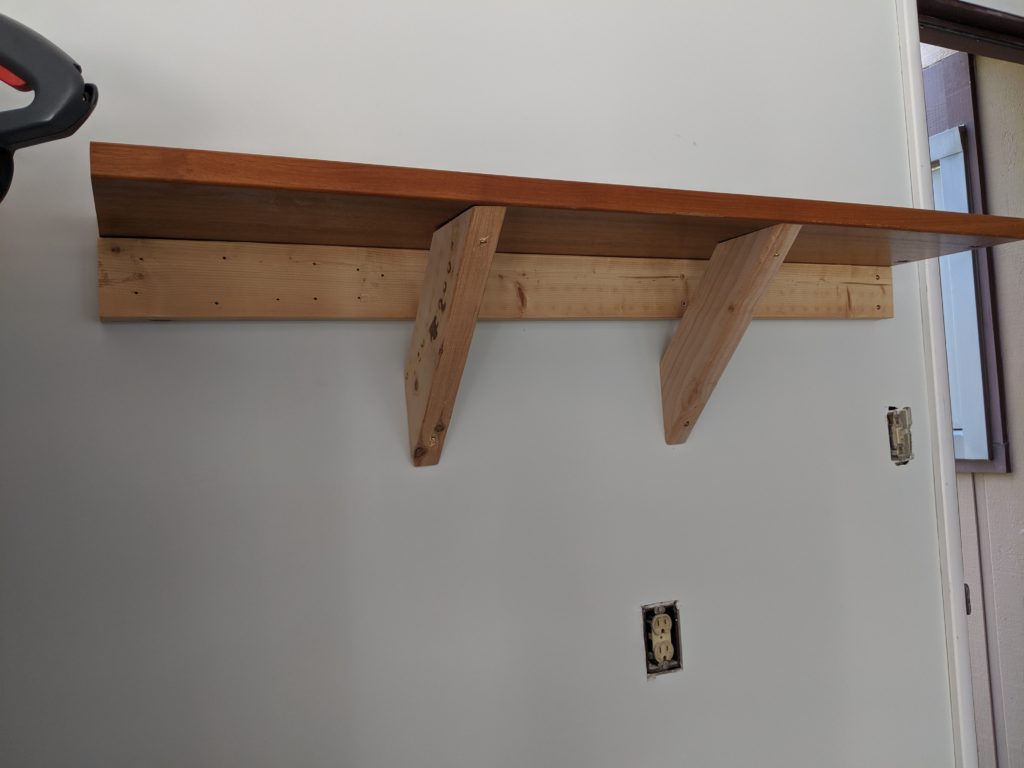
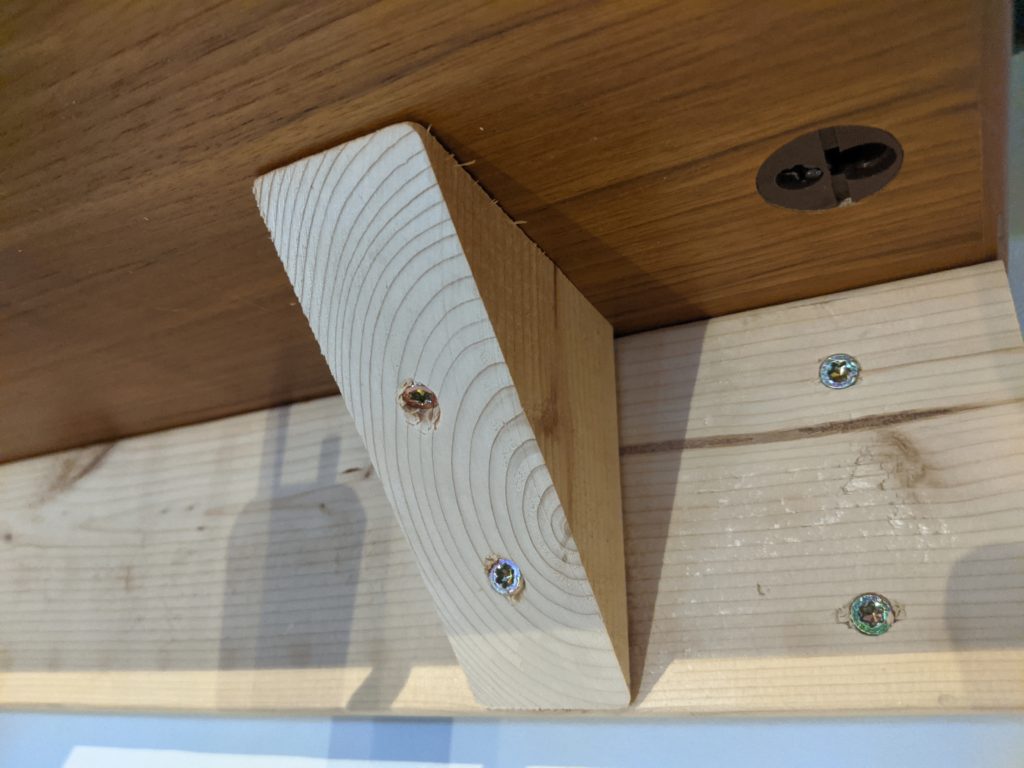
I then measured for the diagonal support pieces and cut several of those on my miter saw.

SEND IN THE SUPPORT, CAPTAIN!
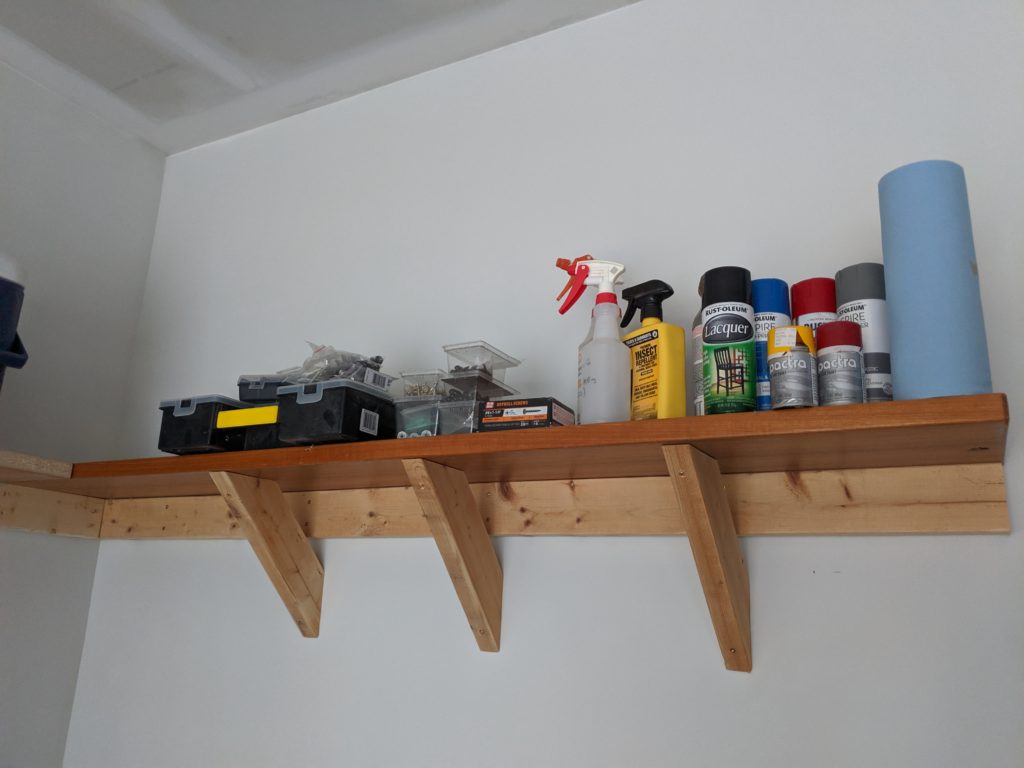
First shelf up!

I also decided to use several leftover 45 degree-cut pieces as additional supports where the wall didn’t have studs:

Reusing these was much better than throwing them away, and it’s more stable too!

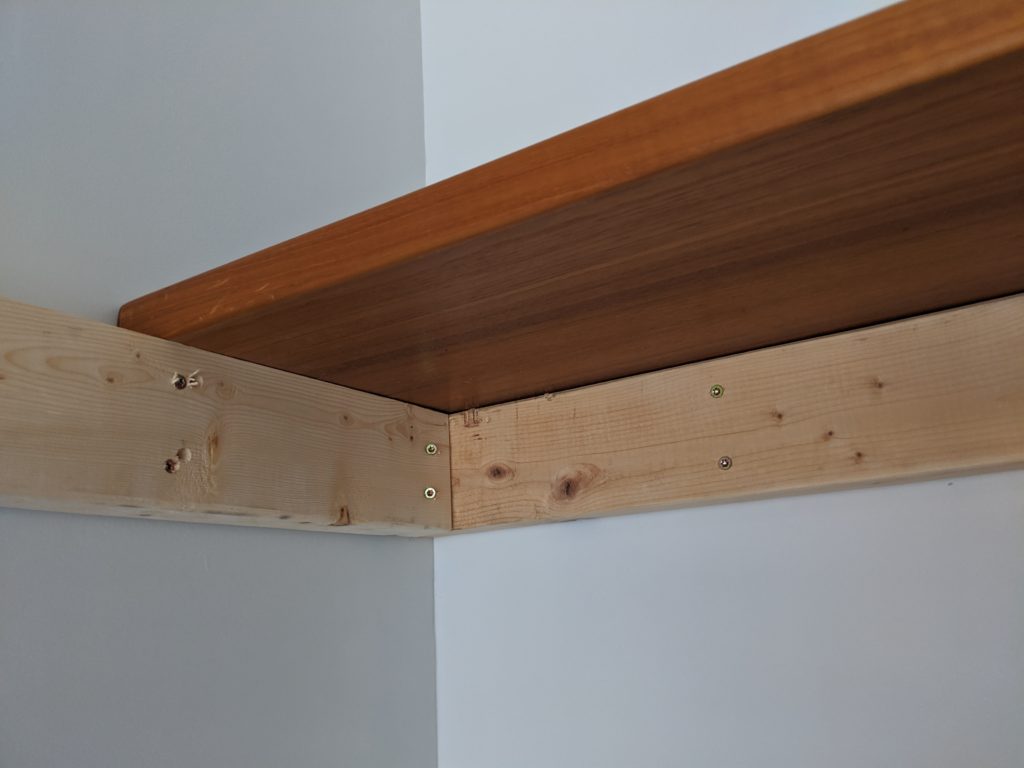
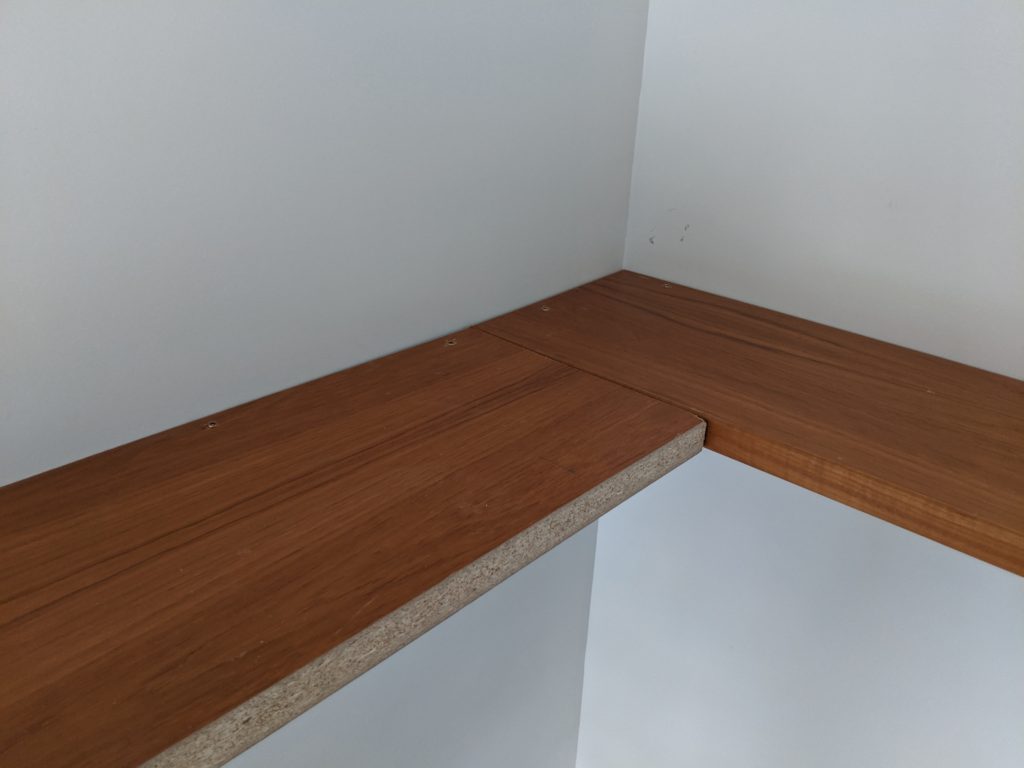
Putting up the corner shelf:

2x4s are up followed by the long desk piece
Adding the second part of the corner shelf

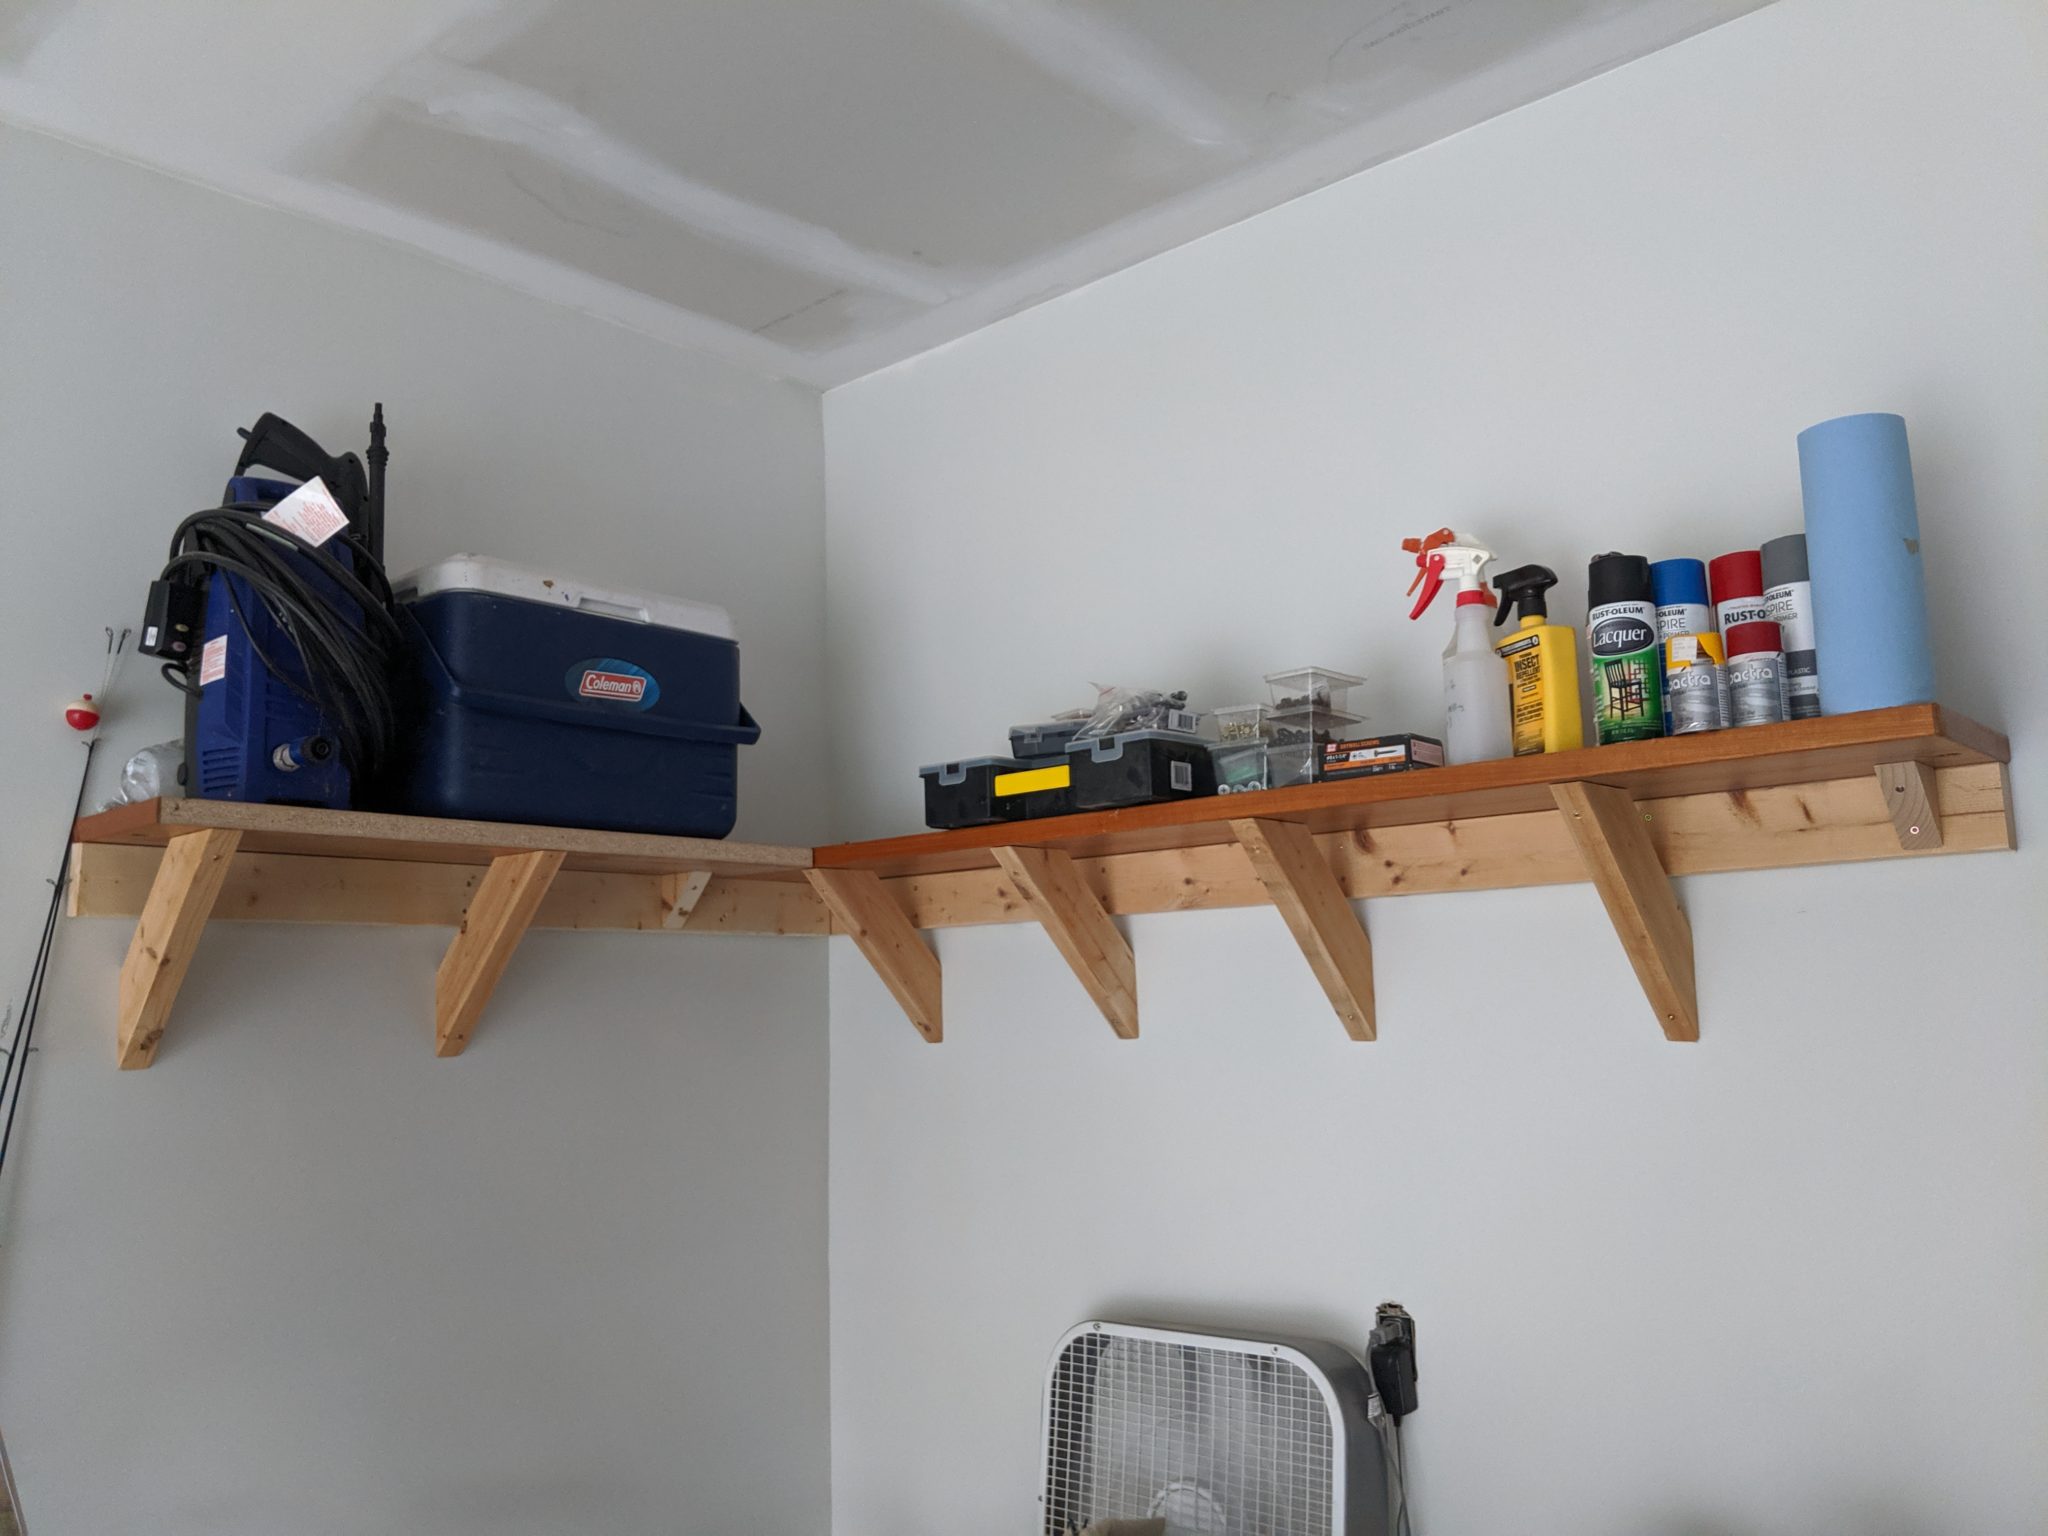
Once I put up the diagonal supports underneath the shelves, I got a ladder and added in additional screws from the top, both into the main 2x4s as well as the diagonal supports. This made the shelves feel a lot more solid.

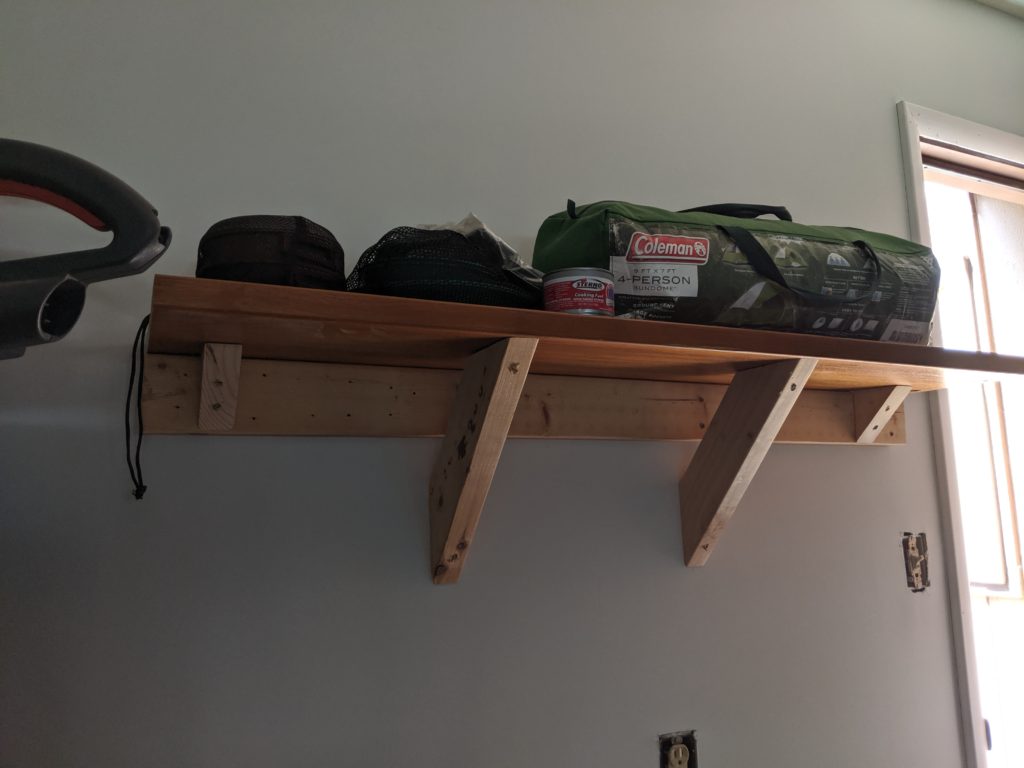
The shelves looked amazing. I started putting things up and was able to clear out one of the floor shelving units!

I love being able to see things at a glance
Camping gear gets a prime spot!

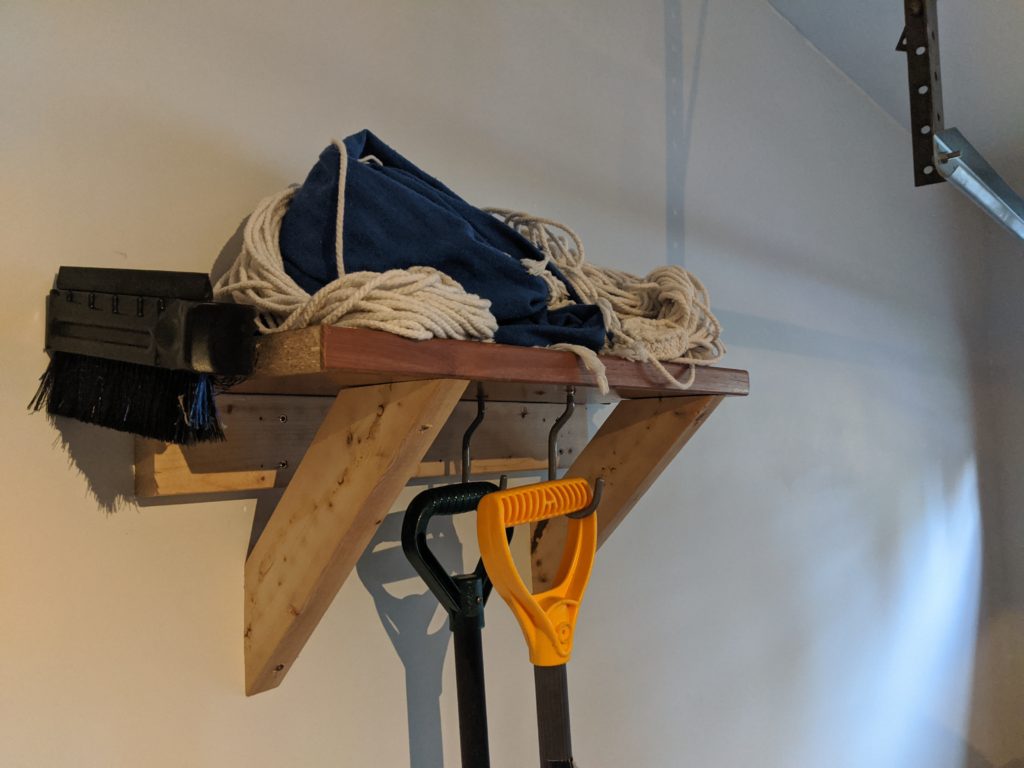
A day or two later I decided to put up two more shelves on a third wall using the leftover desk wood pieces:

One of the added shelves

You’ll also note that I installed bike hooks and put a few more things up that way:

WE NEED MORE POWER!

As a result I was able to get rid of two large, ugly plastic shelving units and freed up a ton of floor space. The whole garage feels much roomier and organized now!

The cost? A box of 2.5 inch t-star screws[4], some hooks, and electricity for the miter saw and drill. Not too bad!

[1] Haha, he said tutu! – My daughter, probably

[2] CRVs really can fit anything. And no, I was not paid to say that by Honda…but I’m open to it!

[3] It wasn’t that hard, I just had to look in the mirror! – No one, probably

[4] A note about the torque screws I used: I wasn’t a huge fan of them. I should have made an extra trip to get Spax brand screws at Home Depot (which I’ve been very impressed with in past projects) instead of just grabbing the Power Pro brand that Lowes had in stock (no, I was not paid to say that by Spax). Compared to Spax, the screws I got didn’t sit flush with the wood, they slipped when trying to start them, and they split some of the 2x4s more than I’ve seen with Spax, so I may as well have just pre-drilled for use with normal wood screws.

Tactical Quitting: When Projects Need to Die

The title is inspired from the concept of a “tactical retreat” so eloquently expressed in this SovietWomble video [warning: strong language]

“Giving up” is usually hard for me to do.

I remember learning about the donkey in the well[1] and being taught to “endure to the end” when I was young. So once I’ve committed to doing something I tend to see it through.

My wife points out how this has manifested itself in my becoming a program manager, where I aim to deliver everything on time, with quality, no surprises.[2]

Sometimes though, you need to tactically quit a project. Especially a DIY project.

Recently I was mentally preparing myself to push through the next phase of creating the sturdiest kitchen table chairs in the world.

For context, I designed a chair to match the farmhouse table I built during my sabbatical last fall, and had built a prototype. The post linked above details that process, and I planned on making three more chairs to complete the set.

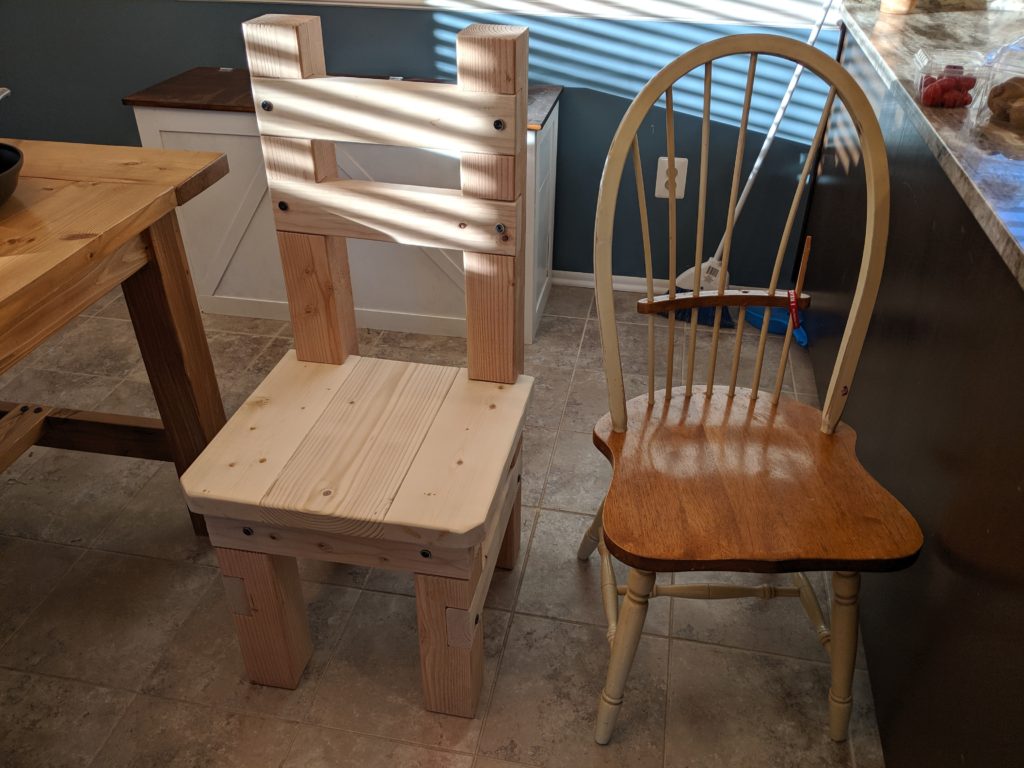
The chair I made (left) and the current kitchen chair style (right)

But even while making the prototype I was dragging my feet; as the picture shows, I didn’t finish the backrests, stain, or seal the chair. I delayed those tasks several times, and opted instead to work on a different project, clean, read, or play a game.

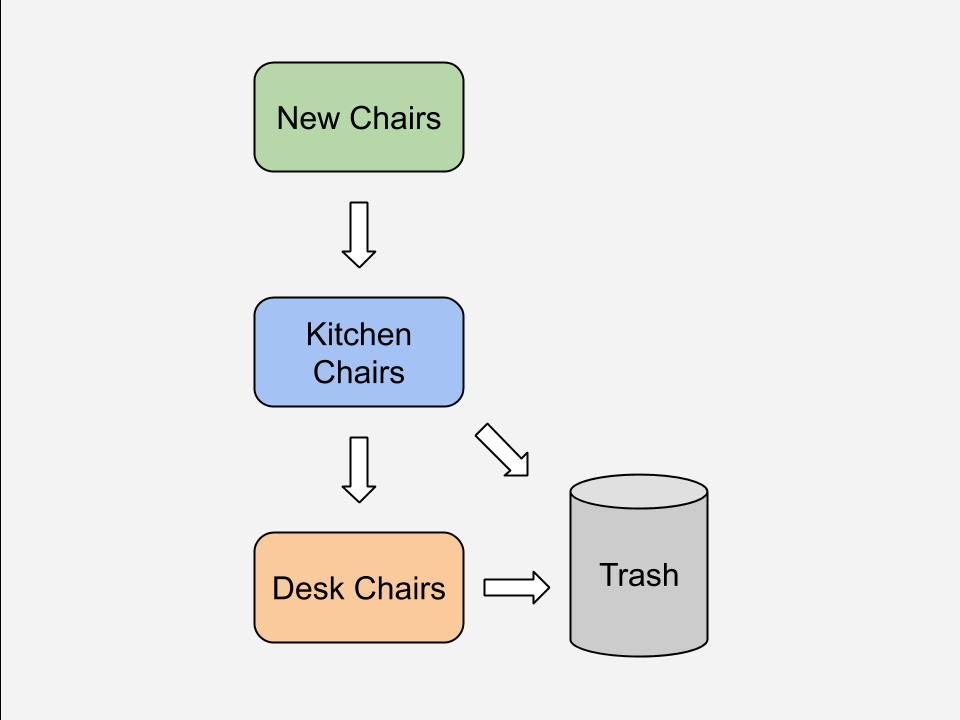
However, time was running out; my kids’ desk chairs were literally falling apart, and I realized that if I made the remaining three kitchen chairs then I could replace their desk chairs with the best current kitchen chairs and I’d take their current desk chairs to the dump with some other stuff that had piled up[3].

Was that confusing? Probably! I made a handy diagram to explain:

Beautiful

So I picked a date to complete the chairs and loaded my car with wood.

The day before my big planned wood shop day I was browsing Nextdoor’s free section. To my surprise, someone had just posted that they were giving away five beautiful Ikea chairs that were a great match for the farmhouse table I had made. Plus, it came with a nice round table we could use for board games.

I quickly emailed the owner and arranged to pick them up. Before heading out I unloaded the lumber I’d purchased for new kitchen chairs, shaking my head the entire time at my wasted effort loading the wood in the first place.

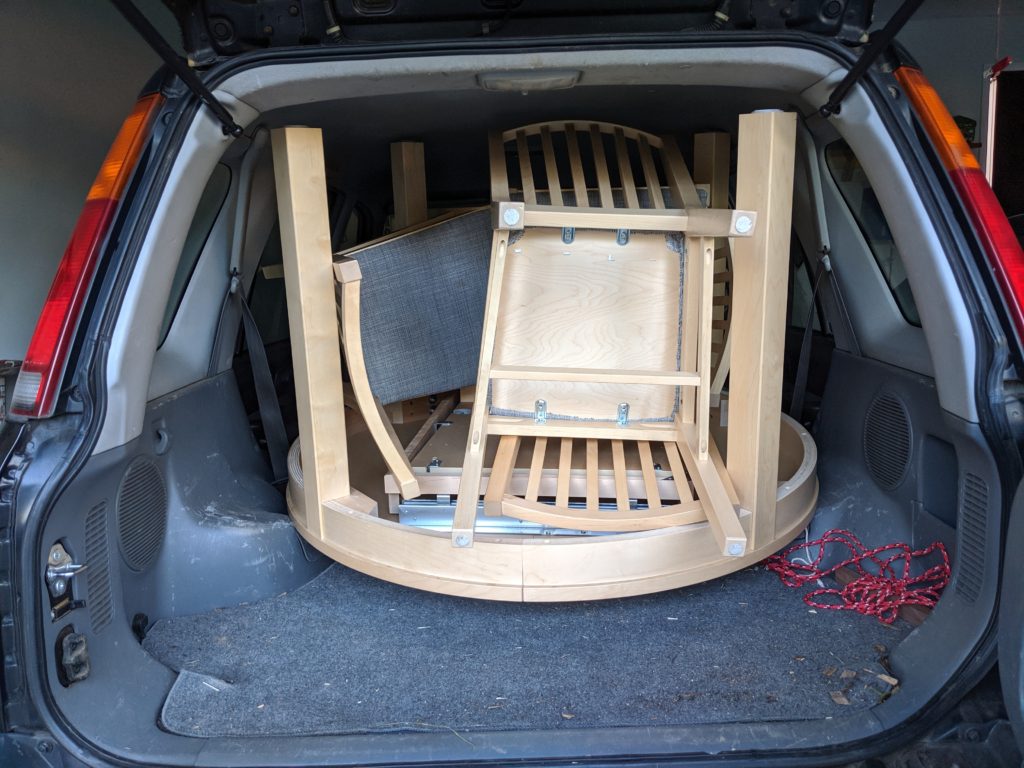
I drove over and fit the table and all five chairs in my CRV[4]. I then hurried home, way more excited than I should have been.

Room to spare!

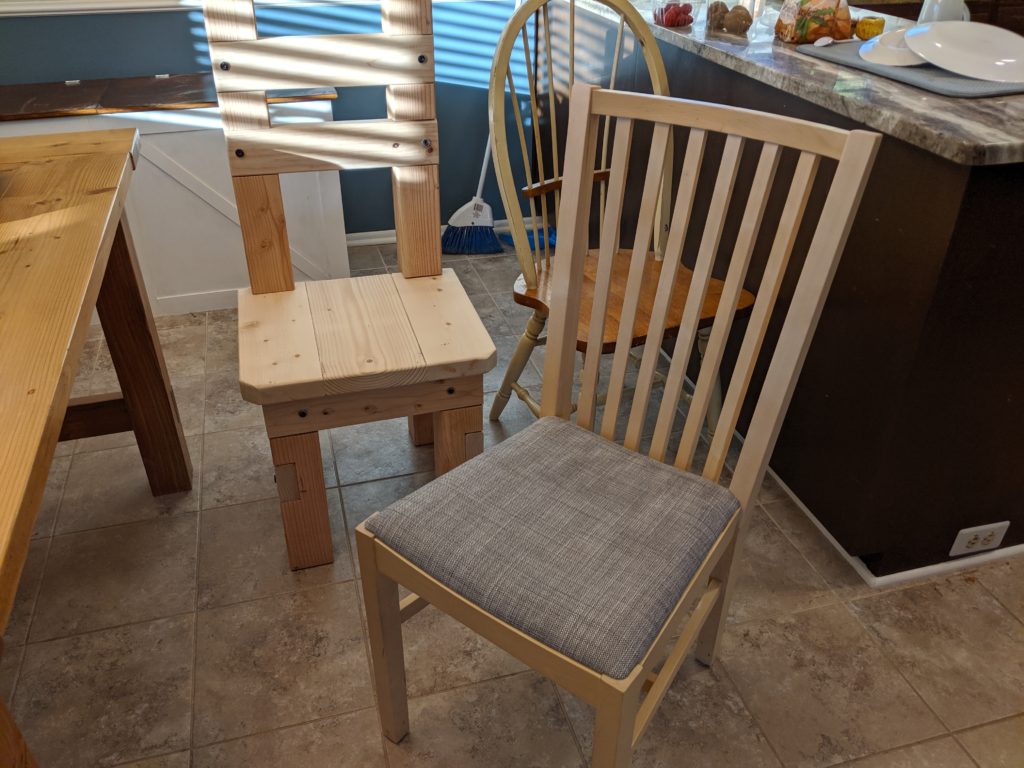
I brought the chairs inside and quickly did the musical chairs (heh) of replacing the kitchen table chairs with the new Ikea chairs, and then replacing the kids’ desk chairs with the nicest of the kitchen chairs (see flowchart above).

Presenting the new kitchen chair; or in other words, “One chair to rule them all”

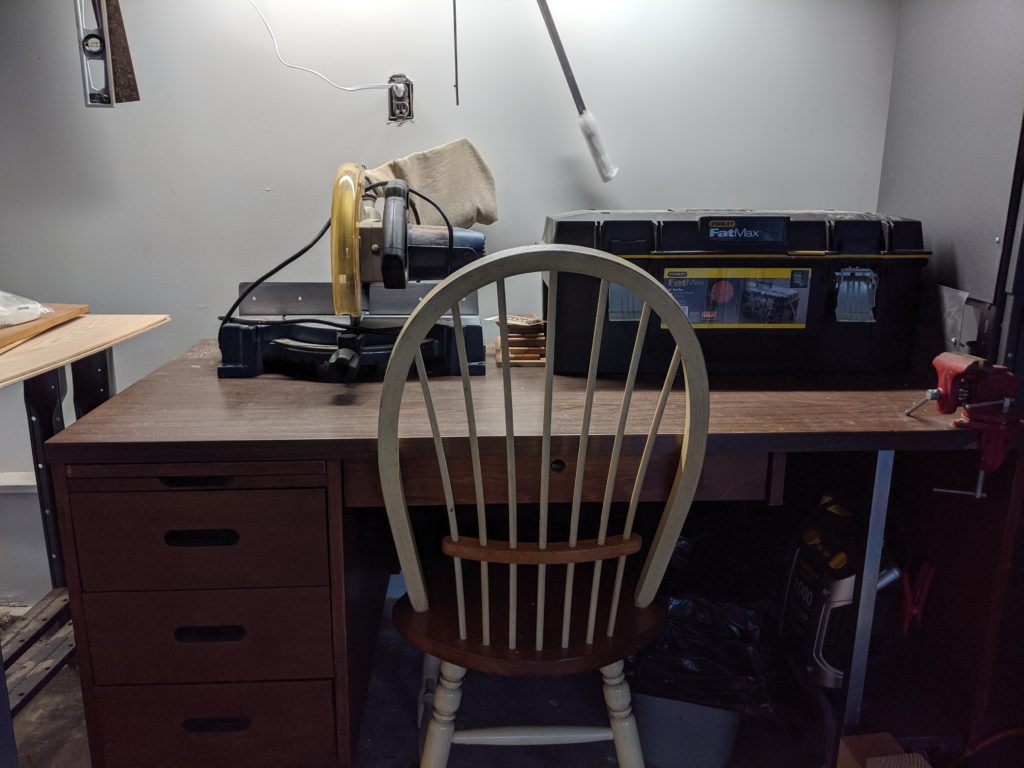
And as an added bonus, my wife got a chair for her sewing desk and I got a chair for my work table in the garage! (I made sure to give her the 5th Ikea chair since it has a padded seat, while I took the remaining old kitchen chair. Chivalry, y’all!)

My back will be forever grateful. Er, hopefully for the next few years at least.

Through it all, I couldn’t have been happier. While I wasn’t able to recoup the cost of the wood I’d purchased for the remaining three chairs because I had already made some preliminary cuts on them, I had saved myself a ton of work and could still return some unused hardware.

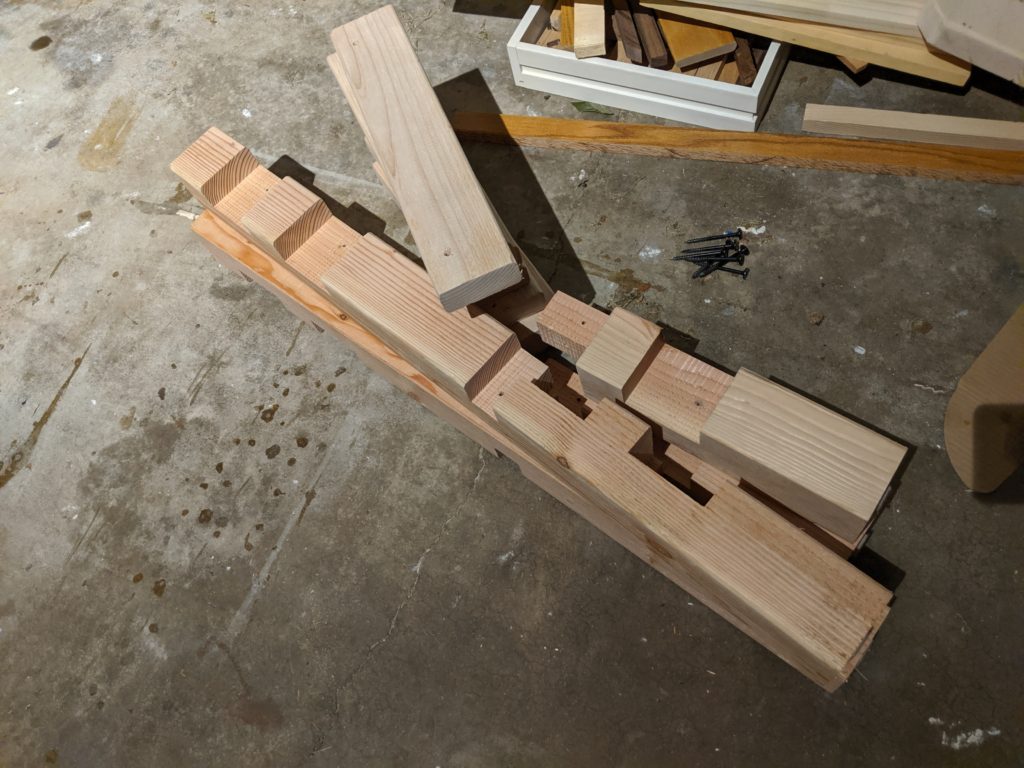
And since we didn’t need any more chairs (not even a super sturdy one) I took it apart for use in the future[5]:

I later cut out the non-dado’d 4×4 sections from the legs to use the other sections

Lessons learned? A few:

  • If you’re dragging your feet on something, pause and reflect. What’s holding you back? There may be a gut feeling telling you something’s up that your brain isn’t aware of.
  • Keep in mind the real goal of your project: is it to remove a specific pain point or to add a specific benefit? Could it be that you want to do it just because everyone else is doing it too? Is it to simply use up material, like in a scrap challenge? Or did someone mention it and you think they want it done, but you haven’t confirmed with them?
    • In this example, the real goal was to replace chairs that were falling apart, with a secondary goal of having chairs that matched the table. I ended up doing exactly that, just in a very different way than expected.
  • A tactical quit, or change, of plans may be much better than pushing through it.
  • Be flexible and think outside the box (or in this case, the chair) for solutions.

Note that there’s definitely nuance here; not everything should be quit at the first (or even first several!) roadblocks, but when you’re facing a continued slowdown it’s good to reflect on your real goals, sanity check against your priorities, consider alternate paths to reach them and then adjust as needed.

So: don’t tactically quit as your first option when a project is behind, but know that it is an option.

[1] The Donkey in the Well:

An old donkey fell into a well. She cried for help and the farmer tried to figure out what to do. After some time the farmer decided the animal was too old to rescue, and the well needed to be covered up anyway.
So he grabbed a shovel and began to throw dirt into the well. When the first load of dirt hit the donkey she cried out and looked around for a new place to stand. As she moved, the dirt fell off her back. 
As the dirt continued to enter the well, the donkey kept moving. Whenever dirt hit the donkey she shook it off and stood on top of it. As the farmer kept shoveling, the donkey kept shaking it off and taking a step up.
Pretty soon the old donkey stepped up over the edge of the well and trotted off, leaving the farmer in shock.

[2] That is a line from one of my most influential mentors at Google, and I hope to post more about it soon!

[3] I love going to the dump. It’s weird, I know; I have a whole post about my love of landfills explaining why.

[4] More evidence for the magic of CRVs!

[5] Luckily I’ve since been able to use almost all of the wood in other projects! Coming soon: a bird stand and garage bench.

The Sturdiest Kitchen Chair in the World

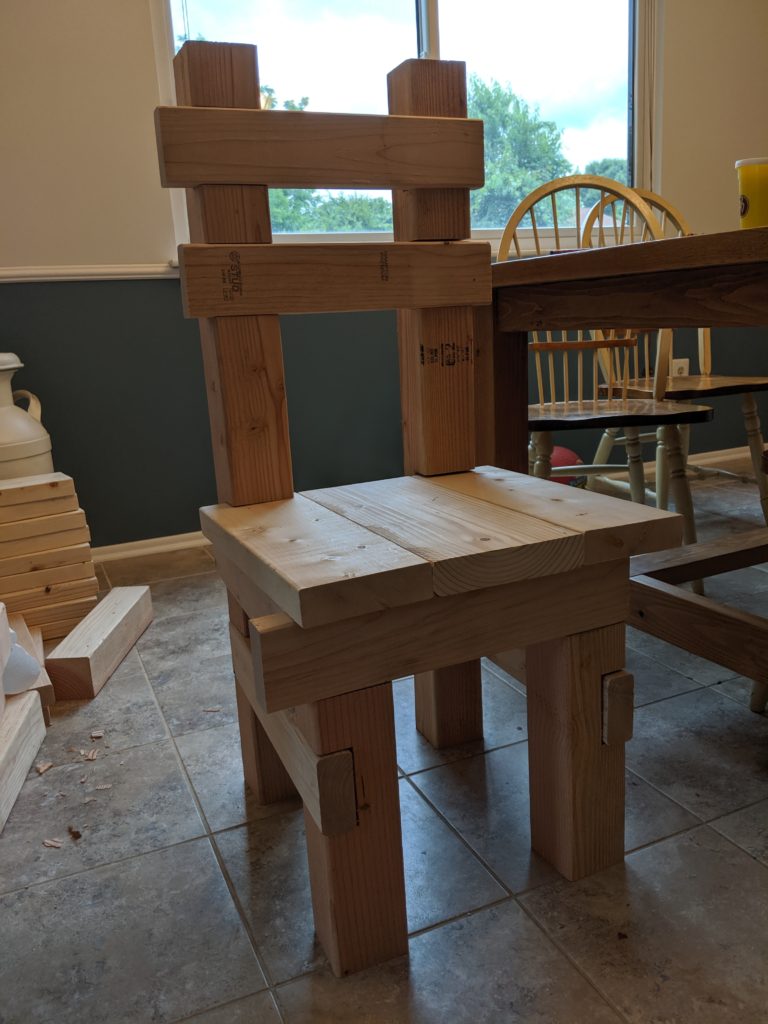
I set out to make a set of chairs that matched the farmhouse style kitchen table I’d made. I ended up creating the sturdiest chair in the world.

Over the past year I’ve gotten into woodworking as a hobby. During my sabbatical last fall I made a farmhouse style kitchen table, and the family loved it.

But the chairs weren’t a great fit. They didn’t match the table’s style or finish at all, plus they were starting to fall apart. I made a note to make new chairs and then forgot about it.

A few months went by and the kitchen chairs were really starting to need replacement. So I picked the project back up again.

I wanted to use the same wood (4x4s, 2x4s, 2x6s and 2x8s) in the same pattern I’d used in my farmhouse kitchen table build. Further, I wanted to assemble them the same way as I’d done with the table; namely, using pocket hole screws.[1]

The issue with that approach is we don’t move a table very much, but chairs need to move all the time in addition to reliably supporting more weight than a table. That meant having four 4x4s attached to 2x4s with pocket hole screws as originally designed was going to cause issues.

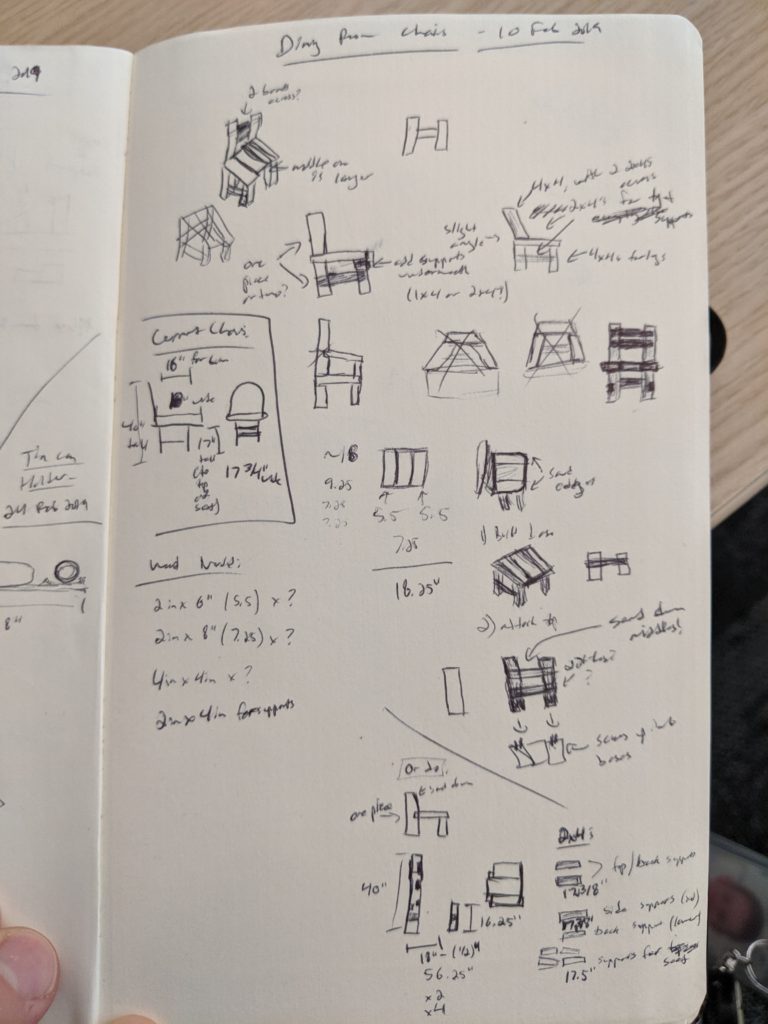
So I updated my design to use rabbet and dado cuts:

The adjusted design with dados in the 4x4s to support the 2x4s. Good luck reading my handwriting!

I didn’t know it then, but the result would be the sturdiest chair in the world.

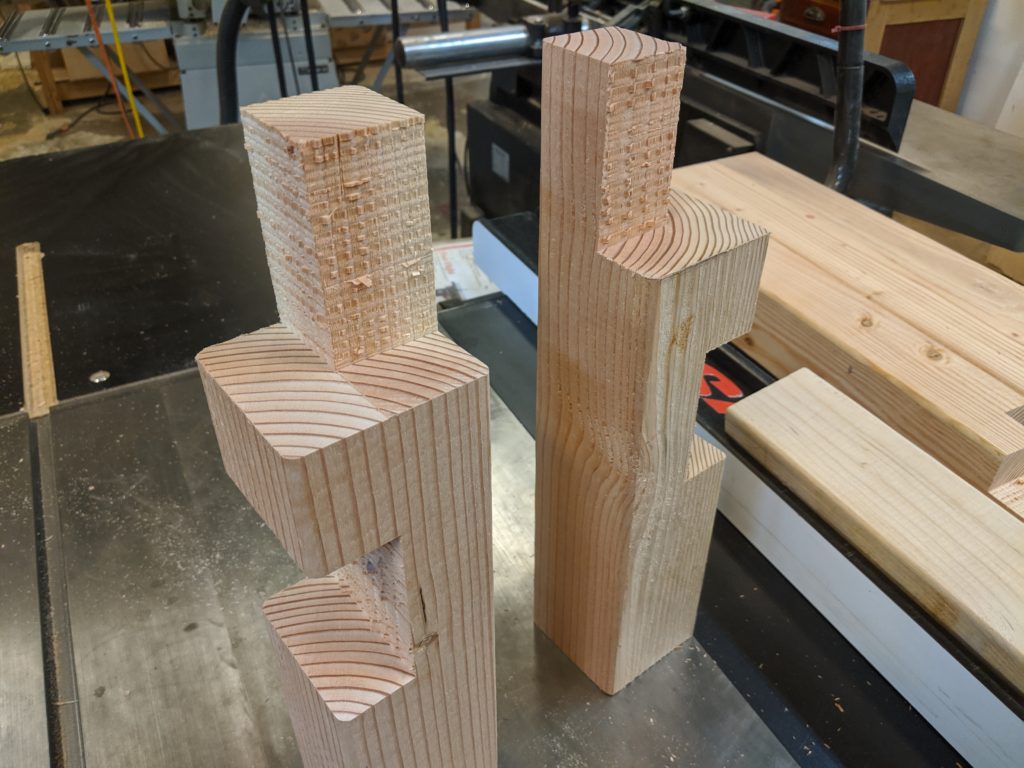
After finding usable scrap in the garage and getting the remaining materials, I went to the table saw and cut my dados and rabbets.

I promise no rabbits were harmed in the making of this project.

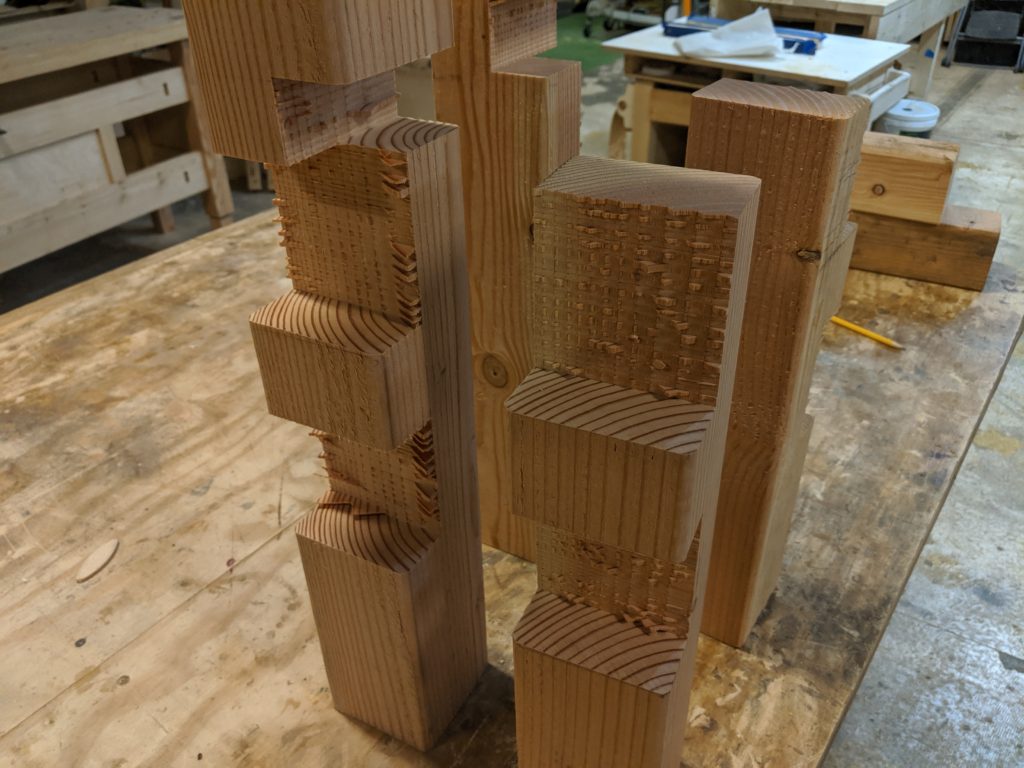
Things got a bit crazy with the back legs; I had multiple dados on each leg as well as a 3.5 inch dado right below a 1.5 inch dado (for the seat):

It kinda felt like playing Jenga or Tetris

With the legs done it was time to dry fit and correct any major issues before moving forward:

My wife is a saint for allowing me to keep the wood in the kitchen

Not bad! I had to make some adjustments to a few dado cuts but nothing major.

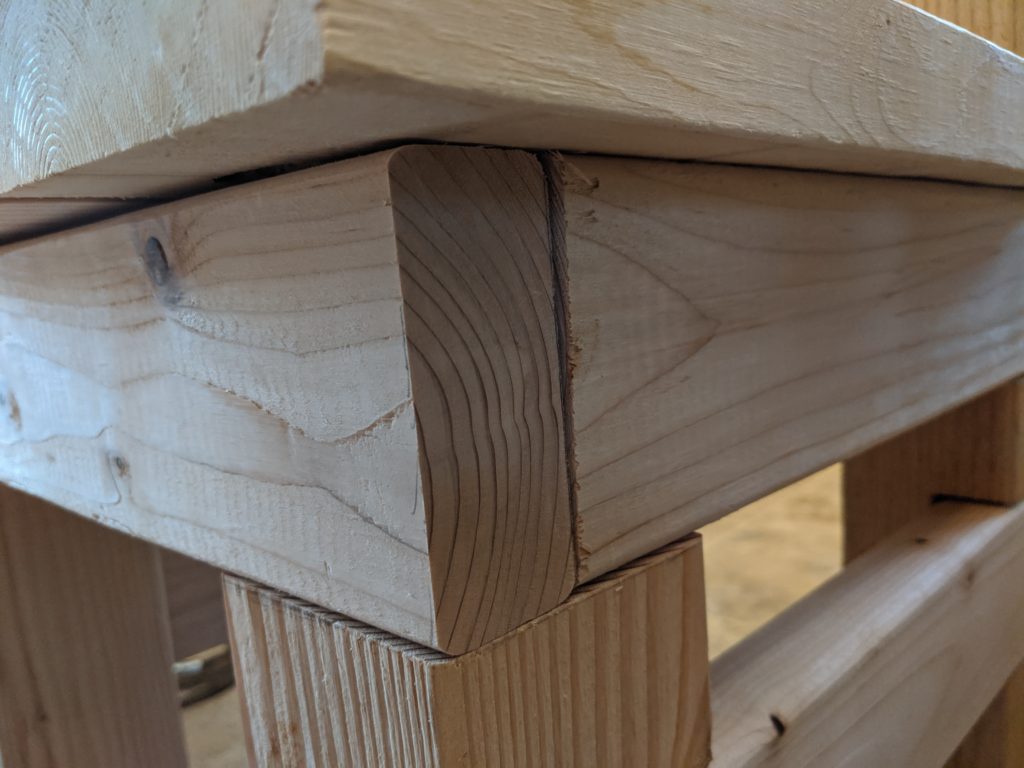
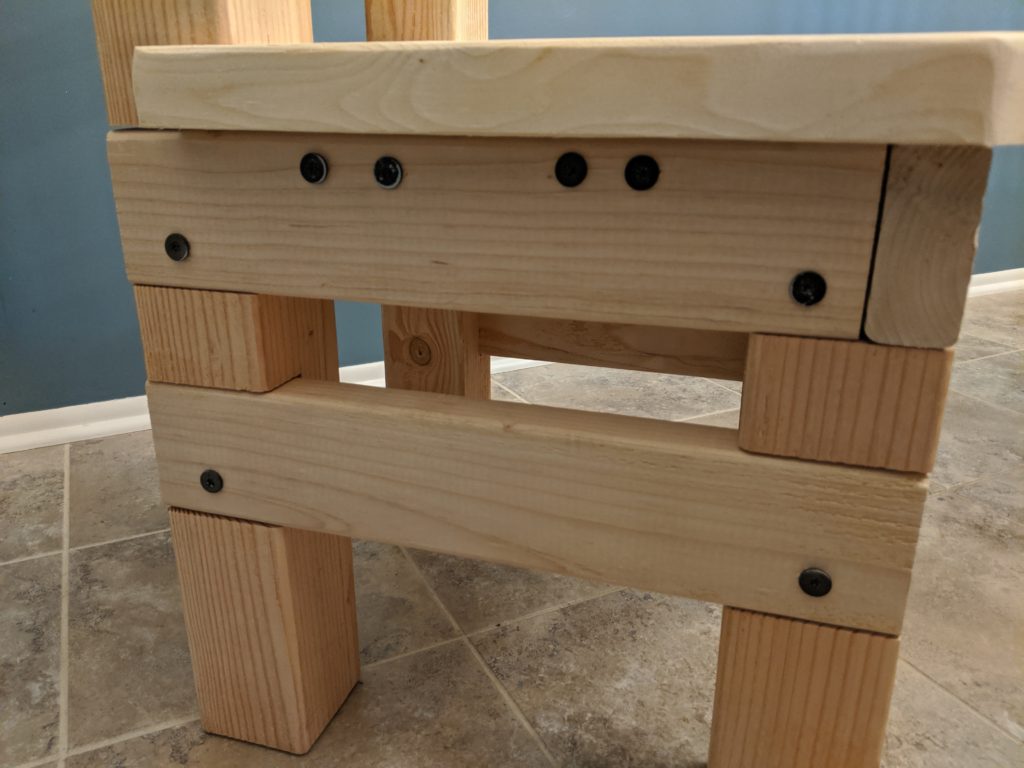
I then cut the other wood (2x4s, etc) to size. Here’s a closeup of the chair’s front right corner so you can get an idea of how I placed the top supports:

Jeeeeeeenga!

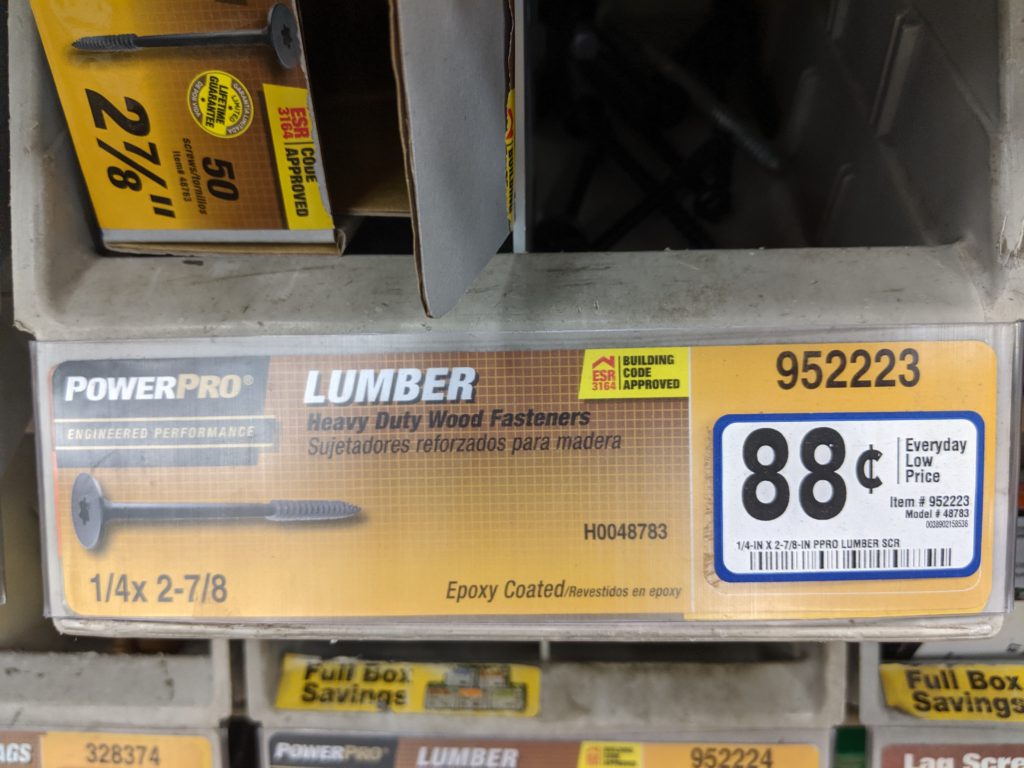
I then used these screws from Lowe’s to put things together:

A bit pricey, but they look amazing

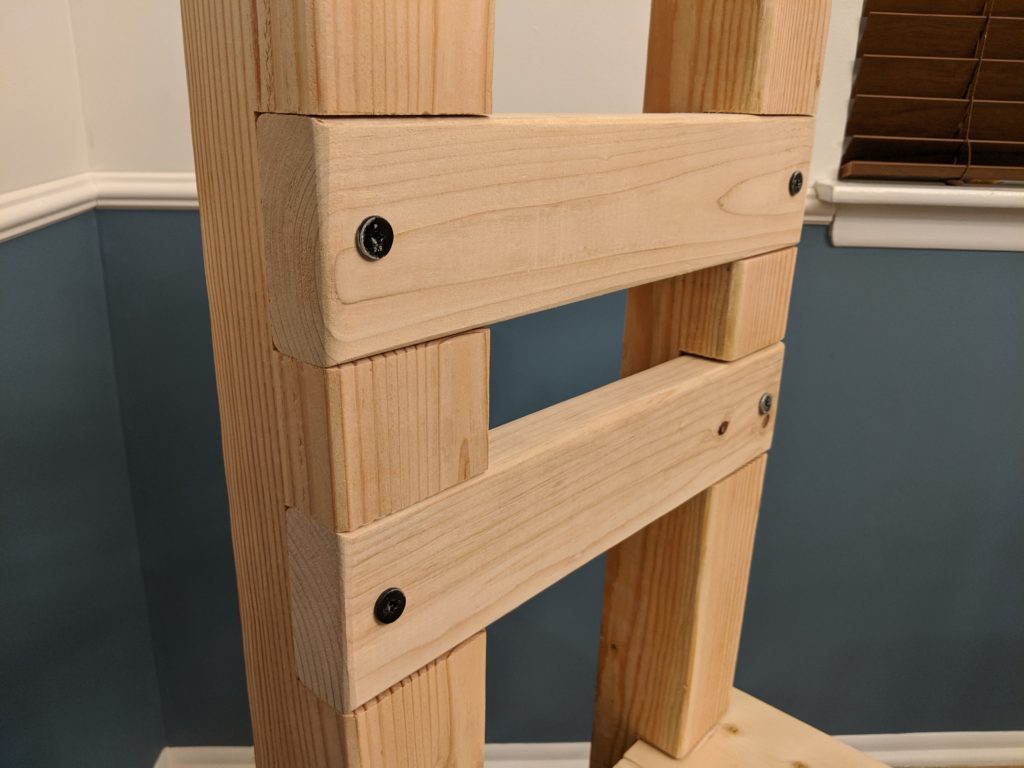
Here’s the backrest; I planned on using 2 screws on each side for each backrest piece but it ended up being really sturdy without them:

Notice the sanded edges too.

And here’s how I screwed in the sides:

Sand before you screw these in, or add painter’s tape to the screws before you sand, otherwise you’ll rub off the paint as I did.

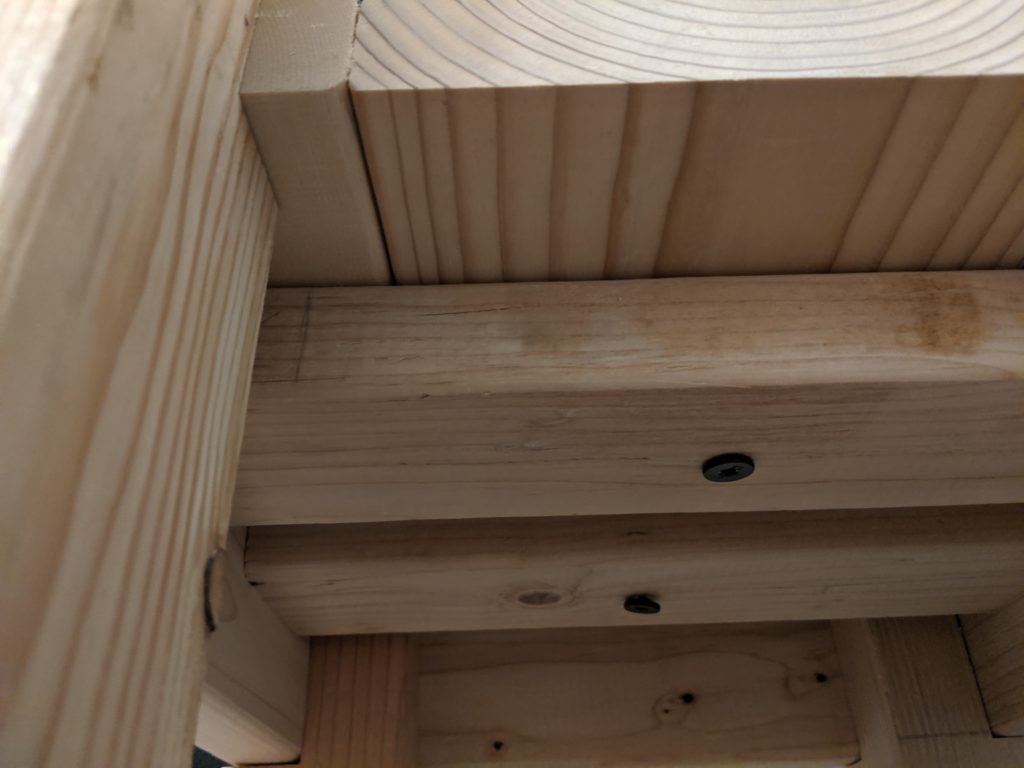
I decided to add two support pieces underneath the seat for added stability since the seat pieces were attached to each other using pocket hole screws:

Not my best job, but they worked!

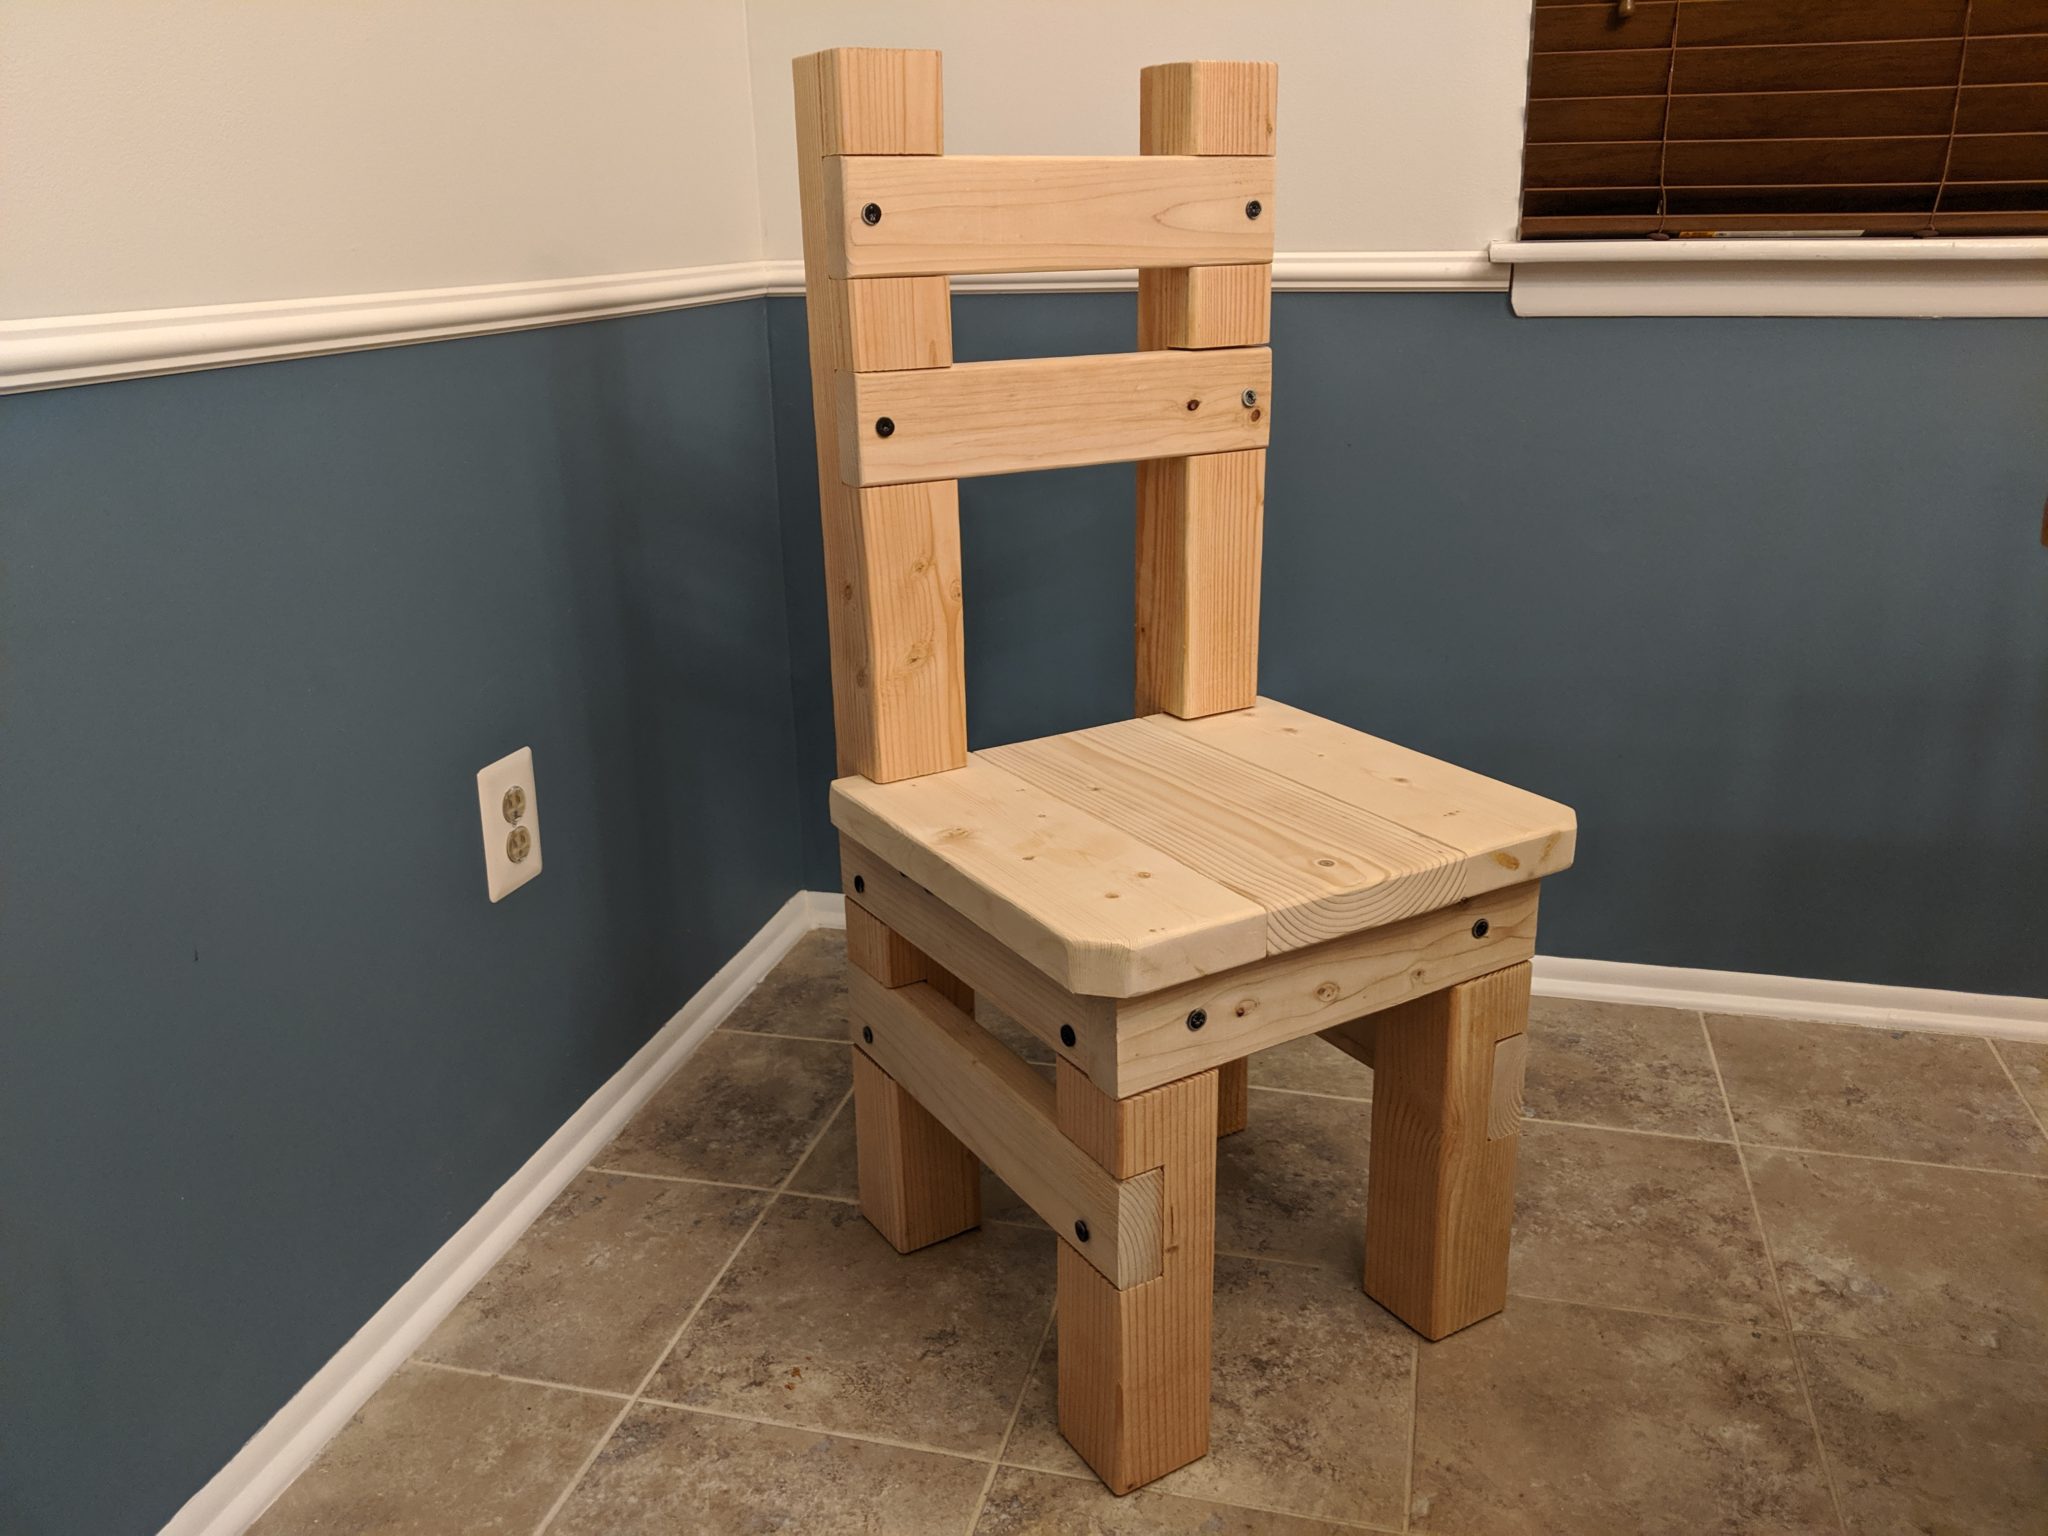
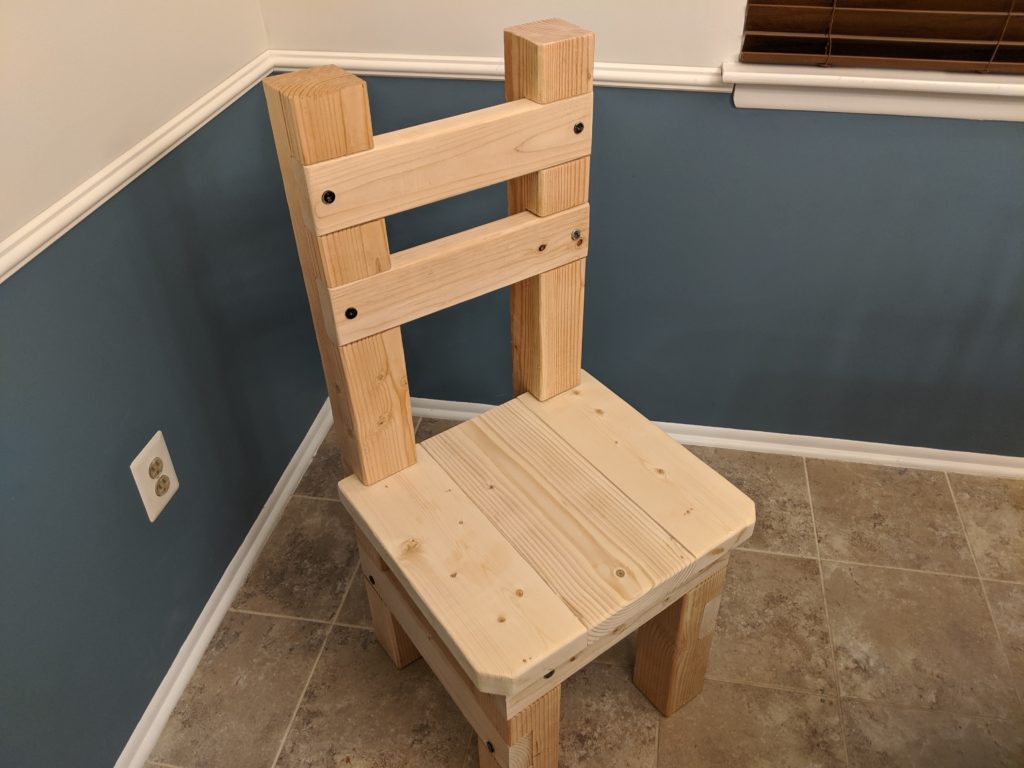
I spent extra time sanding down the edges and corners so no one would get hurt, and here is the result:

A thing of beauty

Sitting on it was actually not bad; the next step was to use the bandsaw to cut a curve in the backrest pieces to be more comfortable.

But before I could do that we got a nice surprise: someone gave us five really nice Ikea chairs!

The three chairs for comparison: Ikea in front, original in back, and the one I made on the left.

As a result, the chair I designed and made was now obsolete; I wasn’t going to turn down five free $70 chairs when I still had to make 3 more by myself.

If you are interested in building this chair for yourself, here are the cuts you need to make for each chair (along with a column you can use to check off as you make each cut):

# pieces:Wood:Cut to:Part/Reason/Placement:Cut?
32×416 inBack rests & front support
22×417.25 inSide supports on the bottom
22×415.75 inSide supports on the top
22×413 inSupports underneath the seat
24×440 inBack legs
24×416.25 inFront legs
22×616.25 inSeat top (sides)
12×816.25 inSeat top (middle)

Note that the two 2×6 and one 2×8 pieces give a total of 18.25 inches in seat width which was perfect for us, but you can adjust as needed by either using smaller wood combinations or cutting them down.

[1] I love pocket hole screws. They’re magic.

Landfills: A Love Story

This is probably the only ode to landfills, ever.

I love going to the local landfill. I remember my family dropping things off once when I was young, and how amazed I was at the immense possibility of what could be made from stuff I saw lying around; I envisioned robots, go karts, an epic treehouse. Unfortunately we couldn’t take anything from the junk piles, but the sense of wonder I felt in that landfill stuck with me.

Where I currently live the landfill is close enough to go there and back in well under an hour, yet far enough that I don’t smell anything. Huge win win.

I will note that on my first several trips to this landfill I was unaware of how pricing worked, and as a result paid more than expected…which took away some of the magic. The first time I was one bag over the lowest price tier, and on another visit I didn’t know I could have asked to pay by weight instead of by bag (which would have been nice since I was dropping off lightweight insulation batting). But never fear! I’ve now optimized my landfill approach and the magic is back.

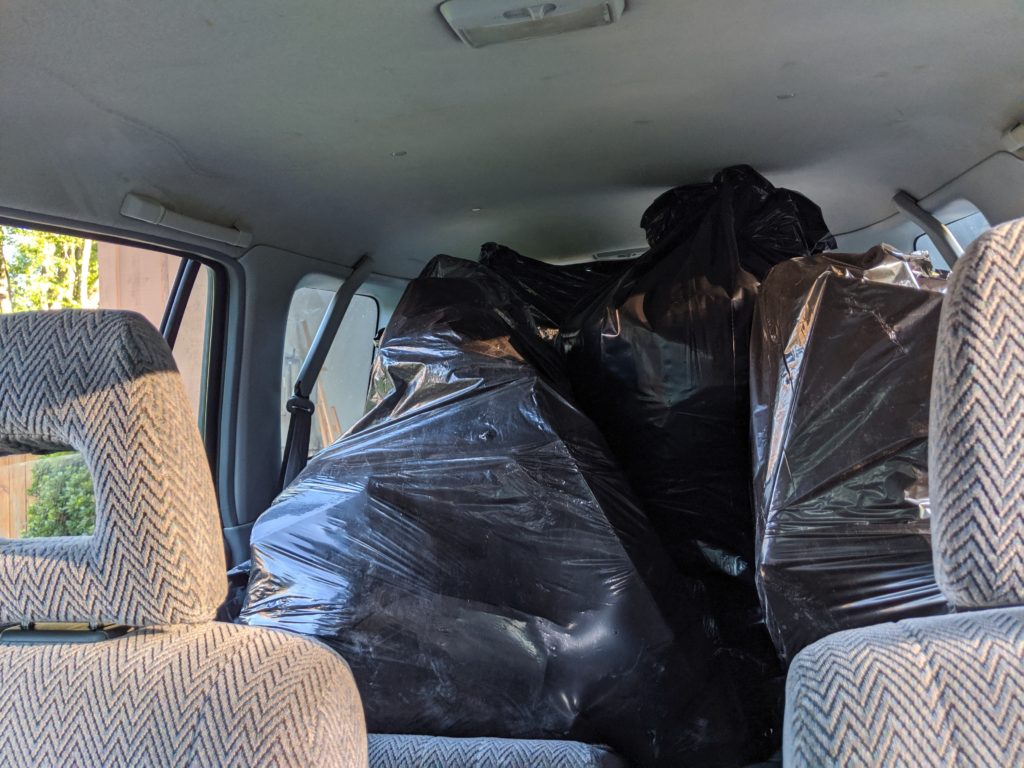
My current approach is to wait until I have the maximum number of bags allowed under the lowest payment tier. With all of the home improvement projects and ultimate scrap challenges I’ve been doing, it doesn’t take long before I’m loading bags in my CRV for another lovely trip to the landfill.[1]

These bags have old garage junk, a long vinyl dryer vent hose that was a fire hazard, some old stove pellets, and stuff the recycling truck rejected (among other things)

My preferred time to go is in the early morning, right at open. The sun and cool air make going to the dump almost a poetic experience, which is probably a brand new sentence (at least in this context).

Empty car! Feels like sipping Sprite on a swing in spring

And I know it sounds weird, but every visit has been like taking a huge weight off literally and figuratively.[2]

Call me odd but nothing quite matches the feeling of driving home in an empty car, a brilliant sun coming over the trees, to a house that’s more free from unneeded items and clutter.

So take a look around and consider what you could improve by what you could remove, and do that. Start small; fill just one bag. Then fill another. Call your local landfill and ask about pricing, and when you hit the limit for the lowest price make a quick trip and see how you feel, too!

[1] This once again proves the magic of CRVs. All sorts of stuff goes into the bags, and a ton of bags go into the CRV.

[2] Ha. Ha. Ha.

The Ultimate Scrap Challenge

I recently published a post doing what I called “The Ultimate Scrap Challenge” during which I created an outdoor patio table using only scraps from previous projects.

It’s a silly, embellished name for such a small project. And I was sure I wasn’t the first to use it.

As I prepared that post I searched online for “ultimate scrap challenge” to see if anyone had used the term already and if I was going to get in trouble for using the phrase.

What I found was this:

Huh.

I was surprised. I certainly am not the first to think of this concept. There’s a huge maker community out there, as well as super minimalist, conservation-minded, and waste-conscious people too.

My guess is these communities already have a term for this kind of activity- and that it’s a much better one than The Ultimate Scrap Challenge- but I’m not aware of its name.

Either way, I want to get people involved in using up junk and clearing their clutter. It’s good for the budget, the environment, and creativity.

So let’s make this a thing.

TUSC Rules

  • “Scrap” is:
    • Material left over from a project
    • Material that went unused (perhaps you bought it and never used it, and it’s too late to return it)
    • Material that’s repurposed (perhaps something is broken and you take parts off)
    • Note: trash does not necessarily qualify as scrap. More on this in the FAQs.
  • Create something new from scrap as defined above.
    • Instead of creating something new you may also improve an existing object
  • Don’t make things that hurt people.

FAQs

  • Does my challenge need to have a specific purpose or utility?
    • Kind of. TUSC isn’t about merely changing scrap into better organized scrap; it’s also about solving problems, inspiring creativity, and saving money along the way.
  • Can I make art as part of TUSC?
    • Sure. In “The Lessons of History” (which I highly recommend!) there’s a definition of art that I really like: “establishing a meaningful order in the chaos of materials.” I think that fits here.
  • But art, especially modern art, doesn’t have utility or meaning.
    • Yeah, I’m not gonna go there right now. Plus that isn’t even a question.
  • Does my challenge have to be made from wood?
    • Nope. I used wood because it was what I wanted to use up. If you have leftover paint from model projects or cloth from sewing projects then please, use that (and anything else you’d like)!
  • Can I 3D print/otherwise create stuff for this?
    • Sure.
  • What if I have to buy something for my challenge?
    • That’s probably fine. You might want to consider: “Will the overall utility of this new creation outweigh the cost of what I’ll buy to make it happen?” If so, go for it. If not, maybe adjust your design or project.
  • What do you mean when you said trash doesn’t qualify as scrap?
    • I admit there’s overlap, but I’d prefer the focus of your TUSC project is on reducing clutter as opposed to just going through the garbage. While a lot of clutter might just be trash, and good material can be sourced from garbage piles, try to prioritize scrap first from your living space and second from other places.
  • Then why don’t you just call it “The Ultimate Clutter Challenge”?
    • I’d argue that “scrap” has a broader definition than “clutter” and fits better here; I don’t consider wood left over from a table project to be “clutter” even though it’s cluttering up my garage. Shrug.

And if you’re a glutton for punishment, you can broaden the scope of your Ultimate Scrap Challenge project to include using only leftover hardware (nails, screws, cables, etc) for added difficulty 🙂

Post your Ultimate Scrap Challenges in the comments and let’s see what we create!